Animation using jQuery


In addition to give an effect using jQuery, we can also do animation using jQuery.

How to animate html element using its stylesheet properties

If we want to animate the html element using its stylesheet properties, we can use animate method and pass parameter and duration as parameters.
In below example, you can see that I am animating “divAnimate1” using animate() method and passsing css stylesheet properties as parameter. In the last I have specified the duration in millisecond that shows that the whole effect should take place in 1500 milliseconds.

<script>
$(document).ready(function() {
    $("#jbtnDiv").click(function() {
    $("#divAnimate1").animate({
        width: "50%",
        opacity: 0.56,
        fontSize: "30pt",
        borderWidth: "5px",
        marginLeft: "150px",
        paddingLeft: "200px"
    }, 1500);
})

$("#jbtnReset").click(function() {
    $("#divAnimate1").animate({
        width: "100%",
        opacity: 1,
        fontSize: "10pt",
        borderWidth: "1",
        marginLeft: "5px",
        paddingLeft: ""
    }, 1500);
})
})
</script>
<div id="divAnimate1">Demo text</div>
<input type="button" value="Animate the div" id="jbtnDiv" />
<input type="button" value="Reset" id="jbtnReset" />

In the above code snippet, you must have noticed that css stylesheet properties have been specified using camel case (first character in the lower case and first character of each following word should be in upper case) ie. instead of “margin-left”, we should use “margin-Left”.

Demo text
How to queue the animation effect

jQuery also facilitate us to animate several css stylesheet property simultaneously using “queue” parameter. If we specify queue as false, the animation we have specified for a particular element will not be queueed and it will run in parallel with another animation effects.

<script>
    $(document).ready(function() {

        $("#jbtnQueue").click(function() {
            $("#jdivQueue").animate({ height: "50px" }, { queue: false, duration: 1500 })
         .animate({ color: "red" }, { queue: false, duration: 1500 })
         .animate({ borderLeftWidth: "30px" }, { queue: false, duration: 1500 })
         .animate({ padding: "20px" }, { queue: false, duration: 1500 })
         .animate({ fontSize: "30px" }, { queue: false, duration: 1500 })
         .animate({ width: "50%" }, { queue: false, duration: 1500 });
        })

        $("#jbtnNoQueue").click(function() {
            $("#jdivNoQueue").animate({ height: "50px" }, 1500)
         .animate({ color: "red" }, 1500)
         .animate({ borderLeftWidth: "30px" }, 1500)
         .animate({ padding: "20px" }, 1500)
         .animate({ fontSize: "30px" }, 1500)
         .animate({ width: "50%" }, 1500);
        })

        $("#jbtnAll").click(function() {
            $("#jbtnQueue").add("#jbtnNoQueue").click();
        })

        $("#jbtnResetMultiple").click(function() {
            $("#jdivQueue").css({ height: "", color: "black", borderLeftWidth: "1px", padding: "", fontSize: "10pt", width: "100%" });
            $("#jdivNoQueue").css({ height: "", color: "black", borderLeftWidth: "1px", padding: "", fontSize: "10pt", width: "100%" });
            $("#jdivAll").css({ height: "", color: "black", borderLeftWidth: "1px", padding: "", fontSize: "10pt", width: "100%" });
            $("#jdivAll").toggle("slow");
        })
    })
</script>
<div id="jdivQueue">jQuery is cool.</div>
<input type="button" value="Animate Simultaneously (not queued)" id="jbtnQueue" />
<div id="jdivNoQueue">jQuery is awesome.</div>
<input type="button" value="Animate one by one (queued)" id="jbtnNoQueue" />
<div id="jdivAll">jQuery is great.</div>
<input type="button" value="Animate both at one click" id="jbtnAll" />

<input type="button" value="Reset" id="jbtnResetMultiple" />
(Note: Please click Reset button after following buttons click)
Note: This div block will toggle display on every Reset button click. jQuery is great.
jQuery is cool.
jQuery is awesome.

Animation effect using jQuery


Query is not only useful for the basic work that we do using JavaScript but also for giving outstanding animation effect. In this tutorials, I will try to show how to use jQuery functions to animate the html elements.

How to show/hide an element

To simply show and hide element, we can use show() and hide() method of the jQuery. There are several parameter that can be passed in these two methods in order to give special effect. These parameters can are:

  • slow
  • normal
  • fast
  • Any numeric digit (number of milliseconds to run the animation)

If we do not pass any parameter to these functions, it act instantly.
In the 2nd button click event, you can see that I have not passsed any parameter to the hide() function, so it will not animatte while hiding the element.
In the click event of last two buttons, I have passed 3000 as parameter so while showing and hidding the animation duration will be 3000 milliseconds.If we want to toggle display an html element, we can use toggle() method. We can also pass the same parameter that is applicable to show() and hide() methods.

// jQuery code
<script>
    $(document).ready(function() {

        $("#jbtnShow").click(function() {
            $("#jShow").show("slow");
        })
        $("#jbtnHide").click(function() {
            $("#jShow").hide();
        })

        //---------------
        $("#jbtnShowFast").click(function() {
            $("#jShow").show("fast");
        })
        $("#jbtnHideNormal").click(function() {
            $("#jShow").hide("normal");
        })
        //----------------
        $("#jbtnShowCount").click(function() {
            $("#jShow").show(3000);
        })
        $("#jbtnHideCount").click(function() {
            $("#jShow").hide(3000);
        })

        // -----------------------
        $("#jbtnToggle").click(function() {
            $("#jShow").toggle("slow");
        })     
    })
</script>

// html code
<div id="jShow" style="display:none;">This is the hiddent text</div>
<input type="button" value="Show Text" id="jbtnShow" />
<input type="button" value="Hide Text" id="jbtnHide" /> |
<input type="button" value="Show Fast" id="jbtnShowFast" />
<input type="button" value="Hide Normal" id="jbtnHideNormal" /> |
<input type="button" value="Show by animating 3000 milliseconds" id="jbtnShowCount" />
<input type="button" value="Hide by animating 3000 milliseconds" id="jbtnHideCount" /> |
<input type="button" value="Click to Toggle display" id="jbtnToggle" />

| | |

How to slide display an element

If we want to give a slide effect while showing or hiding the element, we can use slideDown() and slideUp() method respectively. We have freedom to pass the same parameter that is applicable to the show() and hide() method described above, even we can specify the animation duration in milliseconds as we have done above.

If we want to toggle display with slide effect, we can use sliderToggle() method.

// jQuery code
<script>
    $(document).ready(function() {
        $("#jbtnSlideDown").click(function() {
            $("#jdivWelcome").slideDown();
        })
        $("#jbtnSlideUp").click(function() {
            $("#jdivWelcome").slideUp("slow");
        })
        $("#jbtnSlideToggle").click(function() {
            $("#jdivWelcome").slideToggle();
        })            
    })
</script>  

// html code
<div id="jdivWelcome" style="display:none;">
    Welcome to DotNetFunda.com. <br /><br />
    DotNetFunda.Com is a popular Microsoft® technologies related knowledge based website offering articles, tutorials, tips, forums, interview questions, sample projects with source code and other features including online resources, technical jokes, and IT activities around the world. <br /><br />
    Please enjoy your visit and learn and/or share knowledge. Thanks.
</div>
<input type="button" value="Slide Down" id="jbtnSlideDown"/>
<input type="button" value="Slide Up" id="jbtnSlideUp"/>
<input type="button" value="Slide Toggle" id="jbtnSlideToggle"/>
How to give fade in/out effect

If we want to give fade effect to the html element, we can use fadeIn() and fadeOut() method to show and hide the element respectively with fading effect. We can also use slow, normal, fast and number of milliseconds as parameter to these methods as we had used with show() and hide() method above.

If we do not want to fade an element completely, we can use fadeTo(effect, amount) method and pass effect(slow, normal, fast) and amout (numeric value, where 0 is transparent and 1 is opaque) as parameter.

<script>
    $(document).ready(function() {
        $("#btnFadeIn").click(function() {
            $("#jDivFade").fadeIn();
        })

        $("#btnFadeOut").click(function() {
            $("#jDivFade").fadeOut();
        })

        $("#btnFadeLimited").click(function() {
            $("#jDivFade").fadeTo("slow", 0.40);
        })        
    })
</script>

<div id="jDivFade" style="width:300px;height:100px;
    display:none;text-align:center;">You are intelligent !!!</div>
<input type="button" id="btnFadeIn" value="Fade In" />
<input type="button" id="btnFadeOut" value="Fade Out" />
<input type="button" id="btnFadeLimited" value="Fade to Limited amount" />

How to do? – Part 2


This tutorials shows how to do some commonly used scenarios like how to add css style sheet, loop through elements of a particular type etc.

To add css style with an element

To add the css stylesheet, we can use css method and pass the name and value as the parameter. In the below code, you can see that I have used css method and passed the attribute name and its value as parameter to the element I want to change.

<script>
    $(document).ready(function() {
    $("#jbtnChangeStyle").click(function() {
    $("#jdivAddStyle").css("border", "2px solid #CC3300")
    $("#jdivAddStyle").css("font-weight", "bold");
    })
})
</script>
<div id="jdivAddStyle">This is the sample class</div>
<input type="button" value="Change CSS Style" id="jbtnChangeStyle" />
This is the sample class
Loop through each element

To loop through each elements, we can use each method. Here, you can see that onclick event of the button, I have got the parent element of the li element (ie ul id=”jUlCount”) and instructing to loop through each li element.

<script>
    $(document).ready(function() {
    $("#jbtnLoopLI").click(function() {
            $("li").each(function() {
                $(this).css("border", "1px dotted #FF0066");
            });
        })
    })
</script>
    <ul id="jUlCount">
        <li>One</li>
        <li>Two</li>
        <li>Three</li>
        <li>Four</li>
        <li>Five</li>
        <li>Size</li>        
    </ul>
    <input type="button" id="jbtnLoopLI" value="Loop through each number list" />
  • One
  • Two
  • Three
  • Four
  • Five
  • Size
Loop through all elements of a particular type

To loop through all element of a particular type, you can use get() method that returns the array of the elements. After getting the elements, you can loop through the array and get the desired text or inner html contents using innerText or innerHTML.

<script>
    $(document).ready(function() {
        $("#jbtnLoopAll").click(function() {
        var lis = $("#ulLoop li").get();
            var allLIs = [];
            for (var i = 0; i < lis.length; i++) {
                allLIs.push(lis[i].innerText);
            }
            $("#jspanAdd").text(allLIs.join(" "));
        });
    });
</script>
<ul id="ulLoop">
    <li>Ram</li>
    <li>Mohan</li>
    <li>Gita</li>
    <li>Ramanuj</li>
</ul>
<span id="jspanAdd"></span><br />
<input type="button" id="jbtnLoopAll" value="Loop through all elements of a particular type" />

In the above code snippet, you can see that I have get all the li element using “#ulLoop li”, where #ulLoop” is the id of the parent element and “li” is the element I want to get. Here, if I want to loop through all “li” element of the page, I can use $(“li”).get() instead of $(“#ulLoop li”).get().
In this code snippet, you can see that I have used “push” method to add values into the array and “join” method to join all the values of the array.

  • Ram
  • Mohan
  • Gita
  • Ramanuj


How to do? – Part 1


This tutorials shows how to do some commonly used scenarios like how to select an element, set class, remove class etc.

The first step

All jQuery statement starts with $(dollar) sign. Whenever we are going to write any function for jQuery, we should ensure that it will run after loading the complete document. To do that wrap the jQuery code inside following code block.

        // this is the must
        $(document).ready(function() {

        // write jQury code block here
        // ........

        })// this is the must
To find out an element

To find out an html element itself, you can use the name of the element such as div, input, table, td etc. Following code will find out all div elements in the page.

    // html code
    <div>Text inside the div element.</div>

    jQuery code
<script>    
    $("div")
</script>
To find out an element using id

To find out an html element using id, you can use following code. Notice that the id of the element starts with # (hash).
Lets say, we have a div element like this

    // html code
    <div id="idOfTheHtmlElement">Text inside the div element.</div>

    // jquery code

    $("#idOfTheHtmlElement")
To find out an element using class

To find out an html element using class name, you can use following code. Notice that the class of the element starts with . (dot).

    // html code
    <div>Text inside the div element.</div>

    jQuery code
<script>    
    $(".className")
</script>
Getting and setting html element value

To get and set the value of the form element, use val method. If we want to get the value simply call the val() and if we want to set the value call the val(parameter) like below.

// html code
<input type="text" id="jHowDoI1" value="Sample Text" />  
<input type="button" id="btnGet" value="Get Value" />
<input type="button" id="btnSet" value="Set Value" />

// jQuery Code
<script>
$(document).ready(function() {

    $("#btnGet").click(function() {
        var val = $("#jHowDoI1").val();
        alert(val);
    })

    $("#btnSet").click(function() {
        $("#jHowDoI1").val("Set the value: changed");
    })
})
</script>
Check for an element existence

If we want to check for an element existence, we can use if statement along with length of the element like below. In this code block I am using lenght property of the element to check if its length is more than one. It it is, it is assumed that element exists otherwise not (Notice the ! sign in the 2nd click event, that check for not existence). Even if we remove “Element exists” text inside the “jExists” div element it will return true.

    
// html code
<div id="jExists" style="display:none;">Element exists</div>
<input type="button" id="btnExists" value="Check for the existence of the Element and show"/>
<input type="button" id="btnDoesnotExists" value="Check for the existence of the Element"/>

// jQuery code
<script>
$(document).ready(function() {
    $("#btnExists").click(function() {
        if ($('#jExists').length) {
            $('#jExists').show();
        }
    })

    $("#btnDoesnotExists").click(function() {
        if (!$("#jExists1").length) // notice sign of exclamation
            alert("Element doesn't exists");

    })
})
</script>
Check for a class of an element

To check whether an element has a particular class or not, we can use is(argument) method. In the following block, you may see a slideToggle() function; don’t worry about this right now, this will simply toggle display(slide) a particular html element.

// html code
<div id="jCExists" style="display: none;">Demo Text</div>
<input type="button" value="Class Exists" id="btnCExists" />
<input type="button" value="Class Doesn't Exists" id="btnCNExists" />

// jQuery Code
<script>
    $(document).ready(function() {

        $("#btnCExists").click(function() {
            if ($("#jCExists").is(".demoBlock")) {
                $("#jCExists").slideToggle("slow");
            }
        })

        $("#btnCNExists").click(function() {
            if (!$("#jCExists").is(".demoBlockNOT")) { // notice sign of exclamation
                alert("demoBlock doesn't exists");
            }
        })

    })
</script>
How to escape a special character

There might be certain html element id or class that contain some special character in their name or id like ., [ or ] etc. We can use escape character (\\) to ignore them.

    
// html code
<div id="div.EscapeID">Text inside div element having id as "div.EscapeClass" </div>
<input type="button" id="btn.HideText" value="Hide above text" />

// jQuery block
<script>
    $(document).ready(function() {
        $("#btn\\.HideText").click(function() {
            $("#div\\.EscapeID").toggle();
        })
    })
</script>
Text inside div element having id as “div.EscapeClass”
How to add/remove an attribute in an html element

To add or remove attributes of the html element, we can use attr(name, value) and removeAttr(name) methods respectively.

// html code     
<input type="text" id="txtAttribute" value="Demo text" />
<input type="button" value="Add Attribute: Disable TextBox" id="jbtnDisable" />
<input type="button" value="Remove Attribute: Enable TextBox" id="jbtnEnable" />

// jQuery code
<script>
    $(document).ready(function(){

    $("#jbtnDisable").click(function(){
       $("#txtAttribute").attr("disabled", "disabled");            
    })  

    $("#jbtnEnable").click(function(){
       $("#txtAttribute").removeAttr("disabled", "disabled");            
    })

    })
</script>
How to get dropdown text and value

You can get the value of the selected item from the dropdown using val method as described above and to get the text, you can use text() method of the selected item. You can notice in the below code snippet that I have specified jQuery on the click event instead of writing separate function. If your requirement is short you can use inline jQuery too.

<select id="jSelect">
   <option value="1">India</option>
   <option value="2">USA</option>
 </select>
 <input type="button" value="Get Value" onclick="alert($('#jSelect').val())"/>
 <input type="button" value="Get Text Value" onclick="alert($('#jSelect option:selected').text())"/>
How to load another webpage?

If your requirement is to load another page content at a particular section on your page, you can use load() method like below.

// html code
<div id="divLoad"></div>
<p><a id="aLoad" href="javascript:void(0)" title="Load signature page">Load signature Page and Hide this link</a></p>

jQuery code
<script>
    $(document).ready(function() {
    $("#aLoad").click(function() {
        $("#divLoad").load("/signature.aspx");
        $("#aLoad").hide();
        })
    })
</script>

Load signature Page and Hide this link (Please wait for a while after clicking.)

jQuery Tutorial


This tutorials is in beta version.

What is jQuery?
jQuery is the light weight javascript library to work with html elements in the browser. As per jQuery.com, it is a fast and concise JavaScript Library that simplifies HTML document traversing, event handling, animating, and Ajax interactions for rapid web development. jQuery is designed to change the way that you write JavaScript.

When I used it for the first time, I was amazed to see how powerful and beautiful it is. The small amount of well written code can do a lot of work that need hours of time and skill to write JavaScript ourselves. This tutorials gives some frequently used examples of how jQuery works with demo and sample code.

jQuery is so powerful and robust that Microsoft has decided to ship it with Visual Studio making it compatible for asp hosting development. According to ScottGu of Micorosoft, “I’m excited today to announce that Microsoft will be shipping jQuery with Visual Studio going forward.” (Read the complete article here). Needless to say that jQuery works with latest version of most of the advanced browser like IE, FireFox, Chrome, Safari, Opera. If you download the hotfix (http://code.msdn.microsoft.com/KB958502), your current Visual Studio 2008 will also support jQuery IntelliSense (Read IntelliSense for jQuery).

To start working with jQuery, you need to download the code library from jQuery.com website. jQuery code library is available in several flavour like pack, minified, documentation etc (current url of download is http://code.google.com/p/jqueryjs/downloads/list?can=1&q=), Download them as per your need. I have downloaded pack version of the code library. After you have downloaded the library (at the time of writing this tutorials, the current version is 1.2.6), you can reference it the way you reference any of the JavaScript code file.

eg. <script src=”/include/jquery-1.2.6.pack.js” type=”text/javascript”> </script>

Prerequisite: In order to understand these tutorials, you must have basic understanding about JavaScript and how it works.

Lets see frequently used examples of jQuery in following articles. Please see top-left side tutorial menu for rest of the tutorials.

WPF Tutorial : Styles, Triggers and Animations : 7


Introduction

Perhaps the most interesting and most important feature for any WPF application is Styling. Styling means defining styles for controls, and store in reusable ResourceDictionaries and hence forth, it could be used later on by calling its name. Styles in WPF could be well compared with CSS styles. They are both similar in most of the cases, while the former extends the feature allowing most of the features which WPF have. In this article I will discuss mostly how you could use Style in your WPF application to enhance the Rich experience of your UI.

Before we go on further with styles, lets jot down what we have already discussed so far.

  • A Beginning

  • Layout – Panels & Containers

  • Borders – Fun with Borders and Effects

  • TypeConverter & MarkupExtensions to XAML

  • Dependency Property System

  • Concept Binding

  • Styles, Triggers & Animations (This One)

So basically if you have already gone through the articles in the series, you must have already know most of the things on how you could apply your styles, how could you define style objects etc. In this article I will discuss how you could write better styles for your application.

Style

WPF exposes a property Style for every Control. If you look into the object Hierarchy, the Style is basically a property which exposes an object of Style in FrameworkElement. So each object can associate it and define custom setters to manipulate the basic look and feel of a control.

Clearly, the above diagram shows the association of Style in FrameworkElement and from the object hierarchy every control somehow inherits from FrameworkElement and hence style will be available to it. Style is also a WPF object which is inherited form DispatcherObject which helps in setting different properties of your UI Element.

How Style differs from Theme  ?

Before we move further into Styles lets talk about Themes. Theme is totally different from Styles. Themes are defined at OS level, or more precisely a Theme can take part of delivering styles all over the Desktop while Styles are restricted to the contextual area of a WPF window. WPF are capable of retrieving the color scheme which is defined in OS level. Say for instance, if you do not define style for your application, the elements in the screen will automatically get styles from external environment. Say for instance, in XP if you change the theme to something else you would see that the buttons, TextBox on your WPF window will change its color instantly. You can even set the Theme which the application would use programmatically from your code.

What about Templates ?

Every control defines a ControlTemplate. A ControlTemplate defines the overall structure of the control. As I have already told you, say for instance you have a Button. Button is a control that is made up of more than one control. It would have a ContentPresenter which writes the Text over the control, it would have a Rectangle which keeps the boundary of the Button etc. So Template is a special property associated with a Control which specifies how the control will look like structurally. We can easily define our Template and change the overall structure of a control.

Templates are basically of 2 types :
  1. ControlTemplate
  2. DataTemplate

ControlTemplate defines the structure of the Control. It means say for instance, you define the ControlTemplate for a ComboBox. So from ControlTemplate you can easily change the Button associated with the ComboBox which opens the DropDown, you can change the structure of the TextBox, the Popup etc. So ControlTemplate allows you to change the overall structure of the Control.

Each control is made up of Data. Say for instance a ItemsControl contains a number of Data Element which builds the items inside the Popup. The DataTemplate could be associated with ItemsTemplate and will build up the Data Block for the ComboBox.

So, you should always remember, ControlTemplate defines the whole Control while the DataTemplate defines each individual Data Element.

How to define Style?

Normally a style is an unique object which is used to style WPF controls. Each WPF element contains a number of Dependency Properties. A dependency property defines the basic behavior and look of the control in UI. Styles maintains a collection of Setters which enumerates a DependencyProperty with its value.

Thus you can say a style is a collection of DependencyProperty settings which when applied on a Target will change the behavior of it.

Let us suppose you are going to style a TextBox.

<TextBox Text="This is a TextBox without Styles" 
            HorizontalAlignment="Center" 
            VerticalAlignment="Center" 
            CharacterCasing="Lower" 
            FlowDirection="RightToLeft"
            FontSize="20" 
            FontWeight="UltraBlack"
            Width="400"
            Height="40">
    <TextBox.Background>
        <LinearGradientBrush>
            <GradientStop Color="Cyan" Offset="0.0"/>
            <GradientStop Color="Yellow" Offset="0.5"/>
            <GradientStop Color="Red" Offset="1.0"/>
        </LinearGradientBrush>
    </TextBox.Background>
    <TextBox.Foreground>
        <SolidColorBrush Color="Black"/>
    </TextBox.Foreground>
    <TextBox.Effect>
        <DropShadowEffect BlurRadius="40" Color="Maroon" Direction="50" Opacity="0.5"/>
    </TextBox.Effect>
</TextBox>

So I have just designed a TextBox in the above code. The XAML looks straight forward, where I have configured different properties of the TextBox control to create my stylish TextBox. But looking at the code, you might wonder how difficult it would be if you need to redo the same thing again and again for every TextBox you define in your application. This is what the problem is. So WPF comes with an alternative with style. A style is an object that holds this behaviors into a collection of Setters. So lets redefine the same with Styles.

<TextBox>
    <TextBox.Style>
        <Style TargetType="{x:Type TextBox}">
            <Setter Property="Text" Value="This is a TextBox with Styles"/>
            <Setter Property="HorizontalAlignment" Value="Center"/>
            <Setter Property="VerticalAlignment" Value="Center"/>
            <Setter Property="CharacterCasing" Value="Lower"/>
            <Setter Property="FlowDirection" Value="RightToLeft"/>
            <Setter Property="FontSize" Value="20"/>
            <Setter Property="FontWeight" Value="UltraBlack"/>
            <Setter Property="Width" Value="400"/>
            <Setter Property="Height" Value="40"/>
            <Setter Property="Background">
                <Setter.Value>
                        <LinearGradientBrush>
                        <GradientStop Color="Cyan" Offset="0.0"/>
                        <GradientStop Color="Yellow" Offset="0.5"/>
                        <GradientStop Color="Red" Offset="1.0"/>
                    </LinearGradientBrush>
                </Setter.Value>
            </Setter>
            <Setter Property="Foreground">
                <Setter.Value>
                    <SolidColorBrush Color="Black"/>
                </Setter.Value>
            </Setter>
            <Setter Property="Effect" >
                <Setter.Value>
                    <DropShadowEffect BlurRadius="40" Color="Maroon" Direction="50" Opacity="0.5"/>
                </Setter.Value>
            </Setter>
        </Style>
    </TextBox.Style>
</TextBox>

So you can see, I have defined the Style inside the TextBox and the textbox looks almost the same.  The Setters allows you to enumerate all the properties for the TextBox and produced a style inside it whose TargetType is set to {x:Type Button}

Now how this style can be made reusable for many controls ? Yes, this might be your first question that arose in your mind. Yes, if you have read my previous articles, you should already know the use of ResourceDictionaries. So in our case I will shift the style to Resource section for the Window and reuse the code just by calling the Resource key from the Textbox.

<Grid>
    <Grid.Resources>
        <ResourceDictionary>
            <Style TargetType="{x:Type TextBox}" x:Key="MyTextBoxStyle">
                <Setter Property="Text" Value="This is a TextBox with Styles"/>
                <Setter Property="HorizontalAlignment" Value="Center"/>
                <Setter Property="VerticalAlignment" Value="Center"/>
                <Setter Property="CharacterCasing" Value="Lower"/>
                <Setter Property="FlowDirection" Value="RightToLeft"/>
                <Setter Property="FontSize" Value="20"/>
                <Setter Property="FontWeight" Value="UltraBlack"/>
                <Setter Property="Width" Value="400"/>
                <Setter Property="Height" Value="40"/>
                <Setter Property="Margin" Value="0,20,0,10" />
                <Setter Property="Background">
                    <Setter.Value>
                        <LinearGradientBrush>
                            <GradientStop Color="Cyan" Offset="0.0"/>
                            <GradientStop Color="Yellow" Offset="0.5"/>
                            <GradientStop Color="Red" Offset="1.0"/>
                        </LinearGradientBrush>
                    </Setter.Value>
                </Setter>
                <Setter Property="Foreground">
                    <Setter.Value>
                        <SolidColorBrush Color="Black"/>
                    </Setter.Value>
                </Setter>
                <Setter Property="Effect" >
                    <Setter.Value>
                        <DropShadowEffect BlurRadius="40" Color="Maroon" Direction="50" Opacity="0.5"/>
                    </Setter.Value>
                </Setter>
            </Style>
        </ResourceDictionary>
    </Grid.Resources>
    <Grid.RowDefinitions>
        <RowDefinition Height="Auto" />
        <RowDefinition Height="Auto"/>
        <RowDefinition Height="*"/>
    </Grid.RowDefinitions>
    <TextBox Style="{StaticResource MyTextBoxStyle}" Grid.Row="0" />
    <TextBox Style="{StaticResource MyTextBoxStyle}" Grid.Row="1" 
                Text="The Style is modified here"
                FlowDirection="LeftToRight"/>
</Grid>

So here I have shifted the Style into Resource section and used MyTextBoxStyle key to refer for each TextBox i defined. Notably, the style of both the textboxes remains same, while you can see I have also overridden certain settings in the control itself and it works the same. I have modified the Text of the 2nd TextBox to “The Style is modified here” and also made the FlowDirection to LeftToRight.

Another important thing, that you should always keep into mind, that if you do not define the Key element for the Style in Resource section, it will automatically be applied to all the TextBox you define.

<Style TargetType="{x:Type TextBox}">
</Style>

Say the style you define does not contain any Key. So all the TextBoxes will automatically apply the style when appeared. You can eventually use

<TextBox Style="{x:Null}"/>

to revert the style.

Members of Style

The styling of WPF controls is made up with the help of a class called Style. The style object exposes few properties which help you to define various behavior. Lets look into the properties:

  • Resources : It holds the reference for the ResourceDictionary where the Style is defined.
  • Setters : It is a collection which holds all the DependencyProperty configuration for the whole control.
  • TargetType : TargetType defines the type of the control for which the Style can be applied. So based on the TargetType the Style setters are defined to. So if you define a style for TextBox you cannot use Content as property Setter.
  • BasedOn : This is used to allow Style inheritance. You can use an existing style key to inherit all the properties to a new Style.
  • Triggers : A collection of Setters which would be applied based on certain conditions.

Using those properties you can define your own styles.

What about Explicit and Implicit Styles ?

WPF controls can have two type of styles associated with it. A control can have a style defined in the application and applied to its Style property. If your control is using a Style to define its look and feel or basically your control has set an object of Style into its Style property, then it is using an Explicit Style.

On the other hand, if your control takes the style from external environment (Theme) and the Style property is set to Null, then your control is using Implicit Style.  Basically any WPF control automatically defines a DefaultStyle for it, so that you can set only the portion of the control which you need to change.

Say for instance, you have a Button. If you want to have its Text to be colored Red, you just need to change the Foreground of the Button. You need not to define the whole style. If there is no Default Style defined for Buttons, you need to define all the properties individually to make it appear. Thus the default color of the Text is Black if not defined otherwise.

Triggers

Triggers are a set of styles that work on a particular condition. You can think Trigger as a part of Style which will be set only when the Condition defined for the Trigger is met.

There are few types of Triggers :

  1. Property Trigger : Will be set only when the DependencyProperty of a certain object has been set to a Value.
  2. Data Trigger : Will work for any normal Properties using on Binding.
  3. Event  Trigger : Will work only when some event is triggered from the control.

Now to demonstrate let us look into the code below :

<Style TargetType="{x:Type TextBox}" x:Key="MyTextBoxStyle">
    <Setter Property="Text" Value="This is a TextBox with Styles"/>
    <Setter Property="HorizontalAlignment" Value="Center"/>
    <Setter Property="VerticalAlignment" Value="Center"/>
    <Setter Property="CharacterCasing" Value="Lower"/>
    <Setter Property="FlowDirection" Value="RightToLeft"/>
    <Setter Property="FontSize" Value="20"/>
    <Setter Property="FontWeight" Value="UltraBlack"/>
    <Setter Property="Width" Value="400"/>
    <Setter Property="Height" Value="40"/>
    <Setter Property="Margin" Value="0,20,0,10" />
    <Setter Property="Background">
        <Setter.Value>
            <LinearGradientBrush>
                <GradientStop Color="Cyan" Offset="0.0"/>
                <GradientStop Color="Yellow" Offset="0.5"/>
                <GradientStop Color="Red" Offset="1.0"/>
            </LinearGradientBrush>
        </Setter.Value>
    </Setter>
    <Setter Property="Foreground">
        <Setter.Value>
            <SolidColorBrush Color="Black"/>
        </Setter.Value>
    </Setter>
    <Setter Property="Effect" >
        <Setter.Value>
            <DropShadowEffect BlurRadius="40" Color="Maroon" Direction="50" Opacity="0.5"/>
        </Setter.Value>
    </Setter>
    <Style.Triggers>
        <Trigger Property="IsFocused" Value="True">
            <Setter Property="Effect">
                <Setter.Value>
                    <DropShadowEffect BlurRadius="40" Color="Red" Direction="50" Opacity="0.9"/>
                </Setter.Value>
            </Setter>
        </Trigger>
        <MultiTrigger>
            <MultiTrigger.Conditions>
                <Condition Property="IsFocused" Value="True"/>
                <Condition Property="IsMouseOver" Value="True"/>
            </MultiTrigger.Conditions>
            <Setter Property="Effect">
                <Setter.Value>
                    <DropShadowEffect BlurRadius="40" Color="Violet" Direction="50" Opacity="0.9"/>
                </Setter.Value>
            </Setter>
            <Setter Property="Foreground" Value="White" />
            <Setter Property="Background" Value="Maroon" />
        </MultiTrigger>
    </Style.Triggers>
</Style>

Here you can see I have used Property Trigger to change the DropShadowEffect of TextBox when it is focussed. Every WPF control exposes few properties to work with Property Triggers, which will be set to true based on the control appearance changes. You can use these properties like IsFocused, IsMouseDown etc to work around with Property Triggers.

On the second occasion, I have defined a MultiTrigger. MultiTrigger allows you to mention Condition, so that when all the conditions of the MultiTrigger is met, the Property Setters for the object is applied.

So you can see when you hover your mouse over the TextBox and your textbox has its focus in it, only then you see the TextBox to appear in Maroon background and Violet DropShadow effect.

Animation Basics

Another interesting thing that you might think very interesting is the support of Animation for WPF. Basically, by the word Animation, we generally think of large Texture graphics in 3D space, which would probably be created in 3DS MAX studio or MAC etc. But believe me there is nothing to worry about this in case of WPF. WPF simplifies the concept Animation to be the change of a property over time.

Say for instance,  say you want your textbox to change its color over time, you would write a simple color animation to do this or say you want to change the Opacity of a Border element during time, you need DoubleAnimation to do this. Animation is cool if you are clear about how it works.

Type of Animation

I must say, don’t make yourself more confused by seeing the types of Animation. Animation is actually categorized in the same way as you categorize variables. Say for instance :

  1. DoubleAnimation : This will animate a Double Value from one value to another. So if you want to change the Width of a TextBox over time you need DoubleAnimation.
  2. ColorAnimation : Same as the above if the type of Changing element is Color, you need ColorAnimation.
  3. SingleAnimation, RectAnimation, PointAnimation, Int32Animaition, ThicknessAnimation etc each of them bears the same meaning.

So basically the basis of Animation types is based on the type of the property for which you want your animation to work on.

Animation can also be categorized into two basic ways :

  1. Animation Without KeyFrames : These are animation that only needs two values, From and To. It gives you a smooth animation based on the Timeline.DesiredFramerate property for the animation.
  2. Animation With KeyFrames : Allows you to specify a KeyFrame collection which lets you define the KeyFrame value on a specified time. So that you can adjust your own animation based on specific time intervals.

Let us take a look at a few examples to make you understand animation feature of WPF:

<Window.Triggers>
        <EventTrigger RoutedEvent="Loaded">
            <BeginStoryboard>
                <Storyboard RepeatBehavior="Forever">
                    <DoubleAnimation Storyboard.TargetProperty="Width" From="300" To="200" AutoReverse="True" Duration="0:0:5" ></DoubleAnimation>
                    <DoubleAnimation Storyboard.TargetProperty="Height" From="300" To="200" AutoReverse="True" Duration="0:0:5"></DoubleAnimation>
                </Storyboard>
            </BeginStoryboard>
        </EventTrigger>
    </Window.Triggers>

In the above code, I have defined an EventTrigger which lets you have a DoubleAnimation(as Width is double value) on Width of the Window. We use Loaded Event to start a StoryBoard.

What is a StoryBoard ?

A StoryBoard can be defined as a Container for TimeLines or a collection of animation timelines for which the object specified in Target will animate. We use StoryBoard to specify Animation within it.
Few important properties of StoryBoard :

  • RepeatBehaviour : Specifies the number of times for which the StoryBoard repeat the animation.
  • Target : Specifies the Target for which the storyboard will be applied to.
  • TargetName : Defines the target and reference it by its name attribute.
  • TargetProperty : Specifies the property for which the animation will be applied for.
  • AccelerationRatio / DecelerationRatio : Defines the acceleration or deceleration for the animation.
  • AutoReverse : Defines whether the StoryBoard will be reversed automatically. This is really cool concept, which allows you to get the reverse of the storyboard timeline automatically generated by the WPF.

Animation can also be applied from code.

DoubleAnimation myDoubleAnimation = new DoubleAnimation();
myDoubleAnimation.From = 1.0;
myDoubleAnimation.To = 0.0;
myDoubleAnimation.Duration = new Duration(TimeSpan.FromSeconds(5));

In the above code I have declared a DoubleAnimation which starts From 1.0 and moves to 0.0 in 5 seconds.

Animation with KeyFrames

Animation can be defined either using KeyFrames or without KeyFrames. KeyFrame allows you to define an intermediate frame so that the animation occurs for each individual frame intervals. There are three types of interpolation for an AnimationwithKeyFrames.

  1. Linear
  2. Discrete
  3. Spline


Linear

Lets create an animation using KeyFrames :

 <Border Background="Violet" 
              HorizontalAlignment="Stretch"
              VerticalAlignment="Stretch" >
            <Border.Triggers>
                <EventTrigger RoutedEvent="Border.MouseLeftButtonDown">
                    <EventTrigger.Actions>
                        <BeginStoryboard>
                            <Storyboard>
                                <DoubleAnimationUsingKeyFrames 
                                      Storyboard.TargetName="transformObj"
                                      Storyboard.TargetProperty="X"
                                      Duration="0:0:15">
                                    <LinearDoubleKeyFrame Value="500" KeyTime="0:0:3" />
                                    <LinearDoubleKeyFrame Value="50" KeyTime="0:0:7" />
                                    <LinearDoubleKeyFrame Value="300" KeyTime="0:0:13" />
                                </DoubleAnimationUsingKeyFrames>
                            </Storyboard>
                        </BeginStoryboard>
                    </EventTrigger.Actions>
                </EventTrigger>
            </Border.Triggers>
            <Border.RenderTransform>
                <TranslateTransform x:Name="transformObj" X="0" Y="0" />
            </Border.RenderTransform>
        </Border>

Here the animation is applied as LinearDoubleKeyFrame, which means the animation would be smooth while we define each KeyFrame value based on KeyTime.  Here we change the Translation of the Border based on different KeyTime specified such that on 3rd second, the Rectangle will move to 500, at 7th second it will be at 50 and at 13th second it will be at 300. The animation is LinearDouble so the animation is smooth and steady.

Discrete

If I change the animation to DiscreteAnimation it will place the object only at the KeyTime specified

<DoubleAnimationUsingKeyFrames 
        Storyboard.TargetName="transformObj"
        Storyboard.TargetProperty="X"
        Duration="0:0:15">
    <DiscreteDoubleKeyFrame Value="500" KeyTime="0:0:3" />
    <DiscreteDoubleKeyFrame Value="50" KeyTime="0:0:7" />
    <DiscreteDoubleKeyFrame Value="300" KeyTime="0:0:13" />
</DoubleAnimationUsingKeyFrames>

Thus changing the LinearDouble with DiscreteDouble makes it change its position all of a sudden based on the KeyTime specified for the animation.

Spline

SplineAnimation is used to define more realistic animation behavior for your control. It lets you control acceleration and deceleration of the animation. With KeySpline you can define the the cubic bazier curve using Spline Key frame. Lets look at the example

<DoubleAnimationUsingKeyFrames 
        Storyboard.TargetName="transformObj"
        Storyboard.TargetProperty="X"
        Duration="0:0:15">
    <SplineDoubleKeyFrame Value="500" KeyTime="0:0:3" KeySpline="0.0,0.1 0.1,0.1" />
    <SplineDoubleKeyFrame Value="50" KeyTime="0:0:7" KeySpline="0.0,0.1 0.1,0.1"/>
    <SplineDoubleKeyFrame Value="300" KeyTime="0:0:13" KeySpline="0.0,0.1 0.1,0.1"/>
</DoubleAnimationUsingKeyFrames>

Thus you can see KeySpline allows you to define a smooth animation that starts with acceleration and with highest speed in the middle and ultimately decelerates back again.

You can also use EasingFunction to specify the custom formulas for the animation. For further information try :
KeyFrameAnimation

Conclusion

I hope you like my article. I am also happy that I have covered almost most of the topics that you need to know in WPF. There are still a few things left behind, which I would cover in my next article. Please put your valuable feedback for the article.

Thank you for reading.

WPF Tutorial : Concept Binding 6


Introduction

Before this article, I have discussed about the architecture of WPF, Markup extensions, dependency properties, logical trees and Visual trees, layout, transformation etc. Today I will discuss what we call the most important part of any WPF application, the binding. WPF comes with superior DataBinding capabilities which enables the user to bind objects so that whenever the other object changes, the main object reflects its changes. The main motive of DataBinding is to ensure that the UI is always synchronized with the internal object structure automatically.

Before going further, lets jot down on the things that we have already discussed. If you are new to this article, you can start from my other articles in the list below:

  • A Beginning

  • Layout – Panels & Containers

  • Borders – Fun with Borders and Effects

  • TypeConverter & MarkupExtensions to XAML

  • Dependency Property System

  • Concept Binding (This One)

DataBinding was present before introduction of WPF. In ASP.NET we bind data elements to render proper data from the control. We generally pass in a DataTable and bind the Templates to get data from individual DataRows. On the other hand, in case of traditional windows forms application, we can also bind a property with a data element. The Bindings can be added to properties of objects to ensure whenever the property changes the value, the data is internally reflected to the data. So in one word, DataBinding is nothing new to the system. The main objective of DataBinding is to show data to the application and hence reducing the amount of work the application developer needs to write to just make the application properly display data. In this article, I will discuss how you could use the Databinding in WPF application and also create a sample application to demonstrate the feature in depth.


Binding in WPF

WPF puts the concept of Binding further and introduced new features, so that we could use the Binding feature extensively. Binding establishes the connection between the application and the business layers. If you want your application to follow strict design patter rules, DataBinding concept will help you to achieve that. We will look into greater detail with how to do that in a while.

In WPF we can bind two Properties, One Property and one DependencyProperty, two DependencyProperties etc. WPF also supports Command Binding. Lets discuss how to implement them in detail.

Binding can be classified into few Types :

DataBinding / Object Binding

The most important and primary binding is Databinding. WPF introduces objects like ObjectDataProvider and XMLDataProvider to be declared into XAML to enhance the capability of object binding. DataBinding can be achieved by several ways. As shown by Adnan in his blog we can make use of Binding capabilities by employing either XAML, XAML and C#, and C# itself. So WPF is flexible enough to handle any situation.


<TextBox x:Name="txtName" />
<TextBlock Text="{Binding ElementName=txtName, Path=Text.Length}" />

In the above situation, I have shown the most basic usage of Binding. The Text property of TextBlock is bound with the TextBox txtName so that whenever you enter something on the TextBox during runtime, the TextBlock will show the length of the string.

As a Markup Extension binding is actually a Class with properties. Here we specified the value of the property ElementName and Path. The ElementName ensures that the object that the property belongs to. Path determines the property path which the object needs to look into.

You can use ObjectDataProvider to handle data in your XAML easily. ObjectDataProvider can be added as Resource and later on can be referenced using StaticResource. Lets see the code below :

  <StackPanel Orientation="Vertical">
    <StackPanel.Resources>
      <ObjectDataProvider ObjectType="{x:Type m:StringData}" x:Key="objStrings" MethodName="GetStrings"/>
    </StackPanel.Resources>
    <ListBox Name="lstStrings" Width="200" Height="300" ItemsSource="{Binding Source={StaticResource objStrings}}" />

Just as shown above the ObjectType will get a Type, which is the internal class structure for which the Method GetStrings will be called for. From the ListBox, I have referenced the Object using StaticResource.

Now in the code you can declare a class

 public class StringData
 {
  ObservableCollection<String> lst= new ObservableCollection<String>();

        public StringData()
        {         
            lst.Add("Abhishek");
            lst.Add("Abhijit");
            lst.Add("Kunal");
            lst.Add("Sheo");
        }
        public ObservableCollection<String> GetStrings()
        {
             return lst;
        }
    }

So you can see the list been populated with the strings.

Why ObservableCollection , the INotifyPropertyChanged, INotifyCollectionChanged?

Now as you can see I have used ObvervableCollection. This is important. ObservableCollection sends automatic notification when a new item is inserted. Thus notifies the ListBox to update the list. So if you place a button,which inserts some data in the ObservableCollection, the Binding will automatically be notified by the collection  and hence update the collection automatically. You dont need to manually insert the same in the ListBox.

WPF Binding generally needs to be notified when it is modified. The interfaces INotifyPropertyChanged and INotifyCollectionChanged are needed to update the UIElement which is bound with the data. So if you are crating a property which needed to update the UI when the value of it is modified, the minimum requirement is to implement the same from INotifyPropertyChanged, and for collection (like ItemsSource), it needs to implement INotifyCollectionChanged. ObservableCollection itself implements INotifyCollectionChanged, so it has support to update the control whenever new item is inserted to the list or any old item is removed from the string.

I have already discussed the two in detail in an article :
Change Notification for Objects and Collection

XML Binding

Similar to Object binding, XAML also supports XML binding. You can bind the data coming from XMLDataProvider easily using built in properties like XPath in Binding class definition. Lets look into the code :

<TextBlock Text="{Binding XPath=@description}"/>
<TextBlock Text="{Binding XPath=text()}"/>

So if you are in the node XYZ, the InnerText can be fetched using text() property. The @ sign is used for Attributes. So using XPath you can easily handle your XML.

If you want to read more about XML binding check:
XML Binding in WPF

Importance of DataContext

You might wonder why I have took context of DataContext while I am talking about WPF Bindings. DataContext is actually a Dependency property. It points to Raw Data such that the object that we pass as DataContext will inherit to all its child controls. I mean to say if you define the DataContext for a Grid, then all the elements that are inside the Grid will get the same DataContext.

<Grid DataContext="{StaticResource dtItem}">
<TextBox Text="{Binding MyProperty}" />
</Grid>

Here as I defined DataContext for the Grid, the TextBox inside the grid can refer to the property MyProperty as the dtItem object will be automatically inherited to all its child elements. While using Binding, DataContext is the most important part which you must use.

Binding Members

As you all know about Markup Extensions, Binding is actually a Markup Extension. It is a class Binding with few properties. Lets discuss about the Members that are there in Binding :

  1. Source : The source property holds the DataSource. By default it reference the DataContext of the control. If you place Source property for the Binding, it will take that in liew of original DataContext element.
  2. ElementName : In case of Binding with another Element, ElementName takes the name of the Element defined within the XAML for reference of the object. ElementName acts as a replacement to Source. If path is not specified for the Binding, it will use ToString to get the data from the Object passed as Source.
  3. Path : Path defines the actual property path to get the String Data. If the end product is not a string, it will also invoke ToString to get the data.
  4. Mode : It defines how the Data will be flown. OneWay means object will be updated only when source is updated, on the contrary OneWayToSource is the reverse. TwoWay defines the data to be flown in both ways.
  5. UpdateSourceTrigger : This is another important part of any Binding. It defines when the source will be updated. The value of UpdateSourceTrigger can be :
    • PropertyChanged : It is the default value. As a result whenever the anything is updated in the control, the other bound element will reflect the same.
    • LostFocus : It means whenever the property loses its focus, the property gets updated.
    • Explicit : If you choose this option, you need to explicitly set when to update the Source. You need to use UpdateSource of BindingExpression to update the control.
      BindingExpression bexp = mytextbox.GetBindingExpression(TextBox.TextProperty);
      bexp.UpdateSource();

      By this the source gets updated.

  6. Converter : Converter gives you an interface to put an object which will be invoked whenever the Binding objects gets updated. Any object that implements IValueConverter can be used in place of Converter.
    You can read more about it from :
    Converter in DataBinding
  7. ConverterParameter : It is used in addition to Converter to send parameters to Converter.
  8. FallbackValue : Defines the value which will be placed whenever the Binding cannot return any value. By default it is blank.
  9. StringFormat : A formatting string that indicates the Format to which the data will follow.
  10. ValidatesOnDataErrors : When specified, the DataErrors will be validated. You can use IDataErrorInfo to run your custom Validation block when Data object is updated. You can read more about IDataErrorInfo from :Validate your application using IDataErrorInfo

Using Code

Similar to what you might do with XAML, you can also define binding in the codeBehind. To do this you need to use

  Binding myBinding = new Binding("DataObject");
  myBinding.Source = myDataObject;
  myTextBlock.SetBinding(TextBlock.TextProperty, myBinding);

You can also specify the Binding properties in this way.

Command Binding

WPF Supports CommandBinding. Each command object like Button exposes a property called Command which takes an object that implements ICommand interface and will execute the method Execute whenever object command gets fired.

Say you want your command to be executed whenever the window Inputs gets invoked :

<Window.InputBindings>
        <KeyBinding Command="{Binding CreateNewStudent}" Key="N" Modifiers="Ctrl" />
        <MouseBinding Command="{Binding CreateNewStudent}" MouseAction="LeftDoubleClick" />
    </Window.InputBindings>

In the above code, the CreateNewStudent is a property that exposes the object which inherits ICommand interface and the Execute method will be invoked whenever the Key Ctrl + N or LeftDoubleClick of the window is invoked.

Note : In VS 2008 the InputBindings only take Static Command objects. There is a bug report for this, and it will be fixed in later releases.

You can use CommandParameter to pass parameters to the methods that makes up the ICommand interface.

<Button Content="CreateNew" Command="{Binding CreateNewStudent}" />

Similar to InputBindings, you can use the Command with a Button.  To Execute you need to create an object that implements ICommand like below :

 public class CommandBase : ICommand
    {
        private Func<object, bool> _canExecute;
        private Action<object> _executeAction;
        private bool canExecuteCache;

        public CommandBase(Action<object> executeAction, Func<object, bool> canExecute)
        {
            this._executeAction = executeAction;
            this._canExecute = canExecute;
        }


        #region ICommand Members

        public bool CanExecute(object parameter)
        {
            bool tempCanExecute = _canExecute(parameter);
            canExecuteCache = tempCanExecute;
            return canExecuteCache;
        }
        private event EventHandler _canExecuteChanged;
        public event EventHandler CanExecuteChanged
        {
            add { this._canExecuteChanged += value; }
            remove { this._canExecuteChanged -= value; }
        }
        protected virtual void OnCanExecuteChanged()
        {
            if (this._canExecuteChanged != null)
                this._canExecuteChanged(this, EventArgs.Empty);
        }
        public void Execute(object parameter)
        {
            _executeAction(parameter);
        }

        #endregion
    }

I have used a CommandBase class to make the objects look less clumsy. The actual object class looks like :

private CommandBase createNewstudent;
        public CommandBase CreateNewStudent
        {
            get
            {
                
                this.createNewstudent = this.createNewstudent ?? new CommandBase(param => this.CreateStudent(), param => this.CanCreateStudent);
                return this.createNewstudent;
            }
        }

        private object CreateStudent()
        {
            this.CurrentStudent = new StudentItem();
            return this.CurrentStudent;
        }

        public bool CanCreateStudent
        {
            get { return true; }
        }

Thus you can see the createNewCommand passes CreateStudent lamda expression which is called whenever the object gets updated. The CanCreateStudent is a property that will also be called and based on True or false WPF will allow the command to execute.

The PropertyBinding and CommandBinding gives a total package to separate the presentation logic from the Presentaion Layer. This gives the architecture to put all the logic separated. Microsoft created the whole Expression blend using MVVM pattern which separates the View with the ViewModel and hence gives a chance to handle Unit Testing easily even for presentation layer.  We will discuss more about the topic later on the Series.

MultiBinding

Similar to single Binding, WPF also introduces the concept of MultiBinding. In case of MultiBinding the data bound depends on more than one source. You can specify more than one binding expression and on each of them the actual output is dependent on.

<TextBlock DockPanel.Dock="Top" >
   <TextBlock.Text>
      <MultiBinding Converter="{StaticResource mbindingconv}">
        <Binding ElementName="lst" Path="Items.Count" />
        <Binding ElementName="txtName" Path="Text" />
        <Binding ElementName="txtAge" Path="Text" />
      </MultiBinding>
   </TextBlock.Text>
 </TextBlock>

Here the value for TextBlock is dependent on 3 Elements, the first one is the ListBox count, then txtName and txtAge. I have used Converter to ensure we find all the individual element in the IMultiValueConverter block and handle each values separately. The IMultiValueConverter just similar to IValueConverter can take the value and return the object that are bound to the Text property.

 public class MyMultiBindingConverter : IMultiValueConverter 
    {
        #region IMultiValueConverter Members

        public object Convert(object[] values, Type targetType, object parameter, System.Globalization.CultureInfo culture)
        {
            string returnval = "Total no of Data {0}, NewData : ";

            if (values.Count() <= 0) return string.Empty;

            returnval = string.Format(returnval, values[0]);

            for (int i = 1; i < values.Count(); i++)
                returnval += "- " + values[i];

            return returnval;
        }

        public object[] ConvertBack(object value, Type[] targetTypes, object parameter, System.Globalization.CultureInfo culture)
        {
            throw new NotImplementedException();
        }

        #endregion
    }

For simplicity I have just concat each values that are passed and returned back the output.

Sample Application

In the sample application, I have produced the most simple Binding to ensure everything comes from the Model. You can find the sample application :

Download Sample Application – 265KB

Conclusion

I think you must be enjoying the series.  If you want to complete list of the series,

WPF Tutorial – Dependency Property


Introduction

WPF comes with a lots of new features and alternatives that the normal windows applications do not have. As we have already discussed some of the features of WPF, its time to go a bit further to introduce other new features. After reading the previous articles of this tutorial, I hope you are more or less familiar with WPF architecture, borders, Effects, Transformation, Markup extensions etc. If you don’t, please go through the series of articles as labeled :

  • A Beginning

  • Layout – Panels & Containers

  • Borders – Fun with Borders and Effects

  • TypeConverter & MarkupExtensions to XAML

  • Dependency Property System (This One)

So in this article I am going to introduce you with a new property system that underlay the WPF property system. We will go further to introduce how easily you can use these properties to produce custom callbacks, create attached properties, apply animations and styles etc using the all new Dependency properties.  Finally we will discuss about Binding alternatives that were left behind in the previous article to finis it totally. I hope you will like this article as well as you did for all the tutorials that I provided.

A new Property System

Well, you must have surprised to to see this title. Yes, WPF comes with a completely new technique of defining a property of a control. The unit of the new property system is a Dependency property and the wrapper class which can create a Dependency property is called a DependencyObject. We use to register a Dependency property into the property system to ensure that the object contains the property in it and we can easily get or set the value of those properties whenever we like. We even use normal CLR property to wrap around a dependency property and use GetValue and SetValue to get and set values passed within it.

This is almost same as CLR property system. So what is the advantages of the new property system. Lets see the difference between Dependency property and CLR property.

To Work with dependency property, you must derive the class from DependencyObject as the whole observer which holds the new Property System is defined within the DependencyObject.

Difference between Dependency property and CLR property

CLR property is just a wrapper around private variables. It uses Get / Set methods to retrieve and store value of a variable into it. So to be frank with you a CLR property gives you only one block in which you can write code to invoke whenever a property is get or set. Hence CLR property system is fairly straight forward.

On the other hand, the capabilities of Dependency property system is huge. The idea of Dependency property is to compute the value of the property based on the value of other external inputs. The external inputs might be styles, themes, system properties, animations etc. So, you can say a dependency property works with most of the WPF inbuilt features that were introduced.


Advantages of Dependency Property

As a matter of fact a Dependency Property have a lots of advantages over the normal CLR properties. Lets discuss the advantages a bit before we create our own dependency property :

  1. Property Value Inheritance : By Property Value Inheritance we mean that value of a Dependency property can be overridden in the hierarchy in such a way that the value with highest precedence will be set ultimately.
  2. Data Validation : We can impose Data Validation to be triggered automatically whenever the property value is modified.
  3. Participation in Animation : Dependency property can animate. WPF animation has lots of capabilities to change value at an interval. Defining a dependency property, you can eventually support Animation for that property.
  4. Participation in Styles : Styles are elements that defines the control. We can use Style Setters on Dependency property.
  5. Participation in Templates : Templates are elements that defines the overall structure of the element. By defining Dependency property, we can use it in templates.
  6. DataBinding : As each of the Dependency property itself invokes INotifyPropertyChanged whenever the value of the property is modified, DataBinding is supported internally. To read more about INotifyPropertyChanged, please read.
  7. CallBacks : You can have callbacks to a dependency property, so that whenever a property is changed, a callback is raised.
  8. Resources: A Dependency property can take a Resource. So in XAML, you can define a Resource for the definition of a Dependency property.
  9. Metadata overrides : You can define certain behavior of a dependency property using PropertyMetaData. Thus overriding a metadata form a derived property will not require you to redefine or reimplementing the whole property definition.
  10. Designer Support : A dependency property gets support from Visual Studio Designer. You can see all the dependency properties of a control listed in the Property Window of the Designer.

In these, some of the features are only supported by Dependency Property. Animation, Styles, Templates, Property value Inheritance etc could only be participated using Dependency property. If you use CLR property instead in such cases, the compiler will generate error.

How To define a Dependency Property

Now coming to the actual code, lets see how you could define a Dependency Property.

public static readonly DependencyProperty MyCustomProperty = DependencyProperty.Register("MyCustom", typeof(string), typeof(Window1));

public string MyCustom
{
    get
    {
        return this.GetValue(MyCustomProperty) as string;
    }
    set
    {
        this.SetValue(MyCustomProperty, value);
    }
}

In the above code, I have simply defined a Dependency property. You must have surprised why a dependency property is to be declared as static. Yes, like you even I was surprised when I first saw that. But later on after reading about Dependency property, I came to know that a dependency property is maintained in class level, so you may say Class A to have a property B. So property B will be maintained to all the objects that class A have individually. The Dependency property thus creates an observer for all those properties maintained by class A and stores it there. Thus it is important to note that a Dependency property should be maintained as  static.

The naming convention of a dependency property states that it should have the same wrapper property which is passed as the first argument. Thus in our case, the name of the Wrapper “MyCustom” which we will use in our program  should be passed as the first argument of the Register method, and also the name of the Dependency property should always be suffixed with Property to the original Wrapper key. So in our case the name of the Dependency Property is MyCustomProperty. If you dont follow this, some of the functionality will behave abnormally in your program.

It should also be noted that you should not write your logic inside the Wrapper property as it will not be called every time the property is called for. It will internally call the GetValue and SetValue itself. So if you want to write your own logic when the dependency property is fetched, there are callbacks to do them.

Defining Metadata for Properties

After defining the most simplest Dependency property ever, lets make it a little enhanced. To Add metadata for a DependencyProperty we use the object of the class PropertyMetaData. If you are inside a FrameworkElement as I am inside a UserControl or a Window, you can use FrameworkMetaData rather than PropertyMetaData. Lets see how to code :

static FrameworkPropertyMetadata propertymetadata = new FrameworkPropertyMetadata(“Comes as Default”, FrameworkPropertyMetadataOptions.BindsTwoWayByDefault | FrameworkPropertyMetadataOptions.Journal,new PropertyChangedCallback(MyCustom_PropertyChanged),new CoerceValueCallback(MyCustom_CoerceValue),
false, UpdateSourceTrigger.PropertyChanged);

public static readonly DependencyProperty MyCustomProperty = DependencyProperty.Register(“MyCustom”, typeof(string), typeof(Window1),
propertymetadata, new ValidateValueCallback(MyCustom_Validate));

private static void MyCustom_PropertyChanged(DependencyObject dobj, DependencyPropertyChangedEventArgs e)
{
//To be called whenever the DP is changed.
MessageBox.Show(string.Format(“Property changed is fired : OldValue {0} NewValue : {1}”, e.OldValue, e.NewValue));
}

private static object MyCustom_CoerceValue(DependencyObject dobj, object Value)
{
//called whenever dependency property value is reevaluated. The return value is the
//latest value set to the dependency property
MessageBox.Show(string.Format(“CoerceValue is fired : Value {0}”, Value));
return Value;
}

private static bool MyCustom_Validate(object Value)
{
//Custom validation block which takes in the value of DP
//Returns true / false based on success / failure of the validation
MessageBox.Show(string.Format(“DataValidation is Fired : Value {0}”, Value));
return true;
}
public string MyCustom
{
get
{
return this.GetValue(MyCustomProperty) as string;
}
set
{
this.SetValue(MyCustomProperty, value);
}
}
So this is little more elaborate. We define a FrameworkMetaData, where we have specified the DefaultValue for the Dependency property as “Comes as Default”, so if we dont reset the value of the DependencyProperty, the object will have this value as default.  The FrameworkPropertyMetaDataOption gives you a chance to evaluate the various metadata options for the dependency property. Lets see the various options for the enumeration.

  • AffectsMeasure : Invokes AffectsMeasure for the Layout element where the object is placed.
  • AffectsArrange : Invokes AffectsArrange for the layout element.
  • AffectsParentMeasure : Invokes AffectsMeasure for the parent.
  • AffectsParentArrange : Invokes AffectsArrange for the parent control.
  • AffectsRender : Rerender the control when the value is modified.
  • NotDataBindable : Databinding could be disabled.
  • BindsTwoWayByDefault : By default databinding will be OneWay. If you want your property to have a TwoWay default binding, you can use this.
  • Inherits : It ensures that the child control to inherit value from its base.

You can use more than one option using | separation as we do for flags.

The PropertyChangedCallback is called when the property value is changed. So it will be called after the actual value is modified already. The CoerceValue is called before the actual value is modified. That means after the CoerceValue is called the value that we return from it will be assigned to the property. The validation block will be called before CoerceValue, so this event ensures if the value passed in to the property is valid or not. Depending on the validity, you need to return true or false. If the value is false, the runtime generates an error.

So in the above application after you run the code, the MessageBox comes for the following:

ValidateCallback : You need to put logic to validate the incoming data as Value argument. True makes it to take the value, false will throw the error.

CoerceValue : Can modify or change the value depending on the value passed as argument. It also receives DependencyObject as argument. You can invoke CoerceValueCallback using CoerceValue method associated with DependencyProperty.

PropertyChanged : This is the final Messagebox that you see, which will be called after the value is fully modified. You can get the OldValue and NewValue from the DependencyPropertyChangedEventArgs.

Note on CollectionType Dependency Property

CollectionType dependency property are when you want to hold a collection of DependencyObject into a collection. We often require this in our project. In general when you create a dependency object and pass the default value into it, the value will not be the default value for each instance of the object you create. Rather it will be the initial value for the Dependency property for the type it is registered with. Thus if you want to create a collection of Dependency object and want your object to have its own default value, you need to assign this value to each individual item of the dependency collection rather than defining using Metadata definition.

For instance :

public static readonly DependencyPropertyKey ObserverPropertyKey = DependencyProperty.RegisterReadOnly(“Observer”, typeof(ObservableCollection<Button>), typeof(MyCustomUC),new FrameworkPropertyMetadata(new ObservableCollection<Button>()));

public static readonly DependencyProperty ObserverProperty = ObserverPropertyKey.DependencyProperty;

public ObservableCollection<Button> Observer
{
get
{
return (ObservableCollection<Button>)GetValue(ObserverProperty);
}
}

In the above code you can see we declare a DependencyPropertyKey using the RegisterReadonly method. The ObservableCollection is actually a collection of Button which is eventually a DependencyObject.

Now if you use this collection, you will see that when you create object of the Usercontrol, each of them refers to the same Dependency Property rather than having its own dependency property. As by definition each dependencyproperty allocates memory using its type, so if object 2 creates a new instance of DependencyProperty, it will overwrite the Object 1 collection. Hence the object will act as a Singleton class.  To overcome with this situation, you need to reset the collection with a new instance whenever a new object of the class is created. As the property is readonly you need to use SetValue to crate the new Instance using DependencyPropertyKey.

 public MyCustomUC()
{
            InitializeComponent();
            SetValue(ObserverPropertyKey, new ObservableCollection<Button>());
}

So for each instance the collection will reset and hence you will see unique collection for each UserControl created.

PropertyValue Inheritence

DependencyProperty supports Property Value inheritance. By the definition, after you create a DependencyObject for you, you can easily inherit a DependencyProperty to all its child controls using AddOwner method associated to the DependencyProperty.

Each of DependencyProperty has AddOwner method, which creates a link to another DependencyProperty that is already defined. Say you have a DependencyObject A, which has a property called Width. You want the value of the DependencyObject B to inherit the value of A.

public class A :DependencyObject
{
public static readonly DependencyProperty HeightProperty = DependencyProperty.Register(“Height”, typeof(int), typeof(A),
new FrameworkPropertyMetadata(0,
FrameworkPropertyMetadataOptions.Inherits));

public int Height
{
get
{
return (int)GetValue(HeightProperty);
}
set
{
SetValue(HeightProperty, value);
}
}

public B BObject { get; set; }
}

public class B : DependencyObject
{
public static readonly DependencyProperty HeightProperty;

static B()
{
HeightProperty = A.HeightProperty.AddOwner(typeof(B), new FrameworkPropertyMetadata(0, FrameworkPropertyMetadataOptions.Inherits));
}
public int Height
{
get
{
return (int)GetValue(HeightProperty);
}
set
{
SetValue(HeightProperty, value);
}
}
}

In the above code you can see, the class B inherits the DependencyProperty Height using AddOwner without re declaring the same in the class. Thus when A is declared, if you specify the height of A, it will automatically be transferred to the inherited child object B.

This is same as normal objects. When you specify the Foreground of a Window, it will automatically inherit to all the child elements, hence the Foreground of each controls will behave the same.

Update:

Even though PropertyValueInhertence is there for any dependency property, it will actually work for AttachedProperties. I came to know that Property Value Inhertance only works when the property is taken as attached. If you set the Default Value for the Attached property and also set FrameworkMetaData.Inherits, the property value will be inherited from Parent to Child automatically and also gives the chance for the Children to modify the content. Check MSDN for more details. So, the example that I put above is not proper for Property Value Inheritence, but you can easily create one to see after you read the next section.

Attached Properties

Attached property is another interesting concept. Attached property enables you to attach a property to an object that is outside the object altogether making it to define value for it using that object. Seems a little confused huh? Yes, lets give an example.

Say you have declared a DockPanel, inside which you want your controls to appear. Now DockPanel registers an AttachedProperty.

public static readonly DependencyProperty DockProperty = DependencyProperty.RegisterAttached("Dock", typeof(Dock), typeof(DockPanel), new FrameworkPropertyMetadata(Dock.Left, new PropertyChangedCallback(DockPanel.OnDockChanged)), new ValidateValueCallback(DockPanel.IsValidDock));

You can see, the DockProperty is defined inside the DockPanel as Attached. We use RegisterAttached method to register attached DependencyProperty. Thus any UIElement children to the DockPanel will get the Dock property attached to it and hence it can define its value which automatically propagates to the DockPanel.

Lets declare a Attached DependencyProperty:

public static readonly DependencyProperty IsValuePassedProperty = DependencyProperty.RegisterAttached(“IsValuePassed”, typeof(bool), typeof(Window1),
new FrameworkPropertyMetadata(new PropertyChangedCallback(IsValuePassed_Changed)));

public static void SetIsValuePassed(DependencyObject obj, bool value)
{
obj.SetValue(IsValuePassedProperty, value);
}
public static bool GetIsValuePassed(DependencyObject obj)
{
return (bool)obj.GetValue(IsValuePassedProperty);
}

Here I have declared a DependencyObject that holds a value IsValuePassed. The object is bound to Window1, so you can pass a value to Window1 from any UIElement.

So in my code, the UserControl can pass the value of the property to the Window.

  <local:MyCustomUC x:Name="ucust" Grid.Row="0" local:Window1.IsValuePassed="true"/>

You can see above the IsValuePassed can be set from an external UserControl, and the same will be passed to the actual window.

As you can see I have added two static method to individually Set or Get values from the object. This would be used from the Code to ensure we pass the value from code from appropriate objects.

Say you add a button and want to pass values from code, in such cases the static method will help.

private void Button_Click(object sender, RoutedEventArgs e)
{
     Window1.SetIsValuePassed(this, !(bool)this.GetValue(IsValuePassedProperty));
}

In the similar way as DockPanel Defines SetDock method.


Conclusion

To conclude, DependencyProperty is one of the most important and interesting concept that you must know before you work with WPF. There are certain situations, where you would want to declare a DependencyProperty. From this article I have basically visited each section of the DependencyProperty that you can work. I hope this one has helped you.

Thank you for reading. Looking forward of your feedback.

WPF Tutorial – TypeConverter & Markup Extension 4


Introduction

In my previous article I have discussed about basic architecture of WPF, and then gradually started learning with Layout panels, Transformation, introduced different Controls, containers, UI Transformation etc. In this article I will discuss the most important part of XAML which every developer must learn before starting with any XAML applications.

Markup Extensions are extensions to XAML which you might use to assign custom rules on your XAML based Applications. Thus any custom behavior which you would like to impose on your application in your designer, you should always use Markup Extensions. Here we will discuss how you can use Markup Extensions to generate your custom behaviors to XAML.

  • A Beginning

  • Layout – Panels & Containers

  • Borders – Fun with Borders and Effects

  • TypeConverter & MarkupExtensions to XAML (This One)

XAML or Extensible Application Markup Language is actually an XML format which has special schema defined. Now you might always wonder, how extensible the Markup is. What type of capabilities that are there within XAML which widely differs the XAML with XML. Yes, it is because of XAML parser which has huge number of capabilities to make the normal XML to a very rich UI designs.

You all know XAML is actually a text format. The tags are very same as with any XML where the attributes takes everything as String. Even though you want to assign a object to a string, you cannot do so because the object can only take a string. Markup Extension allows you to handle these kind of situations. So you can say a Markup extension is actually the way to extend a normal XML to a complete Extensible Markup as XAML.

As XAML takes everything as string, sometimes we need to convert those data into valid values. For instance, when we use Margin, we need to specify each values of margin element. In such situation where the conversion is very simple and straight forward, we can use Type Converters to do this job rather than going for Markup extensions. Lets discuss about Type Converters first before we move to Markup Extensions.

Type Converter

As I already told you, markup as an extension of XML cannot impose restriction over a data element. That means we can only specify string data for attributes of any object in XAML. But XAML provides a flexibility to create your Type converter which allows you to impose restriction on the data. Thus even primitives like Single or Double could not have restrictions while you describe in your XAML. Type Converters plays a vital role to put this restriction to XAML parser.

XAML parser while parsing any value of an attribute needs two pieces of information.
1. Value Type : This determines the Type to which the string data should be converted to.
2. Actual Value

Well, when parser finds a data within an attribute, it first looks at the type. If the type is primitive, the parser tries a direct conversion. On the other hand, if it is an Enumerable, it tries to convert it to a particular value of an Enumerable. If neither of them satisfies the data, it finally tries to find appropriate Type Converters class, and converts it to an appropriate type. There are lots of typeconverters already defined in XAML, like Margin.
Margin = 10,20,0,30 means margin :left,top,right,bottom is defined in sequence. Therefore system defines a typeconverter that converts this data into Thickness object.

Custom TypeConverter

To create a TypeConverter we need to decorate the Type with TypeConverterAttribute and define a custom class which converts the data into the actual type. And the actual converter class, a class which implements from TypeConverter.

Let us make it clear using an Example :

TypeConverter to convert a GeoPoint:

To create a TypeConverter as I have already told you, you need to create a class for which the TypeConverter to be applied. In my example, I have created a class which has two properties called Latitude and Longitude and creates an implementation of a Geographic Point.  Lets see how the class looks like :

    [global::System.ComponentModel.TypeConverter(typeof(GeoPointConverter))]
    public class GeoPointItem
    {
        public double Latitude { get; set; }
        public double Longitude { get; set; }

        public GeoPointItem()
        {
        }

        public GeoPointItem(double lat, double lon)
        {
            this.Latitude = lat;
            this.Longitude = lon;
        }

        public static GeoPointItem Parse(string data)
        {
            if (string.IsNullOrEmpty(data)) return new GeoPointItem();

            string[] items = data.Split(',');
            if (items.Count() != 2)
                throw new FormatException("GeoPoint should have both latitude and longitude");

            double lat, lon;
            try
            {
                lat = Convert.ToDouble(items[0]);
            }
            catch (Exception ex) { 
                throw new FormatException("Latitude value cannot be converted", ex); 
            }

            try
            {
                lon = Convert.ToDouble(items[1]);
            }
            catch (Exception ex) { 
                throw new FormatException("Longitude value cannot be converted", ex); 
            }

            return new GeoPointItem(lat, lon);
        }

        public override string ToString()
        {
            return string.Format("{0},{1}", this.Latitude, this.Longitude);
        }
    }

In the above code you can see that I have created  a quite normal class, which defines a Geographic point on Earth. The type has two parameters, Latitude and Longitude and both of which are Double values. I have also overridden theToString() method, which is actually very important in this situation to get the string resultant of the object. The Parse method is used to parse a string format to GeoPointItem.

After implementing this, the first thing that you need to do is to decorate the class with TypeConverter Attribute. This attribute makes sure that the item is Converted easily using the TypeConverter GeoPointConverter passed as argument to the attribute. Thus while XAML parser parses the string, it will call the GeoPointConverter automatically to convert back the value appropriately.

After we are done with this, we need to create the actual converter. Lets look into it :

    public class GeoPointConverter : global::System.ComponentModel.TypeConverter
    {

        //should return true if sourcetype is string
        public override bool CanConvertFrom(System.ComponentModel.ITypeDescriptorContext context, Type sourceType)
        {
            if (sourceType is string)
                return true;
            return base.CanConvertFrom(context, sourceType);
        }
        //should return true when destinationtype if GeopointItem
        public override bool CanConvertTo(System.ComponentModel.ITypeDescriptorContext context, Type destinationType)
        {
            if (destinationType is string)
                return true;

            return base.CanConvertTo(context, destinationType);
        }
        //Actual convertion from string to GeoPointItem
        public override object ConvertFrom(System.ComponentModel.ITypeDescriptorContext context, System.Globalization.CultureInfo culture, object value)
        {
            if (value is string)
            {
                try
                {
                    return GeoPointItem.Parse(value as string);
                }
                catch (Exception ex)
                {
                    throw new Exception(string.Format("Cannot convert '{0}' ({1}) because {2}", value, value.GetType(), ex.Message), ex);
                }
            }

            return base.ConvertFrom(context, culture, value);
        }

        //Actual convertion from GeoPointItem to string
        public override object ConvertTo(System.ComponentModel.ITypeDescriptorContext context, System.Globalization.CultureInfo culture, object value, Type destinationType)
        {
            if(destinationType == null)
                throw new ArgumentNullException("destinationType");
    
             GeoPointItem gpoint = value as GeoPointItem;

            if(gpoint != null)
            if (this.CanConvertTo(context, destinationType))
                return gpoint.ToString();
            
            return base.ConvertTo(context, culture, value, destinationType);
        }
    }

In the above code we have implemented the converter class by deriving it from TypeConverter. After implementing it from TypeConverter class we need to override few methods which XAML parser calls and make appropriate modifications so that the XAML parser gets the actual value whenever required.

1. CanConvertFrom : This will be called when XAML parser tries to parse a string into a GeopointItem value.  When it returns true, it calls ConvertFrom to do actual Conversion.
2. CanConvertTo :  This will be called when XAML parser tries to parse a GeoPointItem variable to a string equivalent.When it returns true, it calls ConvertTo to do actual Conversion.
3. ConvertFrom :Does actual conversion and returns the GeoPointItem after successful conversion.
4. ConvertTo : Does actual conversion and returns the string equivalent of GeoPointItem passed in.

In the above example, you can see I have actually converter the string value to GeoPointItem and vice-versa using the TypeConverter class.

Now its time to use it. To do this I build a custom UserControl and put the property of that to have a GeoPoint.

The XAML looks very simple :

  <Grid>
        <Grid.RowDefinitions>
            <RowDefinition/>
            <RowDefinition/>
        </Grid.RowDefinitions>
        <Grid.ColumnDefinitions>
            <ColumnDefinition/>
            <ColumnDefinition/>
        </Grid.ColumnDefinitions>
        <TextBlock Text="Latitude" Grid.Row="0" Grid.Column="0"></TextBlock>
        <TextBox x:Name="txtlat" MinWidth="40" Grid.Row="0" Grid.Column="1" TextChanged="txtlat_TextChanged"/>
        <TextBlock Text="Longitude" Grid.Row="1" Grid.Column="0"></TextBlock>
        <TextBox x:Name="txtlon" MinWidth="40" Grid.Row="1" Grid.Column="1" TextChanged="txtlon_TextChanged"/>
    </Grid>

It has 2 Textboxes which displays value of Latutude and Longitude individually. And when the value of these textboxes are modified, the actual value of the GeopointItem is modified.

    public partial class GeoPoint : UserControl
    {


        public static readonly DependencyProperty GeoPointValueProperty = DependencyProperty.Register("GeoPointValue", typeof(GeoPointItem), typeof(GeoPoint), new PropertyMetadata(new GeoPointItem(0.0, 0.0)));

        public GeoPoint()
        {
            InitializeComponent();
        }
        
        public GeoPointItem GeoPointValue
        {
            get
            {
                return this.GetValue(GeoPointValueProperty) as GeoPointItem;
            }
            set
            {
                this.SetValue(GeoPointValueProperty, value);
            }
        }

        private void txtlat_TextChanged(object sender, TextChangedEventArgs e)
        {
            GeoPointItem item = this.GeoPointValue;

            item.Latitude = Convert.ToDouble(txtlat.Text);
            this.GeoPointValue = item;
        }

        private void txtlon_TextChanged(object sender, TextChangedEventArgs e)
        {
            GeoPointItem item = this.GeoPointValue;

            item.Longitude = Convert.ToDouble(txtlon.Text);
            this.GeoPointValue = item;
        }

        private void UserControl_Loaded(object sender, RoutedEventArgs e)
        {
            GeoPointItem item = this.GeoPointValue;
            this.txtlat.Text = item.Latitude.ToString();
            this.txtlon.Text = item.Longitude.ToString();

        }
    }

Here when the UserControl Loads, it first loads values passed in to the TextBoxes. The TextChanged operation is handled to ensure the actual object is modified whenever the value of the textbox is modified.


From the window, we need to create an object of the UserControl and pass the value as under:

 <converter:GeoPoint x:Name="cGeoPoint" GeoPointValue="60.5,20.5" />

The converter points to the namespace. Hence you can see the value is shown correctly in the TextBoxes.

Markup Extension

Now as you know about TypeConverter, let us take MarkupExtension into account. Markup Extensions gives the flexibility to create custom objects into your XAML attributes. Every markup extension is enclosed within a {} braces. Thus anything written within the Curl braces will be taken as Markup Extension. Thus XAML parser treats anything within the curl braces not as literal string and rather it tries to find the actual MarkupExtension corresponding to the name specified within the Curl braces.

Exception :

If you want to put braces within a string you need to put {} at the beginning to make it an exception.
You can read “How to Escape {} in XAML” for more information.

Example of Markup Extension :

<TextBox Text={x:Null} />

Probably the simplest of all, it actually a MarkupExtension which returns Null to the Text string.

There are already few Markup Extensions defined with XAML defined within System.Windows.Markup namespace which helps every time to produce functional features within your XAML. Let us discuss few of them :

NullExtension

This is the most simple MarkupExtension we ever have. It actually returns Null when placed against a value.
Example :

Content = "{x:Null}"

ArrayExtension

This is used to create an ArrayList of items. The x:Array actually returns an object of Array of type specified.

Values = {x:Array Type=sys:String}


StaticExtension

Another simple Extension which returns Static field or Property references.

Text="{x:Static Member=local:MyClass.StaticProperty}"

Thus when you define a static property StaticProperty for MyClass, you will automatically set the value to Text property using this.

TypeExtension

Type extension is used to get Types from objects. When the attribute of a control takes the Type object you can use it.

TargetType="{x:Type Button}"

So TargetType receives a Type object of Button.

Reference

It is used to Refer an object declared somewhere in XAML by its name.  It is introduced with .NET 4.0

Text="{x:Reference Name=Myobject}"


StaticResourceExtension

Resources are objects that are defined within the XAML. StaticResource substitutes the key assigned to the object and replaces its reference to the Resource element declared.

<Grid.Resources>

<Color x:Key="rKeyBlack">Black</Color>
<SolidColorBrush Color="{StaticResource rKeyBlack}" x:Key="rKeyBlackBrush"/>


</Grid.Resources>

<TextBlock Background="{StaticResource ResourceKey=rKeyBlackBrush}" />

StaticResource errors out if the key is not there during compile time.

DynamicResourceExtension

This is same as StaticResource, but it defers the value to be a runtime reference. Thus you can declare any key for a DynamicResource and it should be present during runtime when the actual object is created.

<TextBlock Background="{DynamicResource ResourceKey=rKeyBlackBrush}" />

Now the rKeyBlackBrush if not declared as Grid.Resources will not error out. You can add that during Runtime when Window Loads.

What are Resources ?

Resources are objects that are created the object is rendered by XAML parser. Every FrameworkElement object has a ResourceDictionary object placed within it. You can add Resources within this ResourceDictionary and  can reuse those component within the scope.

Resources are reusable component which one can use for several times to produce its output. So if you need an object that you want to reuse more than once in your application, and you don’t want the object to be changed within the scope, Resources are then the best option for you.

 <Grid.Resources>
            <Color x:Key="rKeyRed">Red</Color>
            <Color x:Key="rKeyCyan">Cyan</Color>
            <LinearGradientBrush x:Key="rKeyforegroundGradient">
                <GradientStop Color="{StaticResource rKeyRed}" Offset="0"></GradientStop>
                <GradientStop Color="{StaticResource rKeyCyan}" Offset="1"></GradientStop>
            </LinearGradientBrush>
        </Grid.Resources>
<TextBlock Text="{Binding ElementName=cGeoPoint, Path=GeoPointValue}" FontSize="30" Margin="50" Grid.Row="1" Grid.ColumnSpan="2" Foreground="{StaticResource rKeyforegroundGradient}" />

So you can see we have defined a LinearGradientBrush and used as Foreground of the TextBlock. This object can be reused any time when required.

Every FrameworkElement has a property called Resource which takes an object of ResourceDictionary. You can assign various resources to this Collection which you would use in different object created within the scope of the object.  In XAML, resources are declared using x:Key attribute, and later this key can be used to refer to the resource in ResourceDictionary using StaticResource or DynamicResource.

Difference between StaticResource and DynamicResource

StaticResource finds the key defined within the ResourceDictionary under its scope during the Loading of the application. Hence the Compiler will throw error during compilation if not found in resources. On the other hand, DynamicResource Markup Extension defers the resource assignment to the actual runtime of the application. So the expression remains unevaluated until the object being created.

Note : If the resource is derived from Freezable (immutable), any change to the object will change the UI regardless of whether it is a StaticResource or DynamicResource. Example : Brush, Animation, Geometry objects are Freezable.

Choice between StaticResource and DynamicResource


  • StaticResource requires less CPU during runtime, so it is faster.
  • StaticResource are created when the application loads. So making everything as StaticResource means slowing down the Application  Load process.
  • When the resources are unknown during compilation, you can use DynamicResource. DynamicResource are used when user interaction changes the look and feel of an object.
  • DynamicResource is best when you want your resource to be pluggable. You can read how to create pluggable resources from : Pluggable styles and Resources

Binding

Binding is the most important and complex Markup extension which might be used to bind one object. It provides Databound object when the data object is assigned to the DataContext of the object.
Thus say you have an object Obj which has several properties like Name, Age etc. Then you might write

Text = "{Binding Name}"

which means the DataContext object will automatically be evaluated during runtime and the actual value of Name property of the object will be shown on the Text property.

Binding has lots of flexibilities, thus you can specify expressions on the databound objects and hence made it one of the most complex Markup extension.

<StackPanel Orientation="Vertical">
        <TextBox x:Name="txtObj"></TextBox>
        <TextBox x:Name="txtCustom" Text="{Binding FallbackValue=10, ElementName=txtObj, Path=Text,StringFormat='Text Entered : {0:N2}'}, Mode=TwoWay">
        </TextBox>
    </StackPanel>

As both of them are bound any change to the property automatically reflects the changes to the other textbox. There are few modes of these binding, OneTime, OneWayToSource, OneWay and TwoWay. StringFormat creates formatting of the string. We can have Converters associated with a binding to enable us to return appropriate value based on the value we feed in.
You can read how to create Converter for Binding from :
How to deal with Converter in Binding

In case of binding, you must also make sure that the object which is bound to have implemented INotifyPropertyChanged. Otherwise every binding will work as OneTime.

You can read more on how you can implement Binding with INotifyPropertyChanged from :
Change Notification for objects and Collection

We will discuss Binding in greater detail in next article.

RelativeSource

RelativeSource is a MarkupExtension which you have to use within Binding. Binding has a property called RelativeSource, where you can specify a RelativeSource MarkupExtension. This Markup Extension allows you to give Relative reference to the element rather than absolutely specifying the value. RelativeSource comes handy when absolute Reference is unavailable.

RelativeSource has few properties which one can use  :

  1. AncestorType : It defines the Type of the Ancestor element where the property to be found. So if you defined a button within a Grid, and you want to refer to that Grid, you might go for RelativeSource.
  2. Mode : Determines how the RelativeSource to be found. The enumeration has few values :
    • Self : This means the Binding will take place within the object itself. So if you want the Background and Foreground of the same object, RelativeSource Mode =Self will come handy.
    • FindAncestor : Finds elements parent to it. Thus it will look through all the visual element into the Visual tree and try to find the control for which the AncestorType is provided and it goes on until the object is found in the Ancestor elements to it.
    • TemplatedParent : TemplatedParent allows you to find the value from the object for which the Template is defined. Templates are definition of the control itself which helps to redefine the Data and Control Elements altogether. TemplatedParent allows you to find the Templated object directly.
    • PreviousData : This allows you to track the Previous Data element when the object is bound to a CollectionView. Thus this is actually RelativeSource to previous DataElement.
  3. AncestorLevel : Numeric value that determines how many levels that the RelativeSource should search before determining the result. If you specify 1 as AncestorLevel, it will go through only one level.

You can use RelativeSource for any binding.

<Grid Name="grd"> 

       <TextBox x:Name="txtCustom" Text="{Binding Name,
RelativeSource={RelativeSource AncestorType={x:Type Grid},
Mode=FindAncestor,AncestorLevel=2}}" />

</Grid>

This allows you to find the Grid. Practically speaking, this example doesnt gives you a sense when to use RelativeSource as in this case you can easily get the actual reference to the Grid. RelativeSource comes very useful when the Grid is somewhat inaccessible from it, say the TextBox is within the DataTemplate of a Grid.

TemplateBinding

TemplateBinding allows you to bind the value of a property of an object within the Template of a control to the object TemplatedParent to it.

<RadioButton Foreground="Red">
            <RadioButton.Template>
                <ControlTemplate>
                    <ToggleButton Content="{TemplateBinding Foreground}" />
                </ControlTemplate>
            </RadioButton.Template>
        </RadioButton>

In this case the ToggleButton Caption will be shown as #FFFF0000 which is the equivalent color for RadioButton.

MultiBinding

MultiBinding allows you to create Binding based on more than one Binding. You can create a class from IMultiValueConverter which will allow you to covert multipleBinding statements into one single output.

The only difference between a normal converter and MultiValueConverter is a normal IValueConverter takes one value as argument whereas a MultiValueConverter takes an Array of values from all the Binding elements.

We will discuss more on MultiBinding later in the series.

<Button x:Name="NextImageButton" >

    <Button.IsEnabled>

        <MultiBinding Converter="{StaticResource SelectedItemIndexIsNotLastToBoolean}">

            <Binding Mode="OneWay" ElementName="ImageListBox" Path="SelectedIndex" />

            <Binding Mode="OneWay" ElementName="ImageListBox" Path="Items.Count" />

        </MultiBinding>

    </Button.IsEnabled>

    <Image Source="Icons/navigate_right.png"/>

</Button>


Custom Markup Extension

In the final section, I will build my custom Markup Extension and use it. For simplicity we use Reflection to Get fields, Methods, and Properties and bind them into a ListBox.

To create a custom Markup Extension, you need to create a class and inherit it from MarkupExtension. This class has an abstract method called ProvideValue which you need to override to make the MarkupExtension work.

So actually the XAML parser calls this ProvideValue to get the output from MarkupExtension. So the actual implementation looks like :

    public class ReflectionExtension : global::System.Windows.Markup.MarkupExtension
    {
        public Type CurrentType { get; set; }
        public bool IncludeMethods { get; set; }
        public bool IncludeFields { get; set; }
        public bool IncludeEvents { get; set; }

        public ReflectionExtension(Type currentType)
        {
            this.CurrentType = currentType;
        }
        
        public override object ProvideValue(IServiceProvider serviceProvider)
        {
            if (this.CurrentType == null)
                throw new ArgumentException("Type argument is not specified");

            ObservableCollection<string> collection = new ObservableCollection<string>();
            foreach(PropertyInfo p in this.CurrentType.GetProperties())
                collection.Add(string.Format("Property : {0}", p.Name));
 
            if(this.IncludeMethods)
                foreach(MethodInfo m in this.CurrentType.GetMethods())
                    collection.Add(string.Format("Method : {0} with {1} argument(s)", m.Name, m.GetParameters().Count()));
            if(this.IncludeFields)
                foreach(FieldInfo f in this.CurrentType.GetFields())
                    collection.Add(string.Format("Field : {0}", f.Name));
            if(this.IncludeEvents)
                foreach(EventInfo e in this.CurrentType.GetEvents())
                    collection.Add(string.Format("Events : {0}", e.Name));

            return collection;
        }

    }

You can see the constructor for this class takes one argument of Type. Now to use it we refer it in XAML and use it in similar fashion as we do with other MarkupExtensions.

<ListBox ItemsSource="{local:Reflection {x:Type Grid}, IncludeMethods=true, IncludeFields=true, IncludeEvents=true}" MaxHeight="200" Grid.Row="3" Grid.ColumnSpan="2" />

So here the Constructor gets argument from {x:Type Grid}. The first argument for any MarkupExtension is treated as Constructor argument. The other properties are defined using comma separated strings.

Conclusion

So this article deals with the basics of Markup Extension and Type Converters of basic XAML applications. We have left the Binding markup extension behind, and we will discuss on it on our next topic. I hope this article comes helpful to all of you. Thanks for reading.

WPF Tutorial : Fun with Border & Brush 3


Introduction

Border is the primary building block of any application in WPF. In my current application, I have been using lots of borders to adorn the User Interface. Starting from placing borders directly to the Window to putting borders in ControlTemplate of ListBoxItem, borders generally play a very important role in creating better look and feel for the application. In this application you will see how you can use Borders and most of the properties with ease.

  • A Beginning

  • Layout – Panels & Containers

  • Borders – Fun with Borders and Effects (This One)

  • TypeConverter & MarkupExtensions to XAML

Introduction to Borders

Everyone knows what exactly the Border is. It is a rectangular area used to decorate the UI elements. The main difference between a Rectangle and a Border is that Border allows you to add one single child element inside it. Border.Child allows you to include a child DependancyObject inside a Border. Let us see a sample Border:

<Border Width="50" Height="50" x:Name="brdElement">
  <Border.Background>
     <SolidColorBrush Color="Bisque"></SolidColorBrush>
  </Border.Background>
  <Border.Effect>
    <DropShadowEffect BlurRadius="10" Color="Red" Direction="235" Opacity=".5" RenderingBias="Quality" ShadowDepth="10" />
  </Border.Effect>
</Border>


If you place this in your code you will see something like above. Let us look into detail what exactly I have done.

First of all, Width / Height determines the dimension of the Border element. Border.Background determines what will be the color of the Brush which will draw the inside of the Border. You can see the color is Bisque. You can define any type of Brush here. SolidColorBrush takes one Color element(which is here defined as Bisque) and fills the Border Background with that color.  There are other properties too like CornerRadius, used to create RoundedCorner Border etc. I will discuss them later in the article.

Border Effect can also be applied to a Border. Here I have added a DropShadowEffect. It allows you to put a shadow rendered outside the Border. The dependancy properties that you need to take note are

1. Color : Defines the Color of the Shadow.
2. Opacity : Fades out the Color.  Yo can see the Red color is faded out here to .5; Opacity ranges between 0 – 1.
3. BlurRadius : It defines the extent of shadow radius. Thus if you increase the size of BlurRadius, it will increase the Shadow.
4. Direction : It is the Light Direction in degrees. 235 degree implies where the shadow will focus, thus you can see 360 -235 is the angle where light is placed. Value ranges from 0 to 360.
5. ShadowDepth : It defines the depth of the Shadow. It means, how much the object is raised from the Shadow. If you increase the value of ShadowDepth, you will see, the being raised.

Now with these lets create a few more :

<Border Width="50" Height="50" x:Name="brdElement">
                <Border.Background>
                    <LinearGradientBrush StartPoint="0,0" EndPoint="0,1">
                        <LinearGradientBrush.GradientStops>
                            <GradientStop Color="Red" Offset="0"/>
                            <GradientStop Color="Pink" Offset=".5"/>
                            <GradientStop Color="Azure" Offset="1"/>
                        </LinearGradientBrush.GradientStops>
                    </LinearGradientBrush>
                </Border.Background>
                <Border.Effect>
                    <DropShadowEffect BlurRadius="10" Color="Red" Direction="45" Opacity=".4" RenderingBias="Performance" ShadowDepth="30" />
                </Border.Effect>
            </Border>

In the first sample I have modified the SolidColorBrush to LinearGradientBrush with 3 GradientStops. It takes StartPoint and EndPoint. StartPoint defines where the Gradient will start. So 0,0 means starts from the TopLeft corner. First 0 represents the X axis Offset color, and second defines Y – axis Offset color.

Here I have used Gradient from TopLeft to BottomRight, so the Gradient will be straight.  GradientStops defines the different colors on the Gradient. Here I have defined all the colors from 0 to 1. Thus the Gradient will start from 0,0 means Red to 1,1  as Azure.
If I start as 0,1 to 1,0 it would have been a Diagonal Gradient.

<Border Width="50" Height="50" x:Name="brdElement" BorderBrush="Goldenrod" BorderThickness="2">
                <Border.Background>
                    <LinearGradientBrush StartPoint="0,1" EndPoint="1,0">
                        <LinearGradientBrush.GradientStops>
                            <GradientStop Color="BurlyWood" Offset="0"/>
                            <GradientStop Color="MediumBlue" Offset=".5"/>
                            <GradientStop Color="SlateGray" Offset="1"/>
                        </LinearGradientBrush.GradientStops>
                    </LinearGradientBrush>
                </Border.Background>
                <Border.Effect>
                    <DropShadowEffect BlurRadius="10" Color="CadetBlue" Direction="0" Opacity=".4" RenderingBias="Performance" ShadowDepth="15" />
                </Border.Effect>
            </Border>

In this version, I have modified the Colors of the Gradient. You can see the DropShadow Color, ShadowDepth and Direction is changed as well to demonstrate you how it modifies.

The BorderBrush and BorderThickness defines the border element of the Border. It means it draws the outer boundary of the Border with

More of  Brushes

As I have already discussed the most common Brush viz LinearGradientBrush, SolidColorBrush; Let us look into other brushes that are available to us.

1. RadialGradientBrush : It produces a circular gradient. Thus if I place a RadialGradientBrush instead a LinearGradientBrush, it will show you the Circular gradient.

In the above RadialGradientBrush is used to produce these borders. Lets look at the code :

<Border Width="50" Height="50" BorderBrush="Black" BorderThickness="2">
                <Border.Background>
                    <RadialGradientBrush GradientOrigin=".25,.75" RadiusX=".6" RadiusY=".6">
                        <RadialGradientBrush.GradientStops>
                            <GradientStop Color="Red" Offset="0"></GradientStop>
                            <GradientStop Color="Yellow" Offset="1"></GradientStop>
                        </RadialGradientBrush.GradientStops>
                    </RadialGradientBrush>
                </Border.Background>
            </Border>

The GradientOrigin determines where the Origin is when we take the whole area to be 1. So If you place a value more than 1, Origin will lie outside the border. I have placed .25,.75 in this case.

The RadiusX and RadiusY determines the Radius of the Gradient.  Finally the GradientStops determines the actual gradient colors. Just interchanging the Offsets will produce the 2nd image.

2. ImageBrush : It allows you to draw using Image. You need to specify the ImageSource to determine the what Image to be drawn.

Here an ImageBrush is specified with my image. I have also added a BitmapEffect to the Border with some noise to distort the image a little.

 <Border Width="100" Height="100" >
                <Border.Background>
                    <ImageBrush ImageSource="logo.jpg" Opacity=".7">
                        <!--<ImageBrush.Transform>
                            <SkewTransform AngleX="10" AngleY="10" />
                        </ImageBrush.Transform>-->
                    </ImageBrush>
                </Border.Background>
                <Border.BitmapEffect>
                    <OuterGlowBitmapEffect GlowColor="Brown" GlowSize="20" Noise="3"/>
                </Border.BitmapEffect>
            </Border>

The Opacity specifies the opacity of the image drawn inside the Border.

In addition to this I have added one BitmapEffect with OuterGlowEffect. OuterGlow allows you to glow the outer section of the Border. I used Brown glow with GlowSize = 20 and Noise=3. Noise is used to distort the image, just seen in the image.

3. VisualBrush : This allows you to draw using an already visual element.  It is very simple to use. Just see


In the first Image, I have used VisualBrush to draw the Image on the right side which draws itself as the left side. I have modified the OuterGlowBitmapEffect to BevelBitmapEffect in the next version, to have a bevel effect to the image. The VisualBrush is also flipped XY so it seems upside down. See how the code looks like :

<Border Width="100" Height="100" x:Name="brdElement" CornerRadius="5" >
                <Border.Background>
                    <ImageBrush ImageSource="logo.jpg" Opacity=".7">
                    </ImageBrush>
                </Border.Background>
                <Border.BitmapEffect>
                    <BevelBitmapEffect BevelWidth="5" EdgeProfile="BulgedUp" LightAngle="90" Smoothness=".5" Relief=".7"/>
                </Border.BitmapEffect>
            </Border>
            <Border Width="100" Height="100" Margin="20,0,0,0">
                <Border.Background>
                    <VisualBrush TileMode="FlipXY" Viewport="1,1,1,1" Stretch="UniformToFill" Visual="{Binding ElementName=brdElement}"></VisualBrush>
                </Border.Background>
            </Border>

The VisualBrush is bound to brdElement, which represents the Visual element placed in the window.  TileMode indicates the Flip direction of the actual visual. Thus if there is  a button or any other visual placed other than the border, it would look flipped as well.  So VisualBrush comes very handy at times.

Other than that there are lots of Brushes as well like DrawingBrush, used to draw Geometry objects etc.

Border Effects

As I have already used some Border Effects previously, lets see what are the main effects that you might use in real life.

Border element or any element inherited from Border supports two types of Effects.

1. Effect : Effects are applied to the whole Border. Thus any control inside the Border will also be affected with the effect.

Thus you can see using BlurEffect in the Border actually affects the Text written in the TextBlock inside the Border. You will get clear idea by looking at the code below :

 <Border Background="AliceBlue" Width="100" Height="100" CornerRadius="5" BorderBrush="Black" BorderThickness="2">
                <Border.Effect>
                    <BlurEffect Radius="3" RenderingBias="Quality" />
                </Border.Effect>
                <TextBlock HorizontalAlignment="Center" VerticalAlignment="Center" Text="This is inside Blured Border" TextWrapping="Wrap" TextTrimming="WordEllipsis"/>
            </Border>

2. DropShadowEffect : It is used to place a shadow outside the Border. I have already discussed with it in previous section of the article , so no need to elaborate this anymore.


Border BitmapEffects

Border also defines BitmapEffect. I have already discussed about OuterGlowBitmapEffect and BevelBitmapEffect, so lets discuss about the rest.

1. EmbossBitmapEffect : This effect will emboss the whole border. The LightAngle specifies the angular direction of light placed on the border. So if you write something inside the Border, it would have a shadow effect automatically just like the below :

If you see the code it looks like :

<Border Background="AliceBlue" Width="100" Height="100" CornerRadius="5" BorderBrush="Black" BorderThickness="2">
                <Border.BitmapEffect>
                    <EmbossBitmapEffect LightAngle="270" Relief=".4" />
                </Border.BitmapEffect>
                <TextBlock HorizontalAlignment="Center" Foreground="Gold" FontSize="20" VerticalAlignment="Center" Text="This is Embossed" TextWrapping="Wrap" TextTrimming="WordEllipsis"/>
            </Border>

The Text inside the textblock  is Embossed with the whole border itself.

2. DropShadowBitmapEffect : You can also specify dropshadow using BitmapEffect. It allows to add Noise to it as well.

The code will look like :

<DropShadowBitmapEffect Color="Red" Direction="200" Noise=".6" ShadowDepth="10" Opacity=".6"/>

This is same as normal DropShadowEffect but a bit of enhancements.

For BitmapEffects you can also add all the effects at a time using BitmapEffectGroup.


Points to Remember

While working, I have found both Effect and BitmapEffect of Border, even though looks great for an application may often detoriate performance of the application. So it is always better to avoid Effects. If you still like to use them, always use the effects to small elements. Do not put say BitmapEffect to a border that spans the whole window. This will seriously slow down the WPF application.

Conclusion

Borders and brushes are the most commonly used objects in XAML. So I hope you like the article and has helped you a lot.

Thanks for reading.

WPF Tutorial – Layout-Panels-Containers & Layout Transformation 2


Introduction

In my previous article I have discussed few basics of WPF applications, its architecture and internal structure to start with WPF.  In this article of the series, I am going to discuss about the very basics of writing your first WPF application and how you can place controls in your window. This is very basic to anybody who wants to start with WPF. I will discuss most of them which are commonly used.

  • A Beginning : Part 1

  • Layout – Panels & Containers (This one)

  • Borders – Fun with Borders and Effects

  • TypeConverter & MarkupExtensions to XAML

  • Dependency Property System

  • Concept Binding


A Look on Window

While building your application, the first thing you notice is a Window. Window is the main class that interact with the user and produces the lifetime of windows and dialog boxes. Like in normal windows application, it produces the object windows using the normal API. A window has two sections.

  1. Non-Client Area : which displays the outer boundary of the window, that we normally see with any windows. The main parts of them are Icon, System Menu, a title Bar and Border.
  2. Client part : This is the main part where the WPF controls will appear. You can customize this area using WPF.

Types of Window

WPF window is of 3 types.

  1. Window : This is basically a normal windowed application, where every controls are placed within the same window. The window appears normally as I told you earlier. The Client area are fully customizable using XAML.
  2. NavigationWindow : This is a special type of window which is inherited from Windows but with a Navigation panel top of it. So if you want to create an application that makes sense when used as Wizards, you might better go with NavigationWindow.  You can also customize the navigation panel yourself so that it goes with your own look and feel.
  3. Page : Almost similar to NavigationWindow, the main difference is that, Page can be opened in Web Browser as XBAP applications.
window types

In the above image you can see how Normal Window differs from NavigationWindow. NavigationWindow is very uncommon in general case, but might come handy when you need special treatment for your application.

Let me discuss a bit on how you can use Pages in your application.

Pages are created to be used as a Page for the Same Window. Navigating from one page to another is very simple. Page Class exposes an object of NavigationService which you can use to navigate between pages. NavigationService has few events like Navigating, NavigationFailed, NavigationProgress, NavigationStopped etc which you can use to show progressbar while the page is navigating.  Methods like GoBack, GoForward and Navigate are the best way to navigate from one page to another.

private void Button_Click(object sender, RoutedEventArgs e)
{

     this.NavigationService.Navigate(new Uri("Page2.xaml", UriKind.Relative));
}

Thus you can see, rather than calling a new window for Page2.xaml, I just used NavigationService to navigate from one page to another.

I will write all about Navigation in a separate topic later.

For further reference you can use MSDN Article :
OverView of Navigation

Types of Containers

WPF Window is derived from ContentControl. Basically while working with Controls, you might come across a few types of controls which forms the basis for any WPF control. A ContentControl holds any arbitrary content. It may be a string, an object of any type or even an UIElement like Button, TextBox etc. In other words, A Content is an arbitrary element that might be placed inside a container. Lets take a look at them one by one :

  1. ContentControl  : A ContentControl holds a single child Content. As Window is derived from ContentControl, every window can have only a single Child. For  Example  : Window, Button etc.
  2. HeaderedContentControl : It is basically the same as ContentControl, but additionally there is a header part which shows the Header for the Content. For instance, A GroupBox, Expander are HeaderedContentControl.
  3. ItemsControl : The content of ItemsControl is multiple. Therefore you can place many arbitrary elements inside an ItemsControl. For Instance : ListBox, ListView are examples of ItemsControl.
  4. HeaderedItemsControl : Here each Collection has a specific header content of it. A HeaderedItemsControl is a complex element which holds each content with a specific header. TreeView is an example of HeaderedItemsControl.


The above picture shows the distinction between different ContentControls. Each contentControl contains a Content property which stores the inner content. in your XAML you can specify using Content attribute, or you can directly write the Content inside the Tag. Thus,

<Button Content="This is a Button" />

is same as

<Button>This is a Button</Button>

XAML parser parses the element written inside the XAML ContentControl Tag as Content.

Alignment-Margin-Padding

Alignment, Margin and padding are the 3 most important properties that you should always consider for every UIElement. Before going further with the containers, you need to know about them.

Alignment : Alignment determines how the child elements will be placed within the allocated space of the Parent Element. In other words it determines the position on the space it was provided. There are two types of Alignment,

  1. HorizontalAlignment  :It has 4 possible values Left, Right, Center and Stretch. Stretch is the Default value of any HorizontalAlignment.
  2. VerticalAlignment : It has 4 possible Values Top, Center, Bottom and Stretch. Stretch is the default valueof any VerticalAlignment.

Margin : It determines the distance between one control to the boundary of the cell where it is placed. It can be uniform when specified as a integer value, or you can use TypeConverter to specify the value of all its sides. For instance :
Margin = “20” means Left=20, Top=20, Right=20 and Bottom=20. You can also specify as
Margin=”20,10,0,10″ which means Left =20, Top=10, Right=0, and Bottom=10.

<Button Margin="0,10,0,10">Button 1</Button>
<Button Margin="0,10,0,10">Button 2</Button>
<Button Margin="0,10,0,10">Button 3</Button>

Padding: Padding is present in few of the controls that helps in enlarging the size of the control by its value. So it is almost similar, but Margin places space outside the boundary of the control whereas padding places it inside the boundary of the control.

<Button Padding="0,10,0,10">Button 1</Button>
<Button Padding="0,10,0,10">Button 2</Button>
<Button Padding="0,10,0,10">Button 3</Button>

Each of the Margin and padding takes an object of Thickness.

Button bb = new Button();
bb.Margin = new Thickness(20);
bb.Padding = new Thickness(10, 20, 30, 10);
this.MyGrid.Children.Add(bb);

Layout Containers

Another important part of any WPF application is to define the Layout of the screen. WPF introduces a number of Panels each are derived from abstract class Panel. You can also Derive Panel to define your custom Panel if you wish. We will look into how you can define your own CustomPanel later. Now lets discuss about all the basic Panels supported by WPF.

PANEL

Panel is the abstract class from which each and every panel is derived from. So each layout element that we will talk about is derived from the Panel class and has few properties which I should discuss before talking about Concrete objects.

  1. Z-Index : It determines the index of the UIElement which overlapped with another element. ZIndex is an Attached property which determines the index in layered elements. One with higher Zindex will show above the other.
  2. InternalChildren : This is the basic UIElementCollection element which is exposed using Children property. When defining your custom Panel you can use it to get the elements.
  3. Background : This is also present for any panel element, which specifies the Background Color for the Panel.

Custom Panel

To create a custom Panel yourself, you need to override two methods :

MeasureOverride : This method is called whenever an element is added on the Panel. It takes the availableSize as input and returns the DesiredSize for the element passed. You need to calculate the Size so that it could be placed accordingly in desired size.

ArrangeOverride : This method is called to determine the arrangement of the Element. It will be called once for the whole panel, when Layout is created and the final desired size for the panel is returned from it. It will again be called when Layout is Updated.

You can try the MSDN Sample for more details of creating Custom Panel :
http://go.microsoft.com/fwlink/?LinkID=159979

GRID

Grid is the most basic layout panel which forms a graph in the whole frame. Grid forms a Table which you can address using Row and Column. You can specify the RowDefination and ColumnDefination for Rows and columns of the Grid. You can specify the height of a Row and Width of a Column easily using RowDefinations and ColumnDefinations.

Sizing of Rows and Columns :

As I already said, Height and Width  of each Cell in a Grid can be specified using RowDefinations and ColumnDefinations, the sizing can be specified in more than one way. The Sizing can be :

  • Auto : This is the default Sizing which is determined by the element you place within the Control.
  • * (Star) : When you use star it means the measurement will be done using ratio. 2* means double of 1*. So if you want to make two columns in 2:1 ratio you mention the width as 2* and 1*.
  • Absolute : You can also specify the absolute value of the height and width. Means if you specify 100 as height it will take it accordingly.

From my own experience, it is better practice to use MinHeight and MaxWidth instead of Width and Height when you want your layout to be strict and doesnt depend on the child elements.

In the sample application, I have created a Grid with 3X3 matrix. You can use TextBoxes specified on the top to position the Box in Row and Columns Dynamically.

<Grid Grid.Row="1">
            <Grid.RowDefinitions>
                <RowDefinition />
                <RowDefinition />
                <RowDefinition />
            </Grid.RowDefinitions>
            <Grid.ColumnDefinitions>
                <ColumnDefinition/>
                <ColumnDefinition/>
                <ColumnDefinition/>
            </Grid.ColumnDefinitions>
            <Border Background="BurlyWood" x:Name="brdElement">
                <TextBlock x:Name="tbElement" Text="Row 0, Column 0" HorizontalAlignment="Center" VerticalAlignment="Center"/>
            </Border>
        </Grid>

This will place the Border in 0,0 column of the 3X3 Table.

STACKPANEL

The very next control that I must start with is a StackPanel. StackPanel is a container where all the child elements are placed in stacks, that means one after another, so that no one overlaps on one another.

Stackpanel places controls based on PositiveInfinity, which means the size that it can take in positive direction. The main property of StackPanel is its Orientation. There are two Orientation supported.

Vertical : This is the default orientation for StackPanel where the child items are places vertically one after another from top to bottom.

Horizontal : Here the items are placed from left to Right one after another.

      <StackPanel x:Name="spMain" Orientation="Horizontal">
            <Border Background="Brown" Padding="50"></Border>
            <Border Background="Green" Padding="50" />
        </StackPanel>


WRAPPANEL

WrapPanel is almost similar to StackPanel, but it produces a newLine when it reaches the edge of the panel. Thus WrapPanel has additional flexibility to wrap elements when space matters. Another difference is, WrapPanel always determines the size based on the size of the content rather than PositiveInfinity as of StackPanel.

So if you resized the window, the content will be automatically wrapped to the new line. WrapPanel also exposes Orientation Property as StackPanel.

<WrapPanel x:Name="wpMain" Grid.Row="1">
            <Border Background="Brown" Padding="30"/>
            <Border Background="Green" Padding="30" />
            <Border Background="Brown" Padding="30" />
            <Border Background="Green" Padding="30" />
</WrapPanel>


DOCKPANEL

DockPanel is the most widely used control to determine the layout of an application. It uses DockPanel.Dock attached property to determine the position of the element. The Dock element when Top or Bottom, will make the element appear Top or Bottom of each other, and when its Left and right it is left and right of each other.

In case of DockPanel, if the height and width of the element placed within it is not specified, it takes the size of the area it is provided with.

<DockPanel>
            <Border Background="Aqua" DockPanel.Dock="Top">
                <TextBlock Text="Dock:Top" />
            </Border>
            <Border Background="Red" DockPanel.Dock="Bottom">
                <TextBlock Text="Dock:Bottom" />
            </Border>
            <Border Background="Orange" DockPanel.Dock="Left">
                <TextBlock HorizontalAlignment="Center" VerticalAlignment="Center" Text="Dock:Left" />
            </Border>
            <Border Background="Blue" DockPanel.Dock="Left">
                <TextBlock HorizontalAlignment="Center" VerticalAlignment="Center" Text="Dock:Left" />
            </Border>
            <Border Background="Aqua" DockPanel.Dock="Bottom">
                <TextBlock Text="Dock:Top" />
            </Border>
            <Border Background="Aquamarine" DockPanel.Dock="Top">
                <TextBlock Text="Dock:Top" />
            </Border>
            <Border Background="BurlyWood" DockPanel.Dock="Right">
                <TextBlock HorizontalAlignment="Center" VerticalAlignment="Center" Text="Dock:Right" />
            </Border>
            <Border Background="Coral" DockPanel.Dock="Right">
                <TextBlock HorizontalAlignment="Center" VerticalAlignment="Center" Text="Dock:Right" />
            </Border>
            <Border Background="Cornsilk" >
                <TextBlock HorizontalAlignment="Center" VerticalAlignment="Center" Text="Remaining Fill" />
            </Border>
        </DockPanel>

So, you can see you need to explicitly mention Dock property of each individual element to make it appear accordingly. The sequence of declaration is also play a vital role in case of DockPanels. If you mention two elements in a row with DockPanel.Dock=Top, that means the two individual elements will appear as Vertically Oriented StackPanel.

A property called LastChildFill makes the remaining space to be filled with undocked element. You can see in the figure the last element is filled with the entire space left. You can make it false if you dont need it.

If you want to do this with code, you need to use DockPanel.SetDock.

VirtualizingStackPanel

WPF introduces a special type of panel which Virtualize its content when the content is bound to Data elements. The word virtualize means the content will only be produced when the element is visible to the screen. Thus the performance will be improved a lot.

<ListBox x:Name="lstElements" VirtualizingStackPanel.IsVirtualizing="True" VirtualizingStackPanel.VirtualizationMode="Recycling" ItemsSource="{Binding}"/>

Now from code if you write :

private void Window_Loaded(object sender, RoutedEventArgs e)
{
      ObservableCollection<int> obs = new ObservableCollection<int>();
      Random rnd = new Random(1000);
      for (int i = 0; i < 100000; i++)
          obs.Add(rnd.Next());
      this.lstElements.DataContext = obs;
}

This will produce 100000 elements to be added over the ListBox. If you use VirtualizingStackPanel.IsVirtualizing=True, the content will appear instantly, as it doesnt require to produce all the ListBoxItem elements from the first time. The application will hang if you make IsVirtualizing=false as creating 100000 ListboxItem elements takes a lot of time.

VirtualizationMode can be of two types,

  • Standard:  It means the Item will be created when the ScrollViewer is scrolled.
  • Recycling : It means the item will be replaced with Data when ScrollViewer is scrolled.


CANVAS

Canvas is a special Layout panel which position elements with absolute position means using x and y co-ordinates. When used within a Canvas, elements are not restricted to anything. It can be overlapped when the position intersects with other controls. Each element is drawn based on the sequence of its declaration. You can easily use Panel.ZIndex to make this declaration unspecific.

Canvas doesn’t employ any restriction to its elements. So the width and height of individual elements is very necessary to be specified. You can use Canvas.Left, Canvas.Right, Canvas.Top and Canvas.Bottom to specify the co-ordinates. The only thing you need to remember, that Canvas.Left and Canvas.Right is same, but it determines the start point of co-ordinate system from the extreme left or extreme right.


<Canvas>
     <Border Canvas.Top="20" Canvas.Left="25" Background="Bisque" Width="30" Height="25" />
     <Border Canvas.Top="20" Canvas.Right="25" Background="Green" Width="30" Height="25" />
     <Border Canvas.Bottom="20" Canvas.Right="25" Background="Black" Width="30" Height="25" />
     <Border Canvas.Bottom="20" Canvas.Left="25" Background="IndianRed" Width="30" Height="25" />
     <Ellipse Fill="DarkGray" Canvas.Left="100" Canvas.Top="130" Width="100" Height="80"></Ellipse>
     <Ellipse Fill="DarkCyan" Canvas.Left="100" Canvas.Top="80" Width="100" Height="80"></Ellipse>
     <Ellipse Fill="DarkSalmon" Canvas.Left="140" Canvas.Top="100" Width="100" Height="80" />
</Canvas>

Here you can see the Border elements even though placed in the same are, the Canvas properties changes the Co-ordinate system and thus places on the four sides of the window.

The ellipses are Overlapped between one another in the same sequence as it is specified.

UNIFORMGRID

UniformGrid is a special control which adjusts its elements uniformly. If you want your Rows and Columns to be uniform in your grid, you can use UniformGrid instead of Normal Grid declaration.

In case of UniformGrid, the child elements will always be of same size.

<UniformGrid Columns="2" Rows="3">
        <Border Background="Red" />
        <Border Background="Green" />
        <Border Background="Blue" />
        <Border Background="Yellow" />
        <Border Background="DarkGoldenrod" />
        <Border Background="DarkKhaki" />
    </UniformGrid>

So its 3X2 Grid and all elements are placed according to the sequence it is specified.

ScrollViewer

It is often happens that the elements goes outside of the Display area. In that case, ScrollViewer places an Automatic Scrollbars which can be used to view the area outside the bounds. ScrollViewer encapsulates the ScrollBars within it and displays it whenever it is required. As the ScrollViewer implements IScrollInfo is the main scrolling area inside the scrollviewer. ScrollViewer also responds to mouse and keyboard commands.

<ScrollViewer HorizontalScrollBarVisibility="Auto">
            <StackPanel VerticalAlignment="Top" HorizontalAlignment="Left">
                <TextBlock TextWrapping="Wrap" Margin="0,0,0,20">Scrolling is enabled when it is necessary. Resize the window, making it larger and smaller.</TextBlock>
                <Rectangle Fill="Honeydew" Width="500" Height="500"></Rectangle>
            </StackPanel>
        </ScrollViewer>

The CanContentScroll property of a ScrollViewer determines whether the elements would be scrollable or not. HorizontallScrollBarVisibility and VerticalScrollBarVisibility makes the scrollbar appear accordingly. The default behaviour is Auto which means the scrollbar will appear only when it is required.

GroupBox

GroupBox allows to group content with a custom header in it. This is same as GroupBox we know in windows. The Header property takes the text element which is placed as header of the GroupBox. As GroupBox is a ContentControl, it can have only a single element in the body. So you need to use Panels to add children within it.

 <GroupBox Header="This goes to Header" Margin="50">
            <StackPanel>
                <Button Content="First Element"/>
                <Button Content="Second Element" />
            </StackPanel>
        </GroupBox>

Expander

Expander is same as groupbox but has extra facility to expand content. It is also derived form HeaderedContentControl and thus has one single content within it. The IsExpanded property determines if the panel is expanded or not.

ExpandDirection is used to make the content expanded behaviour. It has four Directions, Down, Up, Right and Left. You can use them to change the Expanded direction of the content.

<Expander Header="This goes to Header" Margin="50" IsExpanded="True" ExpandDirection="Down">
            <StackPanel>
                <Button Content="First Element"/>
                <Button Content="Second Element" />
            </StackPanel>
        </Expander>

ViewBox

ViewBox is a special WPF control which stretch or scale the contents of the elements. This comes very handy to allow anchoring of the elements, as in case of ViewBox the controls will never change its position, rather the whole content will be stretched or shrinked.

The Stretch property of ViewBox can have four properties:

  1. Fill : Fills the content and also makes the Aspect Ratio intact.
  2. None: Stretch behaviour will not be set.
  3. UniformToFill: Fills the element uniformly, and changes the Aspect Ratio.
  4. Uniform : Uniformly enlarges the content.

The stretchDirection can be specified as Both, DownOnly and UpOnly.

<Viewbox Stretch="None" StretchDirection="Both" >
        <Grid>
            <TextBox Text="This is a content" FontWeight="Bold" FontSize="30" />
        </Grid>
    </Viewbox>

Popup

Popup is a special control that is used to create floating window over the actual window. Popup is a control that is rendered always on Top of the window. Popup is used to display quick elements whenever it is needed without altering the whole window.

A Popup control can be positioned using properties called PlacementTarget, PlacementRectangle, Placement, HorizontalOffset, VerticalOffset etc. A popup is a window outside the bounds of the existing WPF window, and thus it can be moved outside the whole content area of the XAML. WPF popup control supports few animation likeFade, Scroll, Slide etc which you can apply to it using PopupAnimation property. A WPF Popup supports transparency when AllowsTransparency is set to true.

 <ToggleButton IsChecked="{Binding ElementName=pup, Path=IsOpen}" Content="Open Popup" Margin="100" />
        <Popup Placement="Bottom" AllowsTransparency="True" PopupAnimation="Fade" x:Name="pup" VerticalOffset="-100">
            <StackPanel>
                <TextBlock Name="McTextBlock" Background="Black" Foreground="White" >
                    This is popup text
                </TextBlock>
                <Button Content="This is button on a Pupup" />
            </StackPanel>
        </Popup>

Here the Popup will be displayed when the ToggleButton is clicked as IsChecked is bound to IsOpen of Popup. When IsOpen is true, the popup will be displayed.

InkCanvas

Another most powerful control which is introduced with WPF is InkCanvas. This control allows you to draw over the Canvas and ultimately get the image bytes saved. It is very powerful as you can easily get the strokes drawn over the canvas as Objects.

Just place an InkCanvas on the WPF Window and you will find that you can draw over the screen. The EditingMode gives you few editing mode for the InkCanvas. We will discuss with this control later in another article.


<StackPanel>
        <InkCanvas Height="200" x:Name="icBox">
        </InkCanvas>
        <RadioButton GroupName="mode" Checked="Pen_Checked" Content="Pen"/>
        <RadioButton GroupName="mode" Checked="Erase_Checked"  Content="Eraser By Point" />
        <RadioButton GroupName="mode" Checked="EraseByStroke_Checked"  Content="Eraser By Stroke" />
    </StackPanel>

Transformation

Transformation is one of the important feature that is introduced with WPF. Transformation allows to map element from one co-ordinate space to another co-ordinate space. The transformation is mapped using Transformation Matrix in 2D space. By manipulating the matrix values you can Transform elements to Rotate, Scale, Skew and Translate.

Transformation are of 4 basic types :

  1. RotateTranform : Rotates an element by a specified Angle. You can specify the Angle of Rotation and the element will be rotated in 2D space.
  2. ScaleTransform : ScaleTransform allows you to scale the element means increase/decrease the size of the element in the 2D space.
  3. SkewTransform : It skews the element by specified angle. Skew stretches elements in a NonUniform manner and thus the element will be transformed so as in 3D space.
  4. TranslateTransform : This transformation will make the element move by a specified X and Y Co-Ordinates.

There is also a provision to apply more than one Transformation using TransformGroup or MatrixTransform. TransformGroup allows you to specify more than one Transformation to be applied on the single element and thus gives you a hybrid Transformation for your control.

<TextBlock FontWeight="Bold" FontSize="20" Text="This is Text" Margin="20">
            <TextBlock.RenderTransform>
                <TransformGroup>
                        <RotateTransform Angle="20" />
                        <SkewTransform AngleX="10" AngleY="10" />
                        <TranslateTransform X="15" Y="19"/>
                        <ScaleTransform ScaleX="2" ScaleY="1" />
                </TransformGroup>
            </TextBlock.RenderTransform>
        </TextBlock>


Conclusion

This is the second part of the Series. I hope you like it. Please dont forget to write your feedback. I have skipped few things intentionally (like details of InkCanvas) as it is making the article very long. I will discuss them in separate article.

If you want to read the First part of the article you can go :
WPF Tutorial – A Beginning : 1

Thanks for reading.

WPF Tutorial – A Beginning : 1


Introduction

After working with more than 6 months in WPF, it is time to start writing on the basics of WPF. I have already put a few articles on this topic, which are basically dealing with some specific problems. Now it is time to go beyond that, and to let you understand how / why WPF came to us as a revolution to UI development.

As this is an article for the beginners to intermediate, I will try to give as much basic examples as I can. I will also put few reference link to each articles of the series to make you navigate the other articles easily.

A Beginning(This One)
Layout – Panels & Containers
Borders – Fun with Borders and Effects
TypeConverter & MarkupExtensions to XAML
Dependency Property System
Concept Binding

Windows Presentation Foundation

Windows Presentation Foundation

As the name says all, WPF is actually a new framework introduced with .NET framework 3.0 which actually puts forward a new set of classes and assemblies which allows us to write programs more efficiently and flexibly. It uses Direct3D rendering which employs graphics cards to render the output on the screen. Thus the drawing in the form will be smooth and also there is a chance to utilize the hardware capabilities installed in your machine. In case of traditional GDI forms application, it is not possible to use advanced graphics capabilities and hence Windows Forms application will always be inefficient in comparison to WPF. Another important thing that I must address in this regard, GDI Windows forms application uses Operating system controls to build its application. Thus it is basically very hard to customize them in your own application. WPF controls are actually drawn over the screen, and hence you can customize controls totally and modify its behavior when required.

Features of WPF

WPF comes with lots of advantages. Let me introduce you a few of its features :

Device Independent Pixel (DPI) :

WPF introduces Device Independent DPI Settings for the applications built with it. For a window, it is very important to calculate how much Dots Per inch(DPI) the screen could draw. This is generally dependent on the hardware device and operating system in which the application runs and also how the DPI settings is applied on the Device. Any user can easily customize these settings and hence make the application look horrible. Windows forms application uses pixel based approach so with changing DPI settings, each control will change its size and look.

WPF addresses this issue and makes it independent of DPI settings of the computer. Lets look how its possible :
DPI Calculation
Let say you have drawn a box, just like one in the figure, which is 1 inch long in 96 dpi screen. Now if you see the same application in 120 dpi settings the box will appear smaller. This is because the things that we see on the screen are totally dependent on dpi settings.

In case of WPF, this is modified to density based approach. That means when the density of pixel is modified, the elements will adjust them accordingly and hence the pixel of WPF application is Device Independent Pixel. As you can see in the figure, the size of the control remains same in case of WPF application and it takes more pixel in case of 120 DPI application to adjust the size properly.

Built-In Support for Graphics and Animation :

WPF applications as being rendered within DirectX environment, it has major support of graphics and animation capabilities. A separate sets of classes are there which specifically deals with animation effects and graphics. The graphics that you draw over the screen is also Vector based and are object oriented. That means, when you draw a rectangle in WPF application, you can easily remove that from the screen as rectangle is actually an object which you always have hold on. On traditional Windows based application, once you draw a rectangle, you cant select that individually. Thus programming approach in case of WPF is completely different and more sophisticated than traditional graphics approach. We will discuss graphics and animation in more detail in later section of the article.

Redefine Styles and Control Templates :

In addition to graphics and animation capabilities, WPF also comes with a huge flexibility to define the styles and ControlTemplates. Style based technique as you might come across with CSS are a set of definitions which defines how the controls will look like when it is rendered on the screen. In case of traditional windows applications, styles are tightly coupled with each controls, so that you need to define color, style etc for each individual control to make it look differently. In case of WPF, Styles are completely separated from the UIElement. Once you define a style, you can change the look and feel of any control by just putting the style on the element.

Most of the UIElements that we generally deal with is actually made using more than one individual elements. WPF introduces a new concept of Templates, which you might use to redefine the whole control itself. Say for instance, you have a CheckBox, which has a Rectangle in it and a ContentPresenter (one where the caption of the TextBox appears). Thus you can redefine your checkbox and put a ToggleButton inside it, so that the check will appear on the ToggleButton rather than on the Rectangle. This is very interesting. We will look into more detail on Styles and ControlTemplates in later section of the article.

Resource based Approach for every control:

Another important feature of WPF is Resource based approach. In case of traditional windows applications, defining styles is very hectic. So if you have 1000 buttons, and you want to apply Color to each Buttons to Gold, you need to create 1000 objects of Color and assign each to one individual elements. Thus it makes it very resource hungry.
In WPF, you can store styles, controls, animations, and even any object as resource. Thus each resource will be declared once when the form loads itself, and you may associate them to the controls. You can maintain a full hierarchy of styles in separate file called ResourceDictionary, from which styles for the whole application will be applied. Thus WPF application could be themed very easily.

New Property System & Binding Capabilities:

On the next step, I must introduce the new property system introduced with WPF. Every element of WPF defines a large number of dependency properties. The dependency properties have strong capabilities than the normal properties. Thus when I define our new property, we can easily register my own property to any object I wish to. It will add up to the same observer that is associated to every object. As every element is derived from DependencyObject in its object hierarchy, each of them contains the Dependency Observer. Once you register a variable as Dependency property, it will create a room on the observer associated with that control and set the value there. We will discuss in more detail in later sections of the series.

What is XAML ?

According to definition, XAML is an XML based markup language for specifying and setting the characteristics of classes. In other words, XAML is a language used by WPF, silverlight or any other application which can declare classes by itself. So, you can declare a variable, define the properties of any class and directly use it in your application. The XAML parser will automatically parse and create the actual object while it renders the application.
XAML is generally used to define layout of UI, its elements and objects for static and visual aspect. We cannot define flow of a program using XAML. So even though there is large capabilities of XAML, it is actually not a programming language, rather it is used to design UI of the application. Thus XAML employs other programming languages like C#, VB.NET etc to define the logic in code behind.

ExpressionBuilder is the best tool to generate XAML.

WPF Architecture

For every new technology, it is very essential to have clear idea about its architecture. So before beginning your application you must grab a few concepts. If you dont like to know WPF in detail, please skip this section. As mentioned earlier, WPF is actually a set of assemblies that build up the entire framework. These assemblies can be categorized as

Managed Layer
UnManaged Layer
Core API

Managed Layer : Managed layer of WPF is built using a number of assemblies. These assemblies build up the WPF framework, communicates with lower level unmanaged API to render its content. The few assemblies that comprise the WPF framework are :

PresentationFramework.dll : Creates the top level elements like layout panels, controls, windows, styles etc.
PresentationCore.dll : It holds base types such as UIElement, Visual from which all shapes and controls are Derived in PresentationFramework.dll.
WindowsBase.dll : They hold even more basic elements which are capable to be used outside the WPF environment like Dispatcher object, Dependency Objects. I will discuss each of them later.

Unmanaged Layer (milcore.dll): The unmanaged layer of WPF is called milcore or Media Integration Library Core. It basically translates the WPF higher level objects like layout panels, buttons, animation etc into textures that Direct3D expects. It is the main rendering engine of WPF.

WindowsCodecs.dll : This is another low level API which is used for imaging support in WPF applications. WindowsCodecs.dll comprises of a number of codecs which encodes / decodes images into vector graphics that would be rendered into WPF screen.

Direct3D : It is the low level API in which the graphics of WPF is rendered.

User32 : It is the primary core api which every program uses. It actually manages memory and process separation.

GDI & Device Drivers : GDI and Device Drivers are specific to the operating system which is also used from the application to access low level APIs.

WPF architecture

In the above figure, you can see how different framework elements communicates between one another that I have just discussed.

Few things to Know before you proceed :

There are quite a few things that you must know before starting with WPF applications.

What is meant by Dispatcher & Thread Affinity?

When WPF application starts, it actually creates two threads automatically. One is Rendering Thread, which is hidden from the programmer, so you cannot use the rendering thread directly from your program; while the other is Dispatcher Thread, which actually holds all the UI elements. So in other words, you might say Dispatcher is actually the UI thread which ties all the elements created within the WPF application. Conversely, WPF requires all the UI elements to be tied with Dispatcher thread, this is called Thread Affinity. Thus you cannot change any element created on Dispatcher thread from any other threads, thus it follows the same Win32 based API’s. Thus it allows you to inter-operate any WPF component into HWND based API.

Dispatcher is a class that handles thread affinity. It is actually a prioritized message loop through which all elements are channeled through. Every UIElement is derived from DispatcherObject which defines a property called Dispatcher which points to the UI thread. Thus from any other thread, if you want to invoke or access UI component, you need to Invoke using Dispatcher thread. DispatcherObject actually has two chief duties, to check and verify if the thread has access to the object.

What is Visual Tree and Logical Tree?

Every programming style contains some sort of LogicalTree which comprises the Overall Program. The LogicalTree comprises the elements as they are listed in XAML. Thus they will only include the controls that you have declared in you XAML.

VisualTree on the other hand, comprises the parts that make up the individual controls. You do not generally need to deal with VisualTree directly, but you should know how each control is comprises of, so it would be easier to build custom templates using this.

Logical & Visual Tree

I personally always like to see the VisualTree before using it. ExpressionBuilder is the one tool that allows you to generate the actual control.

Why RoutedEvent ?

RoutedEvent is very new to C# language, but those who are coming from javascript/web tech, you would have found it in your browser. Actually there are two types of RoutedEvent. One which Bubbles through the Visual tree elements and other which Tunnels through the visual tree elements. There is also Direct RoutedEvent which does not Bubble or Tunnel.

When a Routed event which is registered, is invoked, it Bubbles / Tunnels through the Visual Elements and calls all the Registered RoutedEventHandlers associated within the Visual Tree one by one.

To discriminate between the two, WPF demarcated events with Preview*** as the events which are Tunneled and just *** for the events that Bubbles. For instance IsPreviewMouseDown is the event that tunnels through the Visual Child elements while MouseDown Bubbles. Thus Mouse Down of the Outermost element is called first in case of IsPreviewMouseDown while Mouse Down for the innermost element will be called first in case of MouseDown event.

Why DependencyObject is Used ?

Every WPF control is derived from DependaecyObject. DependencyObject is a class that supports DependencyProperty, a property system that is newly built in WPF. Every object is derived from DependencyObject and hence it can associate itself in various inbuilt features of WPF like EventTriggers, PropertyBindings, Animations etc.

Every DependencyObject actually has an Observer or a List and declares 3 methods called ClearValue, SetValue and GetValue which are used to add/edit/remove those properties. Thus the DependencyProperty will only create itself when you use SetValue to store something. Thus it is resource saving as well. We will look DependencyProperty in detail on other articles of the Series.

What about Hardware Acceleration and Graphics Rendering Tiers in WPF ?

Another important thing that you should know is how the WPF graphics is rendered. Actually WPF rendering automatically detects how much hardware acceleration is supported by the current system and adjusts itself accordingly. The graphics rendering detects the appropriate tier for rendering the output accordingly.

For hardware Rendering few things that has most of the impact are :

Video RAM : This determines the size and number of buffers that the application might use to render its output.
Pixel Shader : It is a graphics utility which calculates effects on per pixel basis.
Vertex Shader : It is a graphics processing utility that performs mathematical calculations on Vertex of the output. They are used to add special effects to objects in 3D environment.
MultiTexture Blending : This is a special function that allows you to apply two or more textures on the same object in 3D.

Now the rendering engine of WPF determines which tier is appropriate for the current application and apply the rendering tiers accordingly.

TIER 0 : No graphics hardware acceleration takes place, rather everything is rendered using Software. Any version of DirectX 9 or less is capable of rendering this output.
TIER 1 : Partial hardware and software rendering. You might use Directx9 or greater to use this tier.
TIER 2 : Full hardware acceleration. Directx9 or above can render this output.

To know more about it, refer here.

Object Hierarchy

Object Hierarchy
There are quite a few objects in any control of WPF. Lets discuss one by one as in figure. (The abstract class is marked in ellipse while concrete class in Rectangles) :

DispatcherObject : Mother of all WPF controls which takes care of UI thread.
DependencyObject : Builds the Observer for Dependency Properties.
Visual : Links between managed libraries and milcore.
UIElement : Adds supports for WPF features like layout, input, events etc.
FrameworkElement : Implementation of UIElement
Shape : Base class of all the Basic Shapes
Control : The UI elements that interact with the user. They can be Templated to change look.
ContentControl : Baseclass of all controls that has single content.
ItemsControl : Baseclass for all controls that shows a collection.
Panel : Baseclass of all panels which shows one or more controls within it.

Building Your First WPF Application

Sample Application
Now the time has come to build your first WPF Application. To do this, let open Visual Studio 2008 / 2010. For this example I used Visual Studio 2008. Create a new Project. You will see a new window. The XAML will look like :


Here the blank window is produced. Height / Width represents the Size of the Window. Title determines the text which is displayed in the TitleBar of the window.
Every control in XAML could be named with x:Name attribute. This will be used to reference the Window object in your XAML. x:Class attribute represents the class which should be associated with current Window. As I already told you, that XAML is not self sufficient, so to define logic you need a class in C# or VB.NET.

Grid is the primary layout for WPF application. Grid can take multiple Child elements. So let us put some controls into the grid.

You can see I have defined RowDefination and ColumnDefination. This allows you to divide the grid into cells so that you can place your control exactly where you want to. For each RowDefination and ColumnDefination you can use Height and Width of it. You can see I have used 50, Auto, and * as width. Auto represents the size which we would define for the control during control definition. * indicates the rest of the space which it can take. Thus you can see the button is spread the rest of the area of the column it finds.

Now in the Behind I put a Messagebox to show the content of TextBox.

private void Button_Click(object sender, RoutedEventArgs e)
{
MessageBox.Show(string.Format(“Hi {0}”, this.txtName.Text));
}

Therefore you can see your name will be prompted to you. Isnt it funny. 🙂

If you have noticed the XAML minutely, you might think how can I define the property of Grid within other controls. Like as I defined Grid.Row=0 in each of the control. This is actually possible due to the use of Dependency properties. Its a new feature introduced with WPF. We will discuss in detail later on.

Conclusion

This is the first part of the series of WPF. This comprises the initial discussion of the WPF application. In the next articles I would delve more into other aspects of WPF programs and how you can work with WPF controls and guide you to build a solution. Hope you like reading this post.

Also I would like you to criticize me, if I made anything wrong, so that I could update my knowledge-base accordingly.

Thank you.

Chapter 4: Introduction to Controls


In this Chapter, I will describe you about some of the most common controls used in Silverlight. After the end of this section, you will be able to understand about those basic controls and their uses. Here I will guide you to understand some of the properties of each control and how to set them from both XAML & Code behind C# file.

To read Silverlight tutorials from begining, click here or you can also read below tutorials.

Introduction to Silverlight
Introduction to Silverlight Application Development
Introduction to Panels

Overview

Silverlight 4 provides a large collection of UI controls for Silverlight application development. These controls are require to do the UI design of the application for giving a better representation to the user. You can customize the look & feel by creating your own Style or extending the control to give more power to the UI. I will describe the control styling in later chapters.

Here is some of the Silverlight 4 controls that I want to describe for you:

  1. TextBlock
  2. TextBox
  3. PasswordBox
  4. RichTextBox
  5. ComboBox
  6. ListBox
  7. CheckBox
  8. RadioButton
  9. Button

TextBlock

TextBlock is the primary element for displaying text inside your Silverlight Application. You will find it useful whenever you want to display some strings. TextBlock is a FrameworkElement available in the System.Windows.Controls namespace. There is a property named “Text” where you have to enter the text string.

<TextBlock Text=”Hello Silverlight” />

This is not necessary for you to use the Text property to set some text inside your TextBlock control. TextBlock control can also be used as a container to set a para of strings. Hard enter to place a line break can be set using the <LineBreak/> control.

<TextBlock>

<TextBlock.Text>

This is the first line of Text.

<LineBreak/>

This is the second line of Text.

</TextBlock.Text>

</TextBlock>


OR


<TextBlock>

This is the first line of Text.

<LineBreak/>

This is the second line of Text.

</TextBlock>
Also, you can represent a series of strings contained inside different Run elements instead of presenting as a single string. In that scenario, each Run element can have different font attributes set towards it. The LineBreak element will represent an explicit new line break

<TextBlock>

<LineBreak/>

<Run Foreground=”Maroon”FontFamily=”Arial”FontSize=”30″

FontWeight=”Bold”>Arial Bold 30</Run>

<LineBreak/>

<Run Foreground=”Teal”FontFamily=”Times New Roman”FontSize=”18″

FontStyle=”Italic”>Times New Roman Italic 18</Run>

<LineBreak/>

<Run Foreground=”SteelBlue”FontFamily=”Verdana”FontSize=”14″

FontWeight=”Bold”>Verdana Bold 14</Run>

</TextBlock>

TextBlock

You will see various Properties and Events available for TextBlock control to do text formatting and other operation.

TextBlock Properties

TextBox

TextBox is another important element in Silverlight. It is also available inside the System.Windows.Controls. Unlike TextBlock, the TextBox inherits from the base class Control. Whenever you want to enter some text inputs from your user using your Silverlight application, you need the help of TextBox. It is one of the most important input control for Silverlight for data entry.

<TextBox Height=”25″ Width=”200″ Text=”This is a Single Line TextBox”/>

<TextBox Height=”100″ Width=”200″

HorizontalScrollBarVisibility=”Disabled”

VerticalScrollBarVisibility=”Auto”

TextWrapping=”Wrap”

Text=”This is a Multi-Line TextBox. This is a Multi-Line TextBox.”/>


publicstaticreadonlyDependencyProperty AcceptsReturnProperty;

Set “AcceptsReturn” to True if you want to insert a Hard line break explicitly in your TextBox by your user. From code behind if you want to set the value to AcceptsReturnProperty of the TextBox, you have to call the SetValue() and then pass the DependencyProperty with the appropriate value:

myTextBox.SetValue(TextBox.AcceptsReturnProperty, true);

myTextBox.SetValue(TextBox.AcceptsReturnProperty, false);

From XAML, you can set it as:

<TextBox AcceptsReturn=”True”/>


publicstaticreadonlyDependencyProperty IsReadOnlyProperty;


Set “IsReadOnly” to True if you want your TextBox as only readable by your user. This is very useful when you are putting a Edit Button near your TextBox to give the user chose whether he wants to update some texts.

To set it from the code behind use the same format of the SetValue() method. Here’s the code:

myTextBox.SetValue(TextBox.IsReadOnlyProperty, true);


publicstaticreadonlyDependencyProperty MaxLengthProperty;

Set “MaxLength” to a positive numeric value , your user can’t add more than the specified value. Suppose you are setting it to 50, hence after inserting 50 characters the TextBox caret will not go forward.

You can set the Max Length property from code behind C# like this:

myTextBox.SetValue(TextBox.MaxLengthProperty, 150);

publicstaticreadonlyDependencyProperty SelectionBackgroundProperty;

“SelectionBackground” color once set, your selected text will have the specified background. You can set both Solid Brush or Gradient Brush as your selection background. If you want to set it from code behind, use the following convention:

myTextBox.SetValue(TextBox.SelectionBackgroundProperty, newSolidColorBrush(Colors.Black));


publicstaticreadonlyDependencyProperty SelectionForegroundProperty;


Like “SelectionBackground” the “SelectionForeground” will set the specified color as the foreground color of the selected text. The property SelectionForeground property can also be set in the same way. In this case, it will change the color of the font for the selected text. Have a look:

myTextBox.SetValue(TextBox.SelectionForegroundProperty, newSolidColorBrush(Colors.Black));


publicstaticreadonlyDependencyProperty TextAlignmentProperty

“TextAlignment” is responsible to set the text alignment to left, right, center or justify.

publicstaticreadonly DependencyPropertyTextProperty;

“Text” property contains the Text entered into the TextBox. You can set it in the same way from XAML & Code as I mentioned above.

publicstaticreadonlyDependencyProperty TextWrappingProperty;

Set “TextWrapping” to Wrap so that, if your entered text becomes longer than the specified width of the TextBox, it will populate the remaining text in a separate line (as described in the MultiLineTextBox figure).

PasswordBox

PasswordBox is available inside the System.Windows.Controls and inherits from Control. Whenever you need to add a Password field in your Silverlight application form to give the user access to login with credential, you have to use this password box. You will find it useful when you need to do login.

<PasswordBox Width=”200″ Height=”25″Password=”kunal2383″ />

<PasswordBox Width=”200″ Height=”25″ Password=”kunal2383″PasswordChar=”X” />

Here are some useful DependencyProperty of the PasswordBox:

publicstaticreadonlyDependencyProperty MaxLengthProperty;

Set “MaxLength” to a positive numeric value , your user can’t add more than the specified value. Suppose you are setting it to 50, hence after inserting 50 characters the TextBox caret will not go forward.

publicstaticreadonly Dependency PropertyPasswordCharProperty;

Sets the password character of the control. The default value for password character of the field box is the asterisk (*). But you can change it by setting the value to this dependency property. If you set ‘X ‘ as password character, whatever you enter in the textbox of the field will display as ‘X’.

publicstaticreadonly DependencyPropertyPasswordProperty;

Gets or Sets the password property of the PasswordBox. If you set the text it will be visible in the UI in asterisk format.

publicstaticreadonly DependencyPropertySelectionBackgroundProperty;

“SelectionBackground” color once set, your selected text will have the specified background.

publicstaticreadonly DependencyPropertySelectionForegroundProperty;

Like “SelectionBackground” the “SelectionForeground” will set the specified color as the foreground color of the selected text.

RichTextBox

Like TextBoxRichTextBox also inherits from Control and available in the namespace System.Windows.Controls. It is useful when you want to give a input box to your user where they can able to format the entered text like word processor. You can display text in various text format like Bold, Italic, Underline, Left/Right/Center align, various font size/color etc.

Have a look into the following XAML code where the RichTextBox has several <Paragraph> tag to split the text in various parts. You can use <Bold>,<Italic> tags to format the entered text. You can also align the text or change the font-size or font-color by setting the proper attributes to the <Paragraph> tag.

<RichTextBox Height=”153″Width=”336″AcceptsReturn=”True”>

<Paragraph>

This is a RichTextBox control having multiple paragraphs inside it.

You will find it more useful while creating an Editor control in Silvelight application.

<LineBreak />

</Paragraph>

<Paragraph>

<Bold>This Text is in Bold</Bold>

<LineBreak />

<Italic>This Text is in Italic</Italic>

</Paragraph>

<ParagraphTextAlignment=”Right”>

This Text is Right aligned.

<LineBreak />

</Paragraph>

<ParagraphTextAlignment=”Center”>

<Hyperlink>This is an Hyperlink Button and center aligned</Hyperlink>

</Paragraph>

</RichTextBox>

Here is the output of the above XAML code:

You can see here that, not only formatted text you can also enter hyperlinks to the RichTextBox control. If you set the AcceptsReturn=”True” your user can explicitly enter hard line break by pressing the “Enter” key.

ComboBox

ComboBox is an items control which works like a ListBox but only one item is visible at a time. It inherits from Selector control and available in the System.Windows.Controls namespace. It contains ComboBoxItem which inherits from ListBoxItem. ComboBoxItem is also present in the same namespace as ComboBox is i.e. System.Windows.Controls namespace.

Let us create a simple ComboBox having some contents inside it. Set the Width of the ComboBox to a specific value, let’s say 200 in our case. Now add ComboBoxItem as the Items of the Combo. This step is not always require (in case of XAML atleast). Set some string as the “Content” of the ComboBoxItem. Here you may ask one question, is it only supports text? The answer is “No”. You can also set any FrameworkElement inside the Content of the ComboBoxItem, such as TextBlock, TextBox, Button, Rectangle etc.

Have a look into the XAML code here:

<ComboBox Width=”200″>

<ComboBox.Items>

<ComboBoxItem Content=”Item 01″/>

<ComboBoxItem Content=”Item 02″/>

<ComboBoxItem Content=”Item 03″/>

<ComboBoxItem Content=”Item 04″/>

<ComboBoxItem Content=”Item 05″/>

<ComboBoxItem Content=”Item 06″/>

<ComboBoxItem Content=”Item 07″/>

<ComboBoxItem Content=”Item 08″/>

<ComboBoxItem Content=”Item 09″/>

<ComboBoxItem Content=”Item 10″/>

</ComboBox.Items>

</ComboBox>

The output of the above XAML will initially look like the below figure:

Now once you click on the small arrow at the right side of the ComboBox, you will see a menu comes out from it containing the content you added there:

Here are some properties those you will find useful while working with the ComboBox:

IsDropDownOpen:

Once set to True the drop down will show with the content. By using this property you can programmatically control the visibility of the dropped menu. By default it is set to False and when you click on the small arrow it sets it to True and thus it opens up in the screen.

IsEditable:

From the name you can easily understand the functionality of this property. By default it is set as False. Hence, in the normal scenario you can’t type anything inside the ComboBox. If you want to edit the content of the ComboBox or want to type inside it, just set the value to True.

MaxDropDownHeight:

You can control the size of the drop down menu. If you set it to some numeric value, the height will be set as per the entered value.

ListBox

ListBox inherited from Selector present inside the System.Windows.Controls namespace. It contains ListBoxItem as Items. It represents it’s children as list. The followings are the DependencyProperties of ListBox:

publicstaticreadonlyDependencyProperty IsSelectionActiveProperty;

publicstaticreadonlyDependencyProperty ItemContainerStyleProperty;

publicstaticreadonlyDependencyProperty SelectionModeProperty;

Some important properties are described below:

SelectionMode:

Gets or Sets the Selection Behaviour of ListBox control. There are three different modes of the Selection of the ListBoxItem: Single, where user can select only one ListBoxItem at a time; Multiple, where user can select multiple items without pressing a Modifier Key; Extended, where user can select multiple items by pressing a Modifier Key. The default mode is “Single”.

<ListBox Width=”200″SelectionMode=”Multiple” Height=”200″>

<ListBox.Items>

<ListBoxItem Content=”Item 01″/>

<ListBoxItem Content=”Item 02″/>

<ListBoxItem Content=”Item 03″/>

<ListBoxItem Content=”Item 04″/>

<ListBoxItem Content=”Item 05″/>

<ListBoxItem Content=”Item 06″/>

<ListBoxItem Content=”Item 07″/>

<ListBoxItem Content=”Item 08″/>

<ListBoxItem Content=”Item 09″/>

<ListBoxItem Content=”Item 10″/>

</ListBox.Items>

</ListBox>

The above example shows you how the ListBox looks like in different SelectionMode. The first example demonstrates “Multiple Selection Mode”. This type of listbox you need to give your user a choice to select multiple items. In the second example shows a simple “Single Selection Mode”, where the user can only select a single choice.

CheckBox

Checkbox inherits from ToggleButton and resides inside System.Windows.Controls namespace. Using this you can give your user a choice to select multiple items. There are three different states for CheckBox. If checked will return true, unchecked will return false and the third state returns null value. Generally the third state is not that much useful in normal scenarios. Use “Content” to set value (e.g. string, rectangle etc) to the checkbox.
Have a look into the following example:

<CheckBoxIsChecked=”True”Content=”Set as Checked (True)” />

<CheckBoxIsChecked=”False”Content=”Set as UnChecked (False)” />

<CheckBoxIsThreeState=”True”IsChecked=”{x:Null}”Content=”Set as Third State (Null)” />

<CheckBoxIsEnabled=”False”IsChecked=”True”Content=”Set as Checked, but disabled” />

<CheckBox>

<CheckBox.Content>

<Grid>

<EllipseHorizontalAlignment=”Stretch” Fill=”Red” />

<TextBlock Text=”Multi Element as Checkbox Content” />

</Grid>

</CheckBox.Content>

</CheckBox>

The first code demonstrates the Checked item, the second code demonstrates unchecked item and third code demonstrates the third state. Third states becomes null. In the fourth code you will see the disabled state of the checkbox. What about the fifth code? Yup, in the fifth code we have added a Ellipse and a TextBlock wrapped with a Grid panel. It is not always necessary to set string as content. As per your requirement you can set anything. But be sure that CheckBox.Content only supports a single element and if you want to set multiple elements wrap with a panel as I demonstrated above.

RadioButton

Like CheckBox the element name RadioButton placed inside System.Windows.Controls assembly namespace also inherits from ToggleButton and contains the same properties as described above in CheckBox examples.

<RadioButtonIsChecked=”True” Content=”Set as Checked (True)” />

<RadioButtonIsChecked=”False” Content=”Set as UnChecked (False)” />

<RadioButton>

<RadioButton.Content>

<Grid>

<EllipseHorizontalAlignment=”Stretch” Fill=”Red” />

<TextBlock Text=”Multi Element as RadioButton Content” />

</Grid>

</RadioButton.Content>

</RadioButton>

<RadioButtonGroupName=”MyGroup” Content=”Set under MyGroup”IsChecked=”True” />

<RadioButtonGroupName=”MyGroup” Content=”Set under MyGroup” />

Normally if you are setting multiple radio buttons inside a page, you can select only one of them. If you need your user to select radio button from each different group of your option you can set a group name to the radio button. By grouping the options using a group name will allow your user to select a single radio option from each group.

Button

Button control in Silverlight inherits from ButtonBase class and can be found under the System.Windows.Controls namespace. Button controls are mainly require to Submit forms or for navigation panels. You can style it as per your need.

You can set some text as it’s content or can place any framework element inside it. If you want to add more than one element inside it, you have to use any panel wrapped to your elements.
See the below code on how we can use Button controls:

<StackPanel x:Name=”LayoutRoot” Margin=”20″ Background=”White”>

<Button Content=”I am a button control” Height=”25″ Width=”200″ Margin=”5″ />

<Button Height=”25″ Width=”200″ Margin=”5″>

<Button.Content>

<CheckBox Content=”Checkbox inside Button” />

</Button.Content>

</Button>

<Button Width=”200″>

<Button.Content>

<StackPanel Orientation=”Horizontal”>

<Rectangle Width=”30″ Height=”25″ Fill=”Green” Margin=”0,0,5,0″ />

<TextBlock Text=”Rectangle inside Button” />

</StackPanel>

</Button.Content>

</Button>

</StackPanel>

The first example is a simple button control whereas the second contains checkbox as it’s content. The third example contains a Rectangle and a Text wrapped by Grid panel. This shows how we can use panel to load multiple elements inside a button.

Button has Click event where you can write your logic to do whatever you want once you click on the button e.g. navigation to a different view, submitting the form etc.

Please leave any feedback or suggestions you have about this tutorials. Thanks and keep reading my forthcoming tutorials and articles.

Introduction to Panels – Silverlight tutorial Chapter 3


In this Chapter I will describe about different Panels available in Silverlight. After reading this chapter you will be familiar with various types of Silverlight Panels. As this tutorial is mainly targeted for Silverlight 4, hence you will find some panels unavailable in the earlier versions of Silverlight.

Go to previous chapter – Introduction to Silverlight Application Development

Overview of Panels

There are total six numbers of panels available in Silverlight. They are as below:

  1. Grid
  2. Canvas
  3. StackPanel
  4. ScrollViewer
  5. Border
  6. ViewBox

You will find Grid, Canvas, StackPanel and Border as most useful panel while you start working with them in your Silverlight application. Let us discuss about those in depth.

“Grid” Layout Panel

The Grid layout panel is the most useful panel you ever use. This is the default panel inserted inside every xaml when you create a UserControl. When we created our first Silverlight example or even the first UserControl, you noticed that there was a Grid panel named “LayoutRoot” where we created Rows and Column definitions to place our control to create the Employee View.

The Grid layout control allows you to define the Grid structure to place individual elements as Rows & Column structure in Matrix format. Once you divide your Grid panel in Rows and Columns you can place your element in the appropriate cell by using Grid.Row or Grid.Column property.


See the Grid structure in the below image:
Grid layout panel

Picture: Grid Layout Panel Structure


Now lets discuss about creating rows and columns, then place some rectangles in each cells. We will create three rows and three columns as described in the above image:

1. Create a UserControl named “GridPanelDemo” in our Silverlight Application.

2. Open the GridPanelDemo.xaml file. You will see that there is a Grid named “LayoutRoot” inside your UserControl.

3. Now enter the following XAML code between the Grid tags (<Grid>…</Grid>):

<Grid.RowDefinitions>

<RowDefinition/>

<RowDefinition/>

<RowDefinition/>

</Grid.RowDefinitions>

<Grid.ColumnDefinitions>

<ColumnDefinition/>

<ColumnDefinition/>

<ColumnDefinition/>

</Grid.ColumnDefinitions>

4. This will divide your Grid in three rows and three columns of equal height and equal width.

5. You can also set height for Rows and widths for Columns by specifying the value to the properties like this:

<RowDefinition Height=”100″/>

and

<ColumnDefinition Width=”100″/>

6. You can specify the value for Height & Width in three different ways:

a. Pixel Value (like: “90”, means the height or width of 90 pixel)
b. Percentage Value (like: “5*”, means the height or width of 50% or “*”, means 100%)
c. Automatic Value (like: “Auto”, means the height or width of the Row or Column will resize automatically as  per the size of content of the respective Row or Column.

7. Now we will put some texts using TextBlock and will put them in appropriate cells of the Grid control. You can achieve this by using the Grid.Row=”ROW_NUMBER” and Grid.Column=”COLUMN_NUMBER” as the property of your TextBlock control. Modify your XAML to set this texts like this:

<Grid x:Name=”LayoutRoot” Background=”BlanchedAlmond”>

<Grid.RowDefinitions>

<RowDefinition/>

<RowDefinition/>

<RowDefinition/>

</Grid.RowDefinitions>

<Grid.ColumnDefinitions>

<ColumnDefinition/>

<ColumnDefinition/>

<ColumnDefinition/>

</Grid.ColumnDefinitions>

<TextBlock Text=”Row[0], Col[0]” Grid.Row=”0″ Grid.Column=”0″ />

<TextBlock Text=”Row[0], Col[1]” Grid.Row=”0″ Grid.Column=”1″ />

<TextBlock Text=”Row[0], Col[2]” Grid.Row=”0″ Grid.Column=”2″ />

<TextBlock Text=”Row[1], Col[0]” Grid.Row=”1″ Grid.Column=”0″ />

<TextBlock Text=”Row[1], Col[1]” Grid.Row=”1″ Grid.Column=”1″ />

<TextBlock Text=”Row[1], Col[2]” Grid.Row=”1″ Grid.Column=”2″ />

<TextBlock Text=”Row[2], Col[0]” Grid.Row=”2″ Grid.Column=”0″ />

<TextBlock Text=”Row[2], Col[1]” Grid.Row=”2″ Grid.Column=”1″ />

<TextBlock Text=”Row[2], Col[2]” Grid.Row=”2″ Grid.Column=”2″ />

</Grid>

8. Also, you can use Grid.RowSpan and Grid.ColumnSpan properties to span your rows and columns. If you are familiar with HTML table tag & properties you can easily understand it properly.

<TextBlock Text=”Row[0], Col[0]” Grid.Row=”0″ Grid.Column=”0″ Grid.RowSpan=”2″ Grid.ColumnSpan=”2″ />

If we use the above code, it will span the 0th Row and 0th Column to two Rows & Columns. This is nothing but merging rows and columns of Grid Layout.

9. Now, open the MainPage.xaml.cs file & in the constructor create the instance of the GridPanelDemo usercontrol and add it as the child of the LayoutRoot i.e. Grid.

LayoutRoot.Children.Add(new GridPanelDemo());

10. Run your Silverlight application. You will see that, the TextBlocks are arranged in the Page in matrix manner.

Grid Layout Panel

Picture: Grid Layout Panel Demo


You will find this useful when you have to position your controls in proper way, in proper Row & Column. Note that, if you don’t create rows or columns and place multiple controls inside your naked Grid, you will see them overlapping each other. So, if you are using Grid be sure that you splitted your Grid in proper rows and columns.

“Canvas” Layout Panel

Canvas is the simplest layout available in Silverlight. It is very easy to understand and using this you can place any content any where inside the canvas. Not only this, you can also layered your application and by layering you can put your content front or back of any other control.

You can think Canvas as a HTML div Tag, where you can put your content in specific location by providing absolute left and top position. Have a look into the below image to get a brief idea on the same.
Canvas Panel

Picture: Canvas Layout Panel Structure


Lets think there are two Rectangles placed inside the Canvas as mentioned in the above figure. The first Rectangle (Blue one) is placed at the (10, 10) position. This is the coordinate location of your first Rectangle. First one stands for “Left” and second one stands for “Top”. So, What is the coordinate position of the second Rectangle (Orange one)? Exactly, it is Left =50 and Top = 30 i.e. (50, 30).
I think it is the right time to go for writing a sample code to create the above canvas with two Rectangles inside it. I am pretty much confident that, you have now a good confidence on the Canvas positioning.

Let us create a new UserControl named “CanvasPanelDemo” and then we will create two Rectangles in it and will place it in proper location.

1. Create a UserControl named “CanvasPanelDemo” in our Silverlight Application.

2. Open the CanvasPanelDemo.xaml file. You will see that there is a Grid named “LayoutRoot” inside your UserControl.

3. Now replace your Grid tag (<Grid>…</Grid>) with a Canvas tag (<Canvas>…</Canvas) and set the background color as Green:

<Canvas Background=”Green” >

</Canvas>

4. Now, open your MainPage.xaml.cs file and modify your constructor to load the newly created CanvasPanelDemo Usercontrol in page load as a child to your LayoutRoot Grid:

LayoutRoot.Children.Add(new CanvasPanelDemo());

5. If you run your application now, you will see that your Canvas has taken the full screen of your browser window. Why? You didn’t set the Height & Width of your UserControl and placed inside a Grid. That’s why it took the full size of the browser window and that’s why you can see your Green canvas taking the whole screen.

6. We will now create two Rectangles and place it inside the Canvas. For the first time, we will not set any position to the rectangles. Lets see what happens then. Modify your XAML to look like this:

<Canvas Background=”Green” >

<Rectangle x:Name=”rectFirst” Fill=”Blue” Height=”80″ Width=”120″/>

<Rectangle x:Name=”rectSecond” Fill=”Orange” Height=”100″ Width=”150″/>

</Canvas>

7. If you run your application again, you will see only one Rectangle present inside your Canvas. Which one? Yes, only the orange one. So, there you will ask “We added two Rectangle, one Green and another Orange. But why only the orange one is visible in the UI? What happened to the first rectangle?” So, my answer will be “Nothing happened to any of your added control. They all are placed inside the Canvas”.

Yes, that’s right. All the two rectangles are available inside your canvas. As we didn’t specify the position of the rectangles and the second rectangle is bigger than the first one, it placed on top of the other i.e. the orange one placed on top of the green rectangle. Whatever control you add at the end of the Canvas will have a higher Z-Index which places your control on top of the other. I will discuss on this later in this chapter.

Canvas Panel

Picture: Canvas Panel Demo 1 (without position)

8. Now, lets go for positioning the rectangles. We will set coordinate position (50, 50) to the first rectangle and coordinate position (200, 100) to the second rectangle. For doing this, we have to set the Canvas.Left and Canvas.Top properties of each Rectangle. Have a look into the following code. You will understand easily how to do this.

<Canvas Background=”Green”>

<Rectangle x:Name=”rectFirst” Fill=”Blue” Height=”80″ Width=”120″

Canvas.Left=”50″ Canvas.Top=”50″ />

<Rectangle x:Name=”rectSecond” Fill=”Orange” Height=”100″ Width=”150″

Canvas.Left=”200″ Canvas.Top=”100″ />

</Canvas>

9. Run your application and you will notice that the first rectangle has been placed at (Left=50, Top=50) location and the second one has been placed at (Left=200, Top=100) location. Your application will look similar to this:

Canvas Panel with proper position

Picture: : Canvas Panel Demo 2 (with proper position)


10. Now if you want to play around it, just modify your XAML to place the rectangle controls in various positions inside the canvas.


I think you are now familiar with positioning silverlight controls inside the Canvas. Let us discuss something on the Z-Index property. Z-Index stands for layering out your Silverlight application. If you are familiar with Photoshop you knew that, photoshop creates layers to position them on top of each other. Those who don’t know about it can learn it from here.

Suppose you want to create an application where two rectangles are there (similar to the previous example) and one rectangle is partially blocking the another. You have to write a logic to modify your application such that, when you click on the first rectangle it will come front of the another. Similar kind of logic for the second rectangle too.


So, how can we develop this? We have to use the Z-Index property for each rectangle. Lets say we will set the Z-Index of the first rectangle to 1 (one) and the second rectangle to 2 (two). Initially the second rectangle is blocking the first one partially. Now once you click on the first rectangle we will set the Z-Index of it to 2 and the Z-Index of the other rectangle to 1. As the Z-Index of the first rectangle is greater than the second it will come on top of the other. The same behaviour will be for the second rectangle. Once we click on the second rectangle (which is hiding behind the first) will come top the other will go behind. For doing this, we will set the Z-Index of the first rectangle to 1 and the second to 2.

1. Open the CanvasPanelDemo.xaml file and modify the Rectangle properties of Canvas.Left and Canvas.Top to place the rectangle on top of each other.

2. Now add the Canvas.ZIndex property to each rectangle. Set it to 1 for the first rectangle and set it to 2 for the second rectangle. After these modifications your xaml will look like this:

<Canvas Background=”Green”>

<Rectangle x:Name=”rectFirst” Fill=”Blue” Height=”80″ Width=”120″

Canvas.Left=”50″ Canvas.Top=”50″ Canvas.ZIndex=”1″ />

<Rectangle x:Name=”rectSecond” Fill=”Orange” Height=”100″ Width=”150″

Canvas.Left=”92″ Canvas.Top=”74″ Canvas.ZIndex=”2″ />

</Canvas>

3. Run your Silverlight application and you will see them in action. You will see the orange rectangle blocking a part of the blue rectangle.
Canvas Panel Demo

Picture: Panel Demo (ZIndex – 1)


4. Now let us write some logic to code behind (C#) to change the ZIndex property of the rectangles. To do this, first we will register the MouseLeftButtonDown event of both the rectangles in the constructor:

public CanvasPanelDemo()


{


InitializeComponent();

rectFirst.MouseLeftButtonDown += (rectFirst_MouseLeftButtonDown);

rectSecond.MouseLeftButtonDown += (rectSecond_MouseLeftButtonDown);


}


5. Now in the MouseLeftButtonDown event of the first rectangle we will set the ZIndex of the first rectangle to 2 and the second rectangle to 1. This will cause the first rectangle to come on top of the second rectangle.

privatevoid rectFirst_MouseLeftButtonDown(object sender, MouseButtonEventArgs e)


{


Canvas.SetZIndex(rectFirst, 2);

Canvas.SetZIndex(rectSecond, 1);


}


6. In the MouseLeftButtonDown event of the second rectangle we will set the ZIndex of the first rectangle to 1 and the second rectangle to 2. This will cause the second rectangle to come on top of the first one.

privatevoid rectSecond_MouseLeftButtonDown(object sender, MouseButtonEventArgs e)


{


Canvas.SetZIndex(rectFirst, 1);

Canvas.SetZIndex(rectSecond, 2);


}


7. Run your application to see it in action. At the initial time the second rectangle will be on top of the first one. When you click on the first rectangle it will come in front. Once you click on the second rectangle the first will go behind and thus the second rectangle will come at the front.

Canvas Panel Demo - ZIndex 2

Picture: Canvas Panel Demo (ZIndex – 2)


Canvas Panel Demo (ZIndex - 3)

Picture: Canvas Panel Demo (ZIndex – 3)


“StackPanel” Layout Panel

StackPanel is one of the most important panel in Silverlight. You will find it useful when you want to show some of your Silvelright elements either Horizontally or Vertically. It has a property called “Orientation”. You can set it appropriately as per your requirement.

Once you add some elements inside StackPanel, you will notice that they will place as a Stack on top of each other. Have a look into the following figure to get a clear understanding of the same.

Picture: StackPanel Orientation (Horizontal & Vertical)


Let us create an example to showcase the StackPanel demo:

1. Create a UserControl named “StackPanelDemo” in your Silverlight project

2. Now, open your MainPage.xaml.cs file and modify your constructor to load the newly created StackPanelDemo Usercontrol in page load as a child to your LayoutRoot Grid:

LayoutRoot.Children.Add(new StackPanelDemo());

3. Open the StackPanelDemo.xaml file and inside the Grid tag named “LayoutRoot” we will add two StackPanels (one Horizontal and another Vertical) with some Rectangles as Children.

4. The following XAML code will create a Vertical StackPanel which consists of four rectangles of different colors:

<StackPanel Orientation=”Vertical” Background=”SkyBlue” Height=”200″

Width=”100″ Grid.Column=”0″>

<Rectangle Height=”50″ Width=”100″ Fill=”Red” />

<Rectangle Height=”50″ Width=”100″ Fill=”Green” />

<Rectangle Height=”50″ Width=”100″ Fill=”Blue” />

<Rectangle Height=”50″ Width=”100″ Fill=”Yellow” />

</StackPanel>

5. The following code will create a Horizontal StackPanel which also contains four rectangles of different colors:

<StackPanel Orientation=”Horizontal” Background=”SkyBlue” Height=”100″

Width=”300″ Grid.Column=”1″>

<Rectangle Height=”100″ Width=”60″ Fill=”Red” />

<Rectangle Height=”100″ Width=”60″ Fill=”Green” />

<Rectangle Height=”100″ Width=”60″ Fill=”Blue” />

<Rectangle Height=”100″ Width=”60″ Fill=”Yellow” />

</StackPanel>

6. Now run your application and you will notice the following UI of your StackPanel Demo application. The left panel is your Vertical StackPanel whereas the right panel is the Horizontal StackPanel.

StackPanel Demo

Picture: StackPanel Demo


“ScrollViewer” Layout Panel

ScrollViewer is another layout container, which you will find interesting in some cases. Though it is not require to use in all the scenarios to hold elements but to show contents inside a scrollable panel like ListBox or Editor window you have to use ScrollViewer. ListBox, TextBox, RichTextBox internally uses ScrollViewer to implement the scrolling functionality.

Now come the question of implementing the scrollviewer functionality to our previous sample of StackPanel demo. If you add more Rectangles in the Vertical StackPanel in the previous demo application, you will notice that the rectangles are cropping inside the StackPanel as it has a fix height of 100. Now do the following to implement the scrolling functionality in the Vertical StackPanel:

1. Open the StackPanelDemo.xaml file to edit our previous XAML file

2. Remove the Height & Grid.Column properties from the StackPanel

3. Surround the StackPanel with ScrollViewer tag (<ScrollViewer> … </ScrollViewer>) and set the Height of the ScrollViewer to 200. Also add the Grid.Column = “0” to the ScrollViewer.

4. Add some more rectangles inside the StackPanel, so that, the ScrollBar got enabled for the ScrollViewer. After the modification of your XAML will look like this:

<ScrollViewer Height=”200″Grid.Column=”0″>

<StackPanel Orientation=”Vertical” Background=”SkyBlue” Width=”100″>

<Rectangle Height=”50″ Width=”100″ Fill=”Red” />

<Rectangle Height=”50″ Width=”100″ Fill=”Green” />

<Rectangle Height=”50″ Width=”100″ Fill=”Blue” />

<Rectangle Height=”50″ Width=”100″ Fill=”Yellow” />

<Rectangle Height=”50″ Width=”100″ Fill=”Red” />

<Rectangle Height=”50″ Width=”100″ Fill=”Green” />

<Rectangle Height=”50″ Width=”100″ Fill=”Blue” />

<Rectangle Height=”50″ Width=”100″ Fill=”Yellow” />

<Rectangle Height=”50″ Width=”100″ Fill=”Red” />

<Rectangle Height=”50″ Width=”100″ Fill=”Green” />

<Rectangle Height=”50″ Width=”100″ Fill=”Blue” />

<Rectangle Height=”50″ Width=”100″ Fill=”Yellow” />

</StackPanel>

</ScrollViewer>

5. If you run the application now, you will see a ScrollBar on the right side of the panel. Thus it make your Rectangles to scroll properly.

ScrollViewer Panel Demo

Picture: ScrollViewer Panel Demo


Here note that, we set the Height to the ScrollViewer and not to the StackPanel. The reason behind this is, if you set the Height of the StackPanel it will have a fix height, thus it will not create the Scrolling behaviour. As we set the Height to the ScrollViewer the StackPanel height increases as and when you add child to it but the ScrollViewer here does a great job and creates a scrollbar cropping the StackPanel to the height of the ScrollViewer.


“Border” Layout Panel

It’s an another type of Layout Panel in Silverlight. But as like other panels it can’t contain multiple contents in it. Border supports only one child as a content. If you want to use Border as a container of multiple controls, you have to wrap those with anyother panel like Grid, Canvas etc. and then place it in the Border. So, what is Border actually? The name says it. It is a border. If we want to add some border in our Silverlight application, we can use it at that time.

Look into the following figure. Here you will see four different shapes. These shapes you can create using Border element. You can create your border filled with Solid color or Gradient color or you can use a transparent color.

Border Panel Example

Picture: Border Panel Example


After seeing the above figure, I think one question came to you mind that “I can create the same thing using the Rectangle too. Then what is the benefit of using Border?” Yes right. You can create the same thing using Rectangle too as we did earlier, but the main difference is “You can create a rounded corner shape using Border. It has the property called “CornerRadius”. If you set it to 45, means your shape will have a corner radius of 45 degree.

Let us create some borders in a demo application:

1. Create a UserControl named “BorderDemo” in your Silverlight project

2. Now, open your MainPage.xaml.cs file and modify your constructor to load the newly created BorderDemo Usercontrol in page load as a child to your LayoutRoot Grid:

LayoutRoot.Children.Add(new BorderDemo());

3. Open the BorderDemo.xaml file and inside the Grid tag named “LayoutRoot” we will add a Border as Content.

4. Let us add the first Border of Height=100 and Width=150 with a brown colored BorderThickness of 2:

<Border Height=”100″ Width=”150″ BorderThickness=”2″ BorderBrush=”Brown”/>

Once run in browser you will see the following view:

Border Panel Demo 1

Picture: Border Panel Demo 1


5. Now we will modify this border to create a Rounded Corner border. To do this, we will add a property “CornerRadius” to it. We will set the value to 25 i.e. 25 degree. Your modified XAML will look like this:

<Border Height=”100″ Width=”150″ CornerRadius=”25″ BorderThickness=”2″ BorderBrush=”Brown”/>

Border Panel Demo 2

Picture: Border Panel Demo 2


6. Now we will change it a little to set a background color to it. Border has a property called “Background”. You can set the color there which you like. Here is the modified XAML of the same:

<Border Height=”100″ Width=”150″ CornerRadius=”25″ BorderThickness=”2″ BorderBrush=”Brown” Background=”Brown”/>

If you run your Silverlight application now, you will see the following:

Border Panel Demo 3

Picture: Border Panel Demo 3


7. Let us modify it a little bit more to add a child inside it. We will put a Text “I am a TextBlock inside Border control”. Put the below code in your XAML. You will notice that I placed a TextBlock inside the <Border> … </Border> tag. You can place any control or panel inside the Border like this.

<Border Height=”100″ Width=”250″ CornerRadius=”25″ BorderThickness=”2″ BorderBrush=”Brown” Background=”Brown”>

<TextBlock Text=”I am a TextBlock inside Border control”

VerticalAlignment=”Center”

HorizontalAlignment=”Center”/>

</Border>


Once you run, it will show similar to this:

Border Panel Demo 4

Picture: Border Panel Demo 4


Remember that, you can add only one child to the Border panel. If you need to add more than one child, add a different panel like Grid, Canvas or StackPanel inside the Border and then add the child elements to that panel. Think before chosing your panels.


“ViewBox” Layout Panel

ViewBox panel is another useful panel in Silverlight. It is actually not a new panel in Silverlight. It was available in Silverlight 3 toolkit, but Microsoft added it in the Silverlight 4 runtime for it’s demand. You can use ViewBox panel to stretch and scale a element control. Like Border it also has only and only one child. If you want to set more than one child, you have to use any other panel inside the ViewBox to hold other children controls.

As I told earlier, you can stretch and scale your control inside your ViewBox. It has a property called “Stretch” which has the following values:
1. Fill:

If you set the Stretch property to Fill, the content will fill the entire space of the ViewBox. It doesn’t preserve the aspect ratio.

<Viewbox Stretch=”Fill” MaxWidth=”100″ MaxHeight=”100″ Name=”viewBox1″>

<Image Source=”images/microsoft_silverlight.jpg”/>

</Viewbox>

<Viewbox Stretch=”Fill”MaxWidth=”200″ MaxHeight=”200″ Name=”viewBox2″>

<Image Source=”images/microsoft_silverlight.jpg”/>

</Viewbox>

<Viewbox Stretch=”Fill”MaxWidth=”300″ MaxHeight=”300″ Name=”viewBox3″>

<Image Source=”images/microsoft_silverlight.jpg”/>

</Viewbox>


//Set the Stretch property to Fill


privatevoid stretchFill(object sender, RoutedEventArgs e)


{


viewBox1.Stretch = Stretch.Fill;

viewBox2.Stretch = Stretch.Fill;

viewBox3.Stretch = Stretch.Fill;


}


ViewBox Demo 1

Picture: ViewBox Demo 1


2. None:
If you set the Stretch property to None, the content will preserve its original size.

<Viewbox Stretch=”Fill” MaxWidth=”100″ MaxHeight=”100″ Name=”viewBox1″>

<Image Source=”images/microsoft_silverlight.jpg”/>

</Viewbox>

<Viewbox Stretch=”Fill”MaxWidth=”200″ MaxHeight=”200″ Name=”viewBox2″>

<Image Source=”images/microsoft_silverlight.jpg”/>

</Viewbox>

<Viewbox Stretch=”Fill”MaxWidth=”300″ MaxHeight=”300″ Name=”viewBox3″>

<Image Source=”images/microsoft_silverlight.jpg”/>

</Viewbox>

//Set the Stretch property to None

privatevoid stretchNone(object sender, RoutedEventArgs e)


{


viewBox1.Stretch = Stretch.None;

viewBox2.Stretch = Stretch.None;

viewBox3.Stretch = Stretch.None;


}


ViewBox Demo 2

Picture: ViewBox Demo 2


3. Uniform:
If you set the Stretch property to Uniform, the content will resize to fit the ViewBox. The ViewBox will take as much space as require to show the entire content and also preserves the aspect ratio.

<Viewbox Stretch=”Fill” MaxWidth=”100″ MaxHeight=”100″ Name=”viewBox1″>

<Image Source=”images/microsoft_silverlight.jpg”/>

</Viewbox>

<Viewbox Stretch=”Fill”MaxWidth=”200″ MaxHeight=”200″ Name=”viewBox2″>

<Image Source=”images/microsoft_silverlight.jpg”/>

</Viewbox>

<Viewbox Stretch=”Fill”MaxWidth=”300″ MaxHeight=”300″ Name=”viewBox3″>

<Image Source=”images/microsoft_silverlight.jpg”/>

</Viewbox>

//Set the Stretch property to Uniform

privatevoid stretchNone(object sender, RoutedEventArgs e)


{


viewBox1.Stretch = Stretch.Uniform;

viewBox2.Stretch = Stretch.Uniform;

viewBox3.Stretch = Stretch.Uniform;


}


ViewBox Demo 3

Picture: ViewBox Demo 3


4. UniformToFill:
If you set the Stretch property to UniformToFill, the content will resize to fill the destination dimension. If the original size differs than the aspect ratio of the ViewBox, the content is then clipped to fit the ViewBox dimension.

<Viewbox Stretch=”Fill” MaxWidth=”100″ MaxHeight=”100″ Name=”viewBox1″>

<Image Source=”images/microsoft_silverlight.jpg”/>

</Viewbox>

<Viewbox Stretch=”Fill”MaxWidth=”200″ MaxHeight=”200″ Name=”viewBox2″>

<Image Source=”images/microsoft_silverlight.jpg”/>

</Viewbox>

<Viewbox Stretch=”Fill”MaxWidth=”300″ MaxHeight=”300″ Name=”viewBox3″>

<Image Source=”images/microsoft_silverlight.jpg”/>

</Viewbox>

//Set the Stretch property to UniformToFill

privatevoid stretchNone(object sender, RoutedEventArgs e)


{


viewBox1.Stretch = Stretch.UniformToFill;

viewBox2.Stretch = Stretch.UniformToFill;

viewBox3.Stretch = Stretch.UniformToFill;


}


ViewBox Demo 4

Picture: ViewBox Demo 4

Introduction to Silverlight Application Development – Silverlight tutorial Chapter 2


In this chapter we will first discuss on how to create a new Silverlight project and the structure of ait. Later in this chapter we will discuss on UserControls and various ways of developement. After reading this chapter you will be able to create a HelloSilverlight application and various UserControls for your application.

Please go to previous chapter to read Introduction to Silverlight.

How to create a new Silverlight Project?

If your development environment is ready then we can proceed towards creating a new Silverlight Application project. At the end of this part we will be able to run our first Silverlight application inside the browser.

1. Open your Visual Studio 2010 IDE

2. Select File > New Project or just press CTRL + SHIFT + N to open up the New Project dialog

3. Expand the “Visual C#” node and then go to sub node “Silverlight”

4. Select “Silverlight Application” in the right pane


Create new project

Figure 1: Visual Studio Project Types


5. Select proper location to store your application (let’s say, “D:\Sample Apps\”

6. Now enter a proper name for your project (call it as: SilverlightApps.HelloSilverlight)

7. Select the .Net Framework version from the combo box at the top (I am using .Net Framework 4.0 by default as I am using Visual Studio 2010) and click OK

8. In the next dialog make sure that “Host the Silverlight application in a new Web site” option is selected


create new silverlight application

Figure 2: Silverlight Hosting Application


9. Choose “Silverlight 4” as the Silverlight Version and hit OK


Wait for a while, Visual Studio will now create the first Silverlight solution for you to use which will contain a Silverlight Project and one Web Application Project to host your Silverlight application. Once done, you will see Visual Studio already created two XAML files (App.xaml & MainPage.xaml) for you inside the Silverlight Application project.

So for now your first Silverlight application has been created. Press F5 to run the application. It will open a browser Window with a blank page on that. Wow! What happened? Nothing is there!!! Don’t worry, everything is fine. We didn’t modify the default blank XAML page. Just right click on the browser page & you will see the Silverlight context menu on that.


first silverlight page

Figure 3: Silverlight inside the Browser


What’s the Project Structure of Silverlight?

When you create a new Silverlight project, Visual Studio IDE creates two different projects for you (as you can see in the below picture). One is your main Silverlight project and the another is a Web application project which will host your Silverlight application (.xap file).


Silverlight project structure

Figure 4: Silverlight Project Structure


The main Silverlight project (SilverlightApps.HelloSilverlight) consists of App.xaml, App.xaml.cs, MainPage.xaml & MainPage.xaml.cs. I already discussed on those file in depth in previous chapter. The web project (SilverlightApps.HelloSilverlight.Web) consists of JavaScript file named Silverlight.js which is responsible for checking the Silverlight version in client side and also if the Silverlight plug-in is missing at the user end, it asks to install the required runtime from Microsoft site. The .aspx & .html pages are present in the root to host the Silverlight application. Your Silverlight application .xap file is located under the ClientBin directory inside the Web project.


Creating a “HelloSilverlight” Application

Now let us start modifying the “MainPage.xaml” by insertinga text “Hello Silverlight”. We will add one TextBlock control inside the Grid panel with it’s text property as “Hello Silverlight”.

But before going to add the content inside your page let me tell you that, you can add it in two ways: “Declarative approach in XAML” and “Programmatic approach in Code-Behind”. In declarative approach you have to add the Silverlight controls in the XAML page in XML format only with their properties as attributes. In other hand, you have to create the objects of the controls programmatically and have to set their properties.

First go with the Declarative Approach:

1. Open the file “MainPage.xaml” in Visual Studio
2. Inside the Grid tag add the following texts:

<TextBlock x:Name=”txtTitle” Text=”Hello Silverlight From XAML” FontSize=”32″ Foreground=”Red” HorizontalAlignment=”Center”/>

Your XAML page will now look like this:

<UserControl x:Class=”SilverlightApps.HelloSilverlight.MainPage”

xmlns=”http://schemas.microsoft.com/winfx/2006/xaml/presentation&#8221;

xmlns:x=”http://schemas.microsoft.com/winfx/2006/xaml&#8221;

xmlns:d=”http://schemas.microsoft.com/expression/blend/2008&#8243;

xmlns:mc=”http://schemas.openxmlformats.org/markup-compatibility/2006&#8243;

mc:Ignorable=”d”

d:DesignHeight=”300″ d:DesignWidth=”400″>

<Grid x:Name=”LayoutRoot” Background=”White”>

<TextBlock x:Name=”txtTitle” Text=”Hello Silverlight From XAML”

FontSize=”32″ Foreground=”Red” HorizontalAlignment=”Center”/>

</Grid>

</UserControl>


3. Press F5 to run your application once again. Once the browser loads your Silverlight application you will see “Hello SilverlightFrom XAML” text appears inside the browser window.


First silverlight application

Figure 5: Hello Silverlight from XAML in Browser

Now, we will create the same from the code behind (programmatically). Assume that, we have not added the Text inside the XAML.

1. Open your “MainPage.xaml.cs” using the Visual Studio
2. There you will find the constructor of the MainPage class. Add the following lines of code after the call to the InitializeComponent() method:


// Create the instance of the textblock and set it’s properties


TextBlock txtTitle = newTextBlock

{

Name = “txtTitle”,

Text = “Hello Silverlight From Code”,

FontSize = 32.0,

Foreground = newSolidColorBrush(Colors.Red),

HorizontalAlignment = HorizontalAlignment.Center

};

// Add the textblock instance as the children of the “LayoutRoot”


LayoutRoot.Children.Add(txtTitle);


Let’s describe it in depth. First of all we are creating the instance of the TextBlock control and setting the Name, Text, FontSize, Foreground color etc. at the time of initialization. Then once the control is ready, we are adding it to the main panel i.e. the Grid layout panel inside the XAML named “LayoutRoot”.

After adding this your code will look like below:

using System;

using System.Collections.Generic;

using System.Linq;

using System.Net;

using System.Windows;

using System.Windows.Controls;

using System.Windows.Documents;

using System.Windows.Input;

using System.Windows.Media;

using System.Windows.Media.Animation;

using System.Windows.Shapes;

namespace SilverlightApps.HelloSilverlight


{


publicpartialclassMainPage : UserControl

{

public MainPage()

{

InitializeComponent();

// Create the instance of the textblock and set it’s properties

TextBlock txtTitle = newTextBlock

{

Name = “txtTitle”,

Text = “Hello Silverlight From Code”,

FontSize = 32.0,

Foreground = newSolidColorBrush(Colors.Red),

HorizontalAlignment = HorizontalAlignment.Center

};

// Add the textblock instance as the children of the “LayoutRoot”

LayoutRoot.Children.Add(txtTitle);

}

}


}


3. Press F5 to run your application. You will now see your browser window opens with a text “Hello Silverlight From Code” inside it.


Hello Silverlight from Code in Browser

Figure 6: Hello Silverlight from Code in Browser

Note that, the TextBlock control has been added as a child element to the LayoutRoot panel which is a Grid. So, the question here is, what are the panels available in Silverlight where we can add child controls? Ok, for now just remember that there are several content holders (panels) available to hold any child controls like: Grid, Canvas, Border, StackPanel etc. In XAML pages the elements are maintained in a hierarchy like the HTML pages (DOM i.e. Document Object Model). This hierarchy allows us to nest different controls inside each other. I will discuss on this in depth in the next chapter.

Creating a Silverlight UserControl

In our last example we have seen, once we created the Silverlight project, the Visual Studio IDE has automatically created two XAML pages: App.xaml&MainPage.xaml. If you view the MainPage.xaml in depth, you will notice that it started with “UserControl” as the root element.

<UserControl x:Class=”SilverlightApps.HelloSilverlight.MainPage”

. . .>

</UserControl>

Also, if you open the MainPage.xaml.cs file you will notice that the class itself inherits from the base class “UserControl”.

namespace SilverlightApps.HelloSilverlight


{


publicpartialclassMainPage : UserControl

{

public MainPage()

{

InitializeComponent();

}

}


}


So, what is that UserControl? UserControls are basic unit of reusable XAML like you use in asp.net. It is the root of your XAML and contain only one child as a control. Though that child may contain one or more other controls but the UserControl must have a maximum of one content control. UserControls are mainly created using XAML and then reused in various places.

How can I create a simple new Silverlight UserControl? Is it difficult to implement? Ummm… I will not tell you. Let us create a simple UserControl then. You will tell me whether it is difficult or simple.

 
Silverlight Tools for Visual Studio comes up with the default template for creating a basic UserControl. Now follow the steps to create it:

  1. Open your existing Silverlight application project (for this example, you can use the “HelloSilverlight” project just now we created)
  2. Right click on the Silverlight project “SilverlightApps.HelloSilverlight” and select Add -> New Item
  3. Select “Silverlight UserControl” from the right panel
  4. Enter a good name (here I am using “EmployeeView”) and hit enter

Silverlight UserControl Creation

Figure 7: Silverlight UserControl Creation


This will create the UserControl named “EmployeeView” with the default template layout and open up the XAML page in the IDE. If you look into the XAML code you will notice the following code:


<UserControl x:Class=”SilverlightApps.HelloSilverlight.EmployeeView”

xmlns=”http://schemas.microsoft.com/winfx/2006/xaml/presentation&#8221;

xmlns:x=”http://schemas.microsoft.com/winfx/2006/xaml&#8221;

xmlns:d=”http://schemas.microsoft.com/expression/blend/2008&#8243;

xmlns:mc=”http://schemas.openxmlformats.org/markup-compatibility/2006&#8243;

mc:Ignorable=”d”

d:DesignHeight=”300″ d:DesignWidth=”400″>

<Grid x:Name=”LayoutRoot” Background=”White”>

</Grid>

</UserControl>


We already discussed about each of the lines in the previous chapter (in “What is MainPage.xaml file” section). So, I will not cover it again. Now let us build our first UserControl to show the Employee’s FirstName, LastName& Department inside the UserControl XAML file. How to do that? Before doing it let us split our Grid panel into three Rows & two Columns (will discuss on this in next chapter):


<Grid x:Name=”LayoutRoot” Background=”White”>

<Grid.RowDefinitions>

<RowDefinition/>

<RowDefinition/>

<RowDefinition/>

</Grid.RowDefinitions>

<Grid.ColumnDefinitions>

<ColumnDefinition Width=”100″/>

<ColumnDefinition Width=”*”/>

</Grid.ColumnDefinitions>

</Grid>


Now, lets add the TextBlocks inside the Grid, in specific Rows and Columns. In our case the left column will hold the “FirstName”, “LastName” and “Department” label. The second column will hold the informations according to the labels. Here is the XAML code for the same:


<UserControl x:Class=”SilverlightApps.HelloSilverlight.EmployeeView”

xmlns=”http://schemas.microsoft.com/winfx/2006/xaml/presentation&#8221;

xmlns:x=”http://schemas.microsoft.com/winfx/2006/xaml&#8221;

xmlns:d=”http://schemas.microsoft.com/expression/blend/2008&#8243;

xmlns:mc=”http://schemas.openxmlformats.org/markup-compatibility/2006&#8243;

mc:Ignorable=”d” Width=”300″>

<Grid x:Name=”LayoutRoot” Background=”White”>

<Grid.RowDefinitions>

<RowDefinition/>

<RowDefinition/>

<RowDefinition/>

</Grid.RowDefinitions>

<Grid.ColumnDefinitions>

<ColumnDefinition Width=”100″/>

<ColumnDefinition Width=”*”/>

</Grid.ColumnDefinitions>

<TextBlock x:Name=”LabelFirstName” Text=”FirstName” Grid.Row=”0″ Grid.Column=”0″/>

<TextBlock x:Name=”FirstName” Text=”Kunal” Grid.Row=”0″ Grid.Column=”1″/>

<TextBlock x:Name=”LabelLastName” Text=”LastName” Grid.Row=”1″ Grid.Column=”0″/>

<TextBlock x:Name=”LastName” Text=”Chowdhury” Grid.Row=”1″ Grid.Column=”1″/>

<TextBlock x:Name=”LabelDepartment” Text=”Department” Grid.Row=”2″ Grid.Column=”0″/>

<TextBlock x:Name=”Department” Text=”Software Engineering” Grid.Row=”2″ Grid.Column=”1″/>

</Grid>

</UserControl>


You can see, I am using “Grid.Row” and “Grid.Column” attributes in each TextBlock. What does it mean? Grid.Row specifies the row number where to place the control. Similarly, Grid.Column specifies the column number. For example, if you use Grid.Row=”2” and Grid.Column=”4” to any element inside your Grid, the element control will be placed in 3rd Row and 5th Column of the Grid. You can think the Grid panel as a Matrix which has zero based index.

Our UserControl is ready now, but before running the application we need to put it inside the MainPage which loads at application load. You can do this in two different ways. One is using the XAML and the another is using the Code-behind file. In code behind it is very easy. You have to follow the same steps as we did in previous chapter to set the “Hello Silverlight” TextBlock, but if you want to set it in XAML you have to do a little trick for the first time. Let us discuss on this step-by-step:


First go with the Declarative Approach:

1. Open the file “MainPage.xaml” in Visual Studio
2. Add the following line inside the UserControl tag of the MainPage.xaml (after any xmlns line):

xmlns:uc="clr-namespace:SilverlightApps.HelloSilverlight"

Now, your MainPage.xaml will look like this (the bolder text I have inserted in the XAML):

<UserControl x:Class=”SilverlightApps.HelloSilverlight.MainPage”

xmlns=”http://schemas.microsoft.com/winfx/2006/xaml/presentation&#8221;

xmlns:x=”http://schemas.microsoft.com/winfx/2006/xaml&#8221;

xmlns:d=”http://schemas.microsoft.com/expression/blend/2008&#8243;

xmlns:mc=”http://schemas.openxmlformats.org/markup-compatibility/2006&#8243;

xmlns:uc=”clr-namespace:SilverlightApps.HelloSilverlight”

mc:Ignorable=”d”

d:DesignHeight=”300″ d:DesignWidth=”400″>

<Grid x:Name=”LayoutRoot” Background=”White”>

</Grid>

</UserControl>


Here, “uc” stands for pre-tag for specifying the namespace. You can use any name. We used “uc” to specify “UserControl” for better readability. Now inside the Grid control you can add the UserControl we have just created. Here is the code for the same:


<Grid x:Name=”LayoutRoot” Background=”White”>

<uc:EmployeeView Width=”300″ Height=”60″/>

</Grid>

Once you run your application now, you will see the following view of your first UserControl application:

First UserControl View

Figure 8: First UserControl View


Now let us create it from Code-behind. I assume that the control we just added inside the Grid has been removed from the XAML, that means your Grid panel has no child inside it. Create the instance of the EmployeeViewUserControl and add it as child to the LayoutRoot Grid:


// Create the instance of the EmployeeViewUserControl


EmployeeView empView = new EmployeeView


{


Width = 300.0,

Height = 60.0,


};


// Add the EmployeeViewUserControl as the child of the default panel “LayoutRoot”


LayoutRoot.Children.Add(empView);


Run your application and you will see the same output. The second approach is easy, am I right? Yup, for the first application it looks very easy enough. But when you write complex applications you will notice that the first approach is easier than the later. Why? Because, you will get more control over the design. You can see the output immediately in the preview sceen, also you can drag the control to position it properly in the panel. In some cases you will find it useful from code.  Depending upon your business need you have to decide where to create and add your UserControl.

Is it confusing? No, when you are sure that you have to dynamically load no. of UserControls based on your data you have to create and load it from the code behind. For the other cases, it will be easier to write inside the XAML.

Remember that, you can create as many instances of your UserControl and place it inside your XAML page. Once we discuss on the different types of panel and layout in next chapter you can get better visibility to that.

How to Start with Silverlight


As we all know that Microsoft Silverlight is a cross-browser, cross-platform, and cross-device plug-in for delivering the next generation of .NET based media experiences and rich interactive applications for the Web. In order to work with Silverlight first you need to install the Silverlight plug-in. Please install the from Silverlight plug-in. To add Silverlight to your file, you need a reference to the Silverlight.js file into your, a xaml file that contains the behavior of the Silverlight and some JavaScript code to creates Silverlight plug-in instance.

Step – 1
If you are going to use Silverlight into your ASP.NET website, you need to add the reference of Silverlight.js file into your page (If you have master page, better to add the reference into it so that you don’t need to add the reference to all your .aspx pages). Please note that the referecne of Silverlight should be placed between <head> and </head> tag and your code should look like <script src=”Silverlight.js” type=”text/javascript”></script>. Silverlight.js file can be found at this website too, however we suggest to get the latest from Microsoft website.
Get Microsoft Silverlight
Step – 2
You need to create a placeholder for your Silverlight content inside your <body> </body> tag where you want your Silverlight content to appear. In general, you should create a div html element and specify its id property like this <div id=”fundaSilverlightPluginHost”> </div>

Step – 3
Write the JavaScript code to call the initialization function of Silverlight object like this. You can write this code after your placeholder (Step-2).

                    <script language="javascript" type="text/javascript">
                        createSilverlightPlugin('fundaSilverlightPluginHost', '300', '200', 'YourXamlFilePath.xaml')
                    </script>

Here I am passing all the required value as a parameter. In this case the
1st parameter is the placeholder that I created in the 2nd step,
2nd parameter is the width of the Silverlight plug-in area
3rd parameter is the height of the Silverlight plug-in area
4thparameter is the .xaml file that specifies the behavior of the Silverlight objectStep – 4
Write JavaScript function to initialize the Silverlight object. In my case it looks like below. It can be placed inside the common JavaScript file of your website. In any case, this code must be rendered to the browse before last step (Step – 3) code otherwise browser may throw JavaScript error. Its always better to place this code between <head> and </head>.

                    
function createSilverlightPlugin(placeHolder, width, height, xamlfile)
{  
    // Retrieve the div element you created in the previous step.
    var parentElement = document.getElementById(placeHolder);
    Silverlight.createObject
    (
        xamlfile,                       // Source property value.
        parentElement,                  // DOM reference to hosting DIV tag.
        placeHolder,                    // Unique plug-in ID value.
        {                               // Per-instance properties.
            width:width,                // Width of rectangular region of 
                                        // plug-in area in pixels.
            height:height,              // Height of rectangular region of 
                                        // plug-in area in pixels.
            inplaceInstallPrompt:false, // Determines whether to display 
                                        // in-place install prompt if 
                                        // invalid version detected.
            background:'#fecefe',       // Background color of plug-in.
            isWindowless:'false',       // Determines whether to display plug-in 
                                        // in Windowless mode.
            framerate:'24',             // MaxFrameRate property value.
            version:'1.0'               // Silverlight version to use.
        },
        {
            onError:null,               // OnError property value -- 
                                        // event handler function name.
            onLoad:null                 // OnLoad property value -- 
                                        // event handler function name.
        },
        null
    );                                  // Context value -- event handler function name.
}

Step – 5
Now, you have the placehoder object and function to initialize the Silverlight object. Its time to write the behavior of the Silverlight object. So create a .xaml file and write below code. Please note that you need to specify this file path as a 4thparameter of Step – 3 initialization function.

<Canvas
   xmlns="http://schemas.microsoft.com/client/2007"
   xmlns:x="http://schemas.microsoft.com/winfx/2006/xaml">
  <Rectangle Height="75" Width="200" Fill="LightGreen" Stroke="Red" StrokeThickness="2" Canvas.Left="5" Canvas.Top="5"></Rectangle>
  <TextBlock Canvas.Left="85" Canvas.Top="20" FontSize="15" FontFamily="Arial, Verdana" Text="DotNetFunda.com Silverlight Tutorials"
               FontWeight="Bold" Foreground="Blue" TextWrapping="Wrap"></TextBlock>

</Canvas>

Instead of writing above code into a separate .xaml file, you may write it into your .aspx page as well. In that case your code should look like below.

  <script type="text/xml" id="xamlScript2">
  <?xml version="1.0"?>
  <Canvas 
    xmlns="http://schemas.microsoft.com/client/2007" xmlns:x="http://schemas.microsoft.com/winfx/2006/xaml">
    <Rectangle Height="75" Width="400" Fill="Blue" Stroke="Red" 
        StrokeThickness="2" Canvas.Left="5" Canvas.Top="5"></Rectangle>
          <TextBlock Canvas.Left="20" Canvas.Top="30" FontSize="20" 
          FontFamily="Arial, Verdana" Text="DotNetFunda.com Silverlight Tutorials"
                       FontWeight="Bold" Foreground="White" TextWrapping="Wrap"></TextBlock>
  </Canvas>
</script>

Notice that if you have written the .xaml code into your .aspx page, your Step – 3 code should be slightly changed as below. Here, instead of specifying the .xaml file path in the 4th parameter of initialization function, you need to specify the id of the .xaml code preceeded by #.

                    <script language="javascript" type="text/javascript">
                        createSilverlightPlugin('divDemoSliverlight', '450', '100', '#xamlScript2')
                    </script>

Step – 6
Thats it!, Just run your page in the browser and you should see a Silverlight banner like below.

Get Microsoft Silverlight

Acknowledgement: I have taken reference of Silverlight.net website in writing these articles.

Introduction to Object Oriented Programming Concepts (OOP) and More


  • 1. Introduction
  • 2. Background
  • 3. Prerequisites
  • 4. The Main Content
    • 4.1. What is Software Architecture?
    • 4.2. Why Architecture is important?
    • 4.3. What is OOP?
    • 4.4. What is an Object?
    • 4.5. What is a Class?
    • 4.6. How to identify and design a Class?
    • 4.7. What is Encapsulation (or information hiding)?
    • 4.8. What is Association?
    • 4.9. What is the difference between Association, Aggregation and Composition?
    • 4.10. What is Abstraction and Generalization?
    • 4.11. What is an Abstract class?
    • 4.12. What is an Interface?
    • 4.13. What is the difference between a Class and an Interface?
    • 4.14. What is the difference between an Interface and an Abstract class?
    • 4.15. What is Implicit and Explicit Interface Implementations?
    • 4.16. What is Inheritance?
    • 4.17. What is Polymorphism?
    • 4.18. What is Method Overloading?
    • 4.19. What is Operator overloading?
    • 4.20. What is Method Overriding?
    • 4.21. What is a Use case?
    • 4.22. What is a Class Diagram?
    • 4.23. What is a Package Diagram?
    • 4.24. What is a Sequence Diagram?
    • 4.25. What is two-tier architecture?
    • 4.26. What is three-tier architecture?
    • 4.27. What is MVC architecture?
    • 4.28. What is SOA?
    • 4.29. What is the Data Access Layer?
    • 4.30. What is the Business Logic Layer?
    • 4.31. What is Gang of Four (GoF) Design Patterns?
    • 4.32. What is the difference between Abstract Factory and Builder design patterns?
  • 5. What is the Conclusion?
  • 6. What I Referred?
  • 7. History

1. Introduction

I have noticed an increase in the number of articles published in the Architect category in code-project during the last few months. The number of readers for most of these articles is also high, though the ratings for the articles are not. This indicates that readers are interested in reading articles on Architecture, but the quality does not match their expectations. This article is a constructive attempt to group/ define/ explain all introductory concepts of software architecture for well seasoned developers who are looking to take their next step as system architects.

One day I read an article that said that the richest 2 percent own half the world’s wealth. It also said that the richest 1 percent of adults owned 40 percent of global assets in the year 2000. And further, that the richest 10 percent of adults accounted for 85 percent of the world’s total wealth. So there is an unbalanced distribution of wealth in the physical world. Have you ever thought of an unbalanced distribution of knowledge in the software world? According to my view point, the massive expansion of the software industry is forcing developers to use already implemented libraries, services and frameworks to develop software within ever shorter periods of time. The new developers are trained to use (I would say more often) already developed software components, to complete the development quicker. They just plug in an existing library and some how manage to achieve the requirements. But the sad part of the story is, that they never get a training to define, design the architecture for, and implement such components. As the number of years pass by, these developers become leads and also software architects. Their titles change, but the old legacy of not understanding, of not having any architectural experience continues, creating a vacuum of good architects. The bottom line is that only a small percentage of developers know how to design a truly object oriented system. The solution to this problem is getting harder every day as the aggressive nature of the software industry does not support an easy adjustment to existing processes, and also the related online teaching materials are either complex or less practical or sometimes even wrong. The most of them use impractical, irrelevant examples of shapes, animals and many other physical world entities to teach concepts of software architecture. There are only very few good business-oriented design references. Unfortunately, I myself am no exception and am a result of this very same system. I got the same education that all of you did, and also referred to the same resource set you all read.

Coming back to the initial point, I noticed that there is a knowledge gap, increasing every day, between the architects who know how to architect a system properly and the others who do not know. The ones, who know, know it right. But the ones, who do not know, know nothing. Just like the world’s wealth distribution, it is an unbalanced distribution of knowledge.

2. Background

This article began after reading and hearing the questions new developers have, on basics of software architecture. There are some good articles out there, but still developers struggle to understand the basic concepts, and more importantly, the way to apply them correctly.

As I see it, newcomers will always struggle to understand a precise definition of a new concept, because it is always a new and hence unfamiliar idea. The one, who has experience, understands the meaning, but the one who doesn’t, struggles to understand the very same definition. It is like that. Employers want experienced employees. So they say, you need to have experience to get a job. But how the hell is one supposed to have that experience if no one is willing to give him a job? As in the general case, the start with software architecture is no exception. It will be difficult. When you start to design your very first system, you will try to apply everything you know or learned from everywhere. You will feel that an interface needs to be defined for every class, like I did once. You will find it harder to understand when and when not to do something. Just prepare to go through a painful process. Others will criticize you, may laugh at you and say that the way you have designed it is wrong. Listen to them, and learn continuously. In this process you will also have to read and think a lot. I hope that this article will give you the right start for that long journey.

The knowledge of the actions of great men, acquired by long experience in contemporary affairs, and a continual study of antiquity” – I read this phrase when I was reading the book named “The Art of War”, seems applicable here, isn’t it?

3. Prerequisites

This article is an effort to provide an accurate information pool for new developers on the basics of software architecture, focusing on Object Oriented Programming (OOP). If you are a developer, who has a minimum of three or more years of continuous development experience and has that hunger to learn more, to step-in to the next level to become a software architect, this article is for you.

4. The Main Content

4.1. What is Software Architecture?

Software Architecture is defined to be the rules, heuristics and patterns governing:

  • Partitioning the problem and the system to be built into discrete pieces
  • Techniques used to create interfaces between these pieces
  • Techniques used to manage overall structure and flow
  • Techniques used to interface the system to its environment
  • Appropriate use of development and delivery approaches, techniques and tools.

4.2. Why Architecture is important?

OOP.jpg

The primary goal of software architecture is to define the non-functional requirements of a system and define the environment. The detailed design is followed by a definition of how to deliver the functional behavior within the architectural rules. Architecture is important because it:

  • Controls complexity
  • Enforces best practices
  • Gives consistency and uniformity
  • Increases predictability
  • Enables re-use.

4.3. What is OOP?

OOP is a design philosophy. It stands for Object Oriented Programming. Object-Oriented Programming (OOP) uses a different set of programming languages than old procedural programming languages (C, Pascal, etc.). Everything in OOP is grouped as self sustainable “objects“. Hence, you gain re-usability by means of four main object-oriented programming concepts.

In order to clearly understand the object orientation, let’s take your “hand” as an example. The “hand” is a class. Your body has two objects of type hand, named left hand and right hand. Their main functions are controlled/ managed by a set of electrical signals sent through your shoulders (through an interface). So the shoulder is an interface which your body uses to interact with your hands. The hand is a well architected class. The hand is being re-used to create the left hand and the right hand by slightly changing the properties of it.

4.4. What is an Object?

An object can be considered a “thing” that can perform a set of related activities. The set of activities that the object performs defines the object’s behavior. For example, the hand can grip something or a Student (object) can give the name or address.

In pure OOP terms an object is an instance of a class.

4.5. What is a Class?

class.gif

A class is simply a representation of a type of object. It is the blueprint/ plan/ template that describe the details of an object. A class is the blueprint from which the individual objects are created. Class is composed of three things: a name, attributes, and operations.

Collapse | Copy Code
public class Student
{
}

According to the sample given below we can say that the student object, named objectStudent, has created out of the Student class.

Collapse | Copy Code
Student objectStudent = new Student();

In real world, you’ll often find many individual objects all of the same kind. As an example, there may be thousands of other bicycles in existence, all of the same make and model. Each bicycle has built from the same blueprint. In object-oriented terms, we say that the bicycle is an instance of the class of objects known as bicycles.

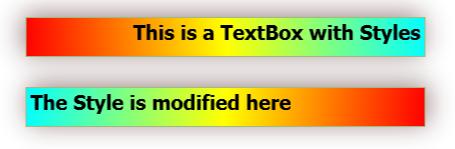
In the software world, though you may not have realized it, you have already used classes. For example, the TextBox control, you always used, is made out of the TextBox class, which defines its appearance and capabilities. Each time you drag a TextBox control, you are actually creating a new instance of the TextBox class.

4.6. How to identify and design a Class?

This is an art; each designer uses different techniques to identify classes. However according to Object Oriented Design Principles, there are five principles that you must follow when design a class,

  • SRP – The Single Responsibility Principle –
    A class should have one, and only one, reason to change.
  • OCP – The Open Closed Principle –
    You should be able to extend a classes behavior, without modifying it.
  • LSP – The Liskov Substitution Principle-
    Derived classes must be substitutable for their base classes.
  • DIP – The Dependency Inversion Principle-
    Depend on abstractions, not on concretions.
  • ISP – The Interface Segregation Principle-
    Make fine grained interfaces that are client specific.

For more information on design principles, please refer to Object Mentor.

Additionally to identify a class correctly, you need to identify the full list of leaf level functions/ operations of the system (granular level use cases of the system). Then you can proceed to group each function to form classes (classes will group same types of functions/ operations). However a well defined class must be a meaningful grouping of a set of functions and should support the re-usability while increasing expandability/ maintainability of the overall system.

In software world the concept of dividing and conquering is always recommended, if you start analyzing a full system at the start, you will find it harder to manage. So the better approach is to identify the module of the system first and then dig deep in to each module separately to seek out classes.

A software system may consist of many classes. But in any case, when you have many, it needs to be managed. Think of a big organization, with its work force exceeding several thousand employees (let’s take one employee as a one class). In order to manage such a work force, you need to have proper management policies in place. Same technique can be applies to manage classes of your software system as well. In order to manage the classes of a software system, and to reduce the complexity, the system designers use several techniques, which can be grouped under four main concepts named Encapsulation, Abstraction, Inheritance, and Polymorphism. These concepts are the four main gods of OOP world and in software term, they are called four main Object Oriented Programming (OOP) Concepts.

4.7. What is Encapsulation (or information hiding)?

The encapsulation is the inclusion within a program object of all the resources need for the object to function – basically, the methods and the data. In OOP the encapsulation is mainly achieved by creating classes, the classes expose public methods and properties. The class is kind of a container or capsule or a cell, which encapsulate the set of methods, attribute and properties to provide its indented functionalities to other classes. In that sense, encapsulation also allows a class to change its internal implementation without hurting the overall functioning of the system. That idea of encapsulation is to hide how a class does it but to allow requesting what to do.

class.gif

In order to modularize/ define the functionality of a one class, that class can uses functions/ properties exposed by another class in many different ways. According to Object Oriented Programming there are several techniques, classes can use to link with each other and they are named association, aggregation, and composition.

There are several other ways that an encapsulation can be used, as an example we can take the usage of an interface. The interface can be used to hide the information of an implemented class.

Collapse | Copy Code
IStudent myStudent = new LocalStudent();
IStudent myStudent = new ForeignStudent();

According to the sample above (let’s assume that LocalStudent and ForeignStudent are implemented by the IStudent interface) we can see how LocalStudent and ForeignStudent are hiding their, localize implementing information through the IStudent interface.

4.8. What is Association?

Association is a (*a*) relationship between two classes. It allows one object instance to cause another to perform an action on its behalf. Association is the more general term that define the relationship between two classes, where as the aggregation and composition are relatively special.

Collapse | Copy Code
public class StudentRegistrar
{
    public StudentRegistrar ();
    {
        new RecordManager().Initialize();
    }
}

In this case we can say that there is an association between StudentRegistrar and RecordManager or there is a directional association from StudentRegistrar to RecordManager or StudentRegistrar use a (*Use*) RecordManager. Since a direction is explicitly specified, in this case the controller class is the StudentRegistrar.

Association.gif

To some beginners, association is a confusing concept. The troubles created not only by the association alone, but with two other OOP concepts, that is association, aggregation and composition. Every one understands association, before aggregation and composition are described. The aggregation or composition cannot be separately understood. If you understand the aggregation alone it will crack the definition given for association, and if you try to understand the composition alone it will always threaten the definition given for aggregation, all three concepts are closely related, hence must study together, by comparing one definition to another. Let’s explore all three and see whether we can understand the differences between these useful concepts.

4.9. What is the difference between Association, Aggregation and Composition?

Association is a (*a*) relationship between two classes, where one class use another. But aggregation describes a special type of an association. Aggregation is the (*the*) relationship between two classes. When object of one class has an (*has*) object of another, if second is a part of first (containment relationship) then we called that there is an aggregation between two classes. Unlike association, aggregation always insists a direction.

Collapse | Copy Code
public class University
{
    private Chancellor  universityChancellor = new Chancellor();
}

aggregation.gif

In this case I can say that University aggregate Chancellor or University has an (*has-a*) Chancellor. But even without a Chancellor a University can exists. But the Faculties cannot exist without the University, the life time of a Faculty (or Faculties) attached with the life time of the University . If University is disposed the Faculties will not exist. In that case we called that University is composed of Faculties. So that composition can be recognized as a special type of an aggregation.

Composite.gif

Same way, as another example, you can say that, there is a composite relationship in-between a KeyValuePairCollection and a KeyValuePair. The two mutually depend on each other.

.Net and Java uses the Composite relation to define their Collections. I have seen Composition is being used in many other ways too. However the more important factor, that most people forget is the life time factor. The life time of the two classes that has bond with a composite relation mutually depend on each other. If you take the .net Collection to understand this, there you have the Collection Element define inside (it is an inner part, hence called it is composed of) the Collection, farcing the Element to get disposed with the Collection. If not, as an example, if you define the Collection and it’s Element to be independent, then the relationship would be more of a type Aggregation, than a Composition. So the point is, if you want to bind two classes with Composite relation, more accurate way is to have a one define inside the other class (making it a protected or private class). This way you are allowing the outer class to fulfill its purpose, while tying the lifetime of the inner class with the outer class.

So in summary, we can say that aggregation is a special kind of an association and composition is a special kind of an aggregation. (Association->Aggregation->Composition)

association_aggre_com.gif

4.10. What is Abstraction and Generalization?

Abstraction is an emphasis on the idea, qualities and properties rather than the particulars (a suppression of detail). The importance of abstraction is derived from its ability to hide irrelevant details and from the use of names to reference objects. Abstraction is essential in the construction of programs. It places the emphasis on what an object is or does rather than how it is represented or how it works. Thus, it is the primary means of managing complexity in large programs.

While abstraction reduces complexity by hiding irrelevant detail, generalization reduces complexity by replacing multiple entities which perform similar functions with a single construct. Generalization is the broadening of application to encompass a larger domain of objects of the same or different type. Programming languages provide generalization through variables, parameterization, generics and polymorphism. It places the emphasis on the similarities between objects. Thus, it helps to manage complexity by collecting individuals into groups and providing a representative which can be used to specify any individual of the group.

Abstraction and generalization are often used together. Abstracts are generalized through parameterization to provide greater utility. In parameterization, one or more parts of an entity are replaced with a name which is new to the entity. The name is used as a parameter. When the parameterized abstract is invoked, it is invoked with a binding of the parameter to an argument.

4.11. What is an Abstract class?

Abstract classes, which declared with the abstract keyword, cannot be instantiated. It can only be used as a super-class for other classes that extend the abstract class. Abstract class is the concept and implementation gets completed when it is being realized by a subclass. In addition to this a class can inherit only from one abstract class (but a class may implement many interfaces) and must override all its abstract methods/ properties and may override virtual methods/ properties.

Abstract classes are ideal when implementing frameworks. As an example, let’s study the abstract class named LoggerBase below. Please carefully read the comments as it will help you to understand the reasoning behind this code.

Collapse | Copy Code
public abstract class LoggerBase
{
    /// <summary>
    /// field is private, so it intend to use inside the class only
    /// </summary>
    private log4net.ILog logger = null; 

    /// <summary>
    /// protected, so it only visible for inherited class
    /// </summary>
    protected LoggerBase()
    {
        // The private object is created inside the constructor
        logger = log4net.LogManager.GetLogger(this.LogPrefix);
        // The additional initialization is done immediately after
        log4net.Config.DOMConfigurator.Configure();
    }

    /// <summary>
    /// When you define the property as abstract,
    /// it forces the inherited class to override the LogPrefix
    /// So, with the help of this technique the log can be made,
    /// inside the abstract class itself, irrespective of it origin.
    /// If you study carefully you will find a reason for not to have “set” method here.
    /// </summary>
    protected abstract System.Type LogPrefix
    {
        get;
    }

    /// <summary>
    /// Simple log method,
    /// which is only visible for inherited classes
    /// </summary>
    /// <param name="message"></param>
    protected void LogError(string message)
    {
        if (this.logger.IsErrorEnabled)
        {
            this.logger.Error(message);
        }
    }

    /// <summary>
    /// Public properties which exposes to inherited class
    /// and all other classes that have access to inherited class
    /// </summary>
    public bool IsThisLogError
    {
        get
        {
            return this.logger.IsErrorEnabled;
        }
    }
}

The idea of having this class as an abstract is to define a framework for exception logging. This class will allow all subclass to gain access to a common exception logging module and will facilitate to easily replace the logging library. By the time you define the LoggerBase, you wouldn’t have an idea about other modules of the system. But you do have a concept in mind and that is, if a class is going to log an exception, they have to inherit the LoggerBase. In other word the LoggerBase provide a framework for exception logging.

Let’s try to understand each line of the above code.

Like any other class, an abstract class can contain fields, hence I used a private field named logger declare the ILog interface of the famous log4net library. This will allow the Loggerbase class to control, what to use, for logging, hence, will allow changing the source logger library easily.

The access modifier of the constructor of the LoggerBase is protected. The public constructor has no use when the class is of type abstract. The abstract classes are not allowed to instantiate the class. So I went for the protected constructor.

The abstract property named LogPrefix is an important one. It enforces and guarantees to have a value for LogPrefix (LogPrefix uses to obtain the detail of the source class, which the exception has occurred) for every subclass, before they invoke a method to log an error.

The method named LogError is protected, hence exposed to all subclasses. You are not allowed or rather you cannot make it public, as any class, without inheriting the LoggerBase cannot use it meaningfully.

Let’s find out why the property named IsThisLogError is public. It may be important/ useful for other associated classes of an inherited class to know whether the associated member logs its errors or not.

Apart from these you can also have virtual methods defined in an abstract class. The virtual method may have its default implementation, where a subclass can override it when required.

All and all, the important factor here is that all OOP concepts should be used carefully with reasons, you should be able to logically explain, why you make a property a public or a field a private or a class an abstract. Additionally, when architecting frameworks, the OOP concepts can be used to forcefully guide the system to be developed in the way framework architect’s wanted it to be architected initially.

4.12. What is an Interface?

In summary the Interface separates the implementation and defines the structure, and this concept is very useful in cases where you need the implementation to be interchangeable. Apart from that an interface is very useful when the implementation changes frequently. Some say you should define all classes in terms of interfaces, but I think recommendation seems a bit extreme.

Interface can be used to define a generic template and then one or more abstract classes to define partial implementations of the interface. Interfaces just specify the method declaration (implicitly public and abstract) and can contain properties (which are also implicitly public and abstract). Interface definition begins with the keyword interface. An interface like that of an abstract class cannot be instantiated.

If a class that implements an interface does not define all the methods of the interface, then it must be declared abstract and the method definitions must be provided by the subclass that extends the abstract class. In addition to this an interfaces can inherit other interfaces.

The sample below will provide an interface for our LoggerBase abstract class.

Collapse | Copy Code
public interface ILogger
{
    bool IsThisLogError { get; }
}

4.13. What is the difference between a Class and an Interface?

In .Net/ C# a class can be defined to implement an interface and also it supports multiple implementations. When a class implements an interface, an object of such class can be encapsulated inside an interface.

If MyLogger is a class, which implements ILogger, there we can write

Collapse | Copy Code
ILogger log = new MyLogger();

A class and an interface are two different types (conceptually). Theoretically a class emphasis the idea of encapsulation, while an interface emphasis the idea of abstraction (by suppressing the details of the implementation). The two poses a clear separation from one to another. Therefore it is very difficult or rather impossible to have an effective meaningful comparison between the two, but it is very useful and also meaningful to have a comparison between an interface and an abstract class.

4.14. What is the difference between an Interface and an Abstract class?

There are quite a big difference between an interface and an abstract class, even though both look similar.

    • Interface definition begins with a keyword interface so it is of type interface
    • Abstract classes are declared with the abstract keyword so it is of type class
    • Interface has no implementation, but they have to be implemented.
    • Abstract class’s methods can have implementations and they have to be extended.
    • Interfaces can only have method declaration (implicitly public and abstract) and fields (implicitly public static)
    • Abstract class’s methods can’t have implementation only when declared abstract.
    • Interface can inherit more than one interfaces
    • Abstract class can implement more than one interfaces, but can inherit only one class
    • Abstract class must override all abstract method and may override virtual methods
    • Interface can be used when the implementation is changing
    • Abstract class can be used to provide some default behavior for a base class.
    • Interface makes implementation interchangeable
    • Interface increase security by hiding the implementation
    • Abstract class can be used when implementing framework
    • Abstract classes are an excellent way to create planned inheritance hierarchies and also to use as non-leaf classes in class hierarchies.

Abstract classes let you define some behaviors; they force your subclasses to provide others. For example, if you have an application framework, an abstract class can be used to provide the default implementation of the services and all mandatory modules such as event logging and message handling etc. This approach allows the developers to develop the application within the guided help provided by the framework.

However, in practice when you come across with some application-specific functionality that only your application can perform, such as startup and shutdown tasks etc. The abstract base class can declare virtual shutdown and startup methods. The base class knows that it needs those methods, but an abstract class lets your class admit that it doesn’t know how to perform those actions; it only knows that it must initiate the actions. When it is time to start up, the abstract class can call the startup method. When the base class calls this method, it can execute the method defined by the child class.

4.15. What is Implicit and Explicit Interface Implementations?

As mentioned before .Net support multiple implementations, the concept of implicit and explicit implementation provide safe way to implement methods of multiple interfaces by hiding, exposing or preserving identities of each of interface methods, even when the method signatures are the same.

Let’s consider the interfaces defined below.

Collapse | Copy Code
interface IDisposable
{
    void Dispose();
}

Here you can see that the class Student has implicitly and explicitly implemented the method named Dispose() via Dispose and IDisposable.Dispose.

Collapse | Copy Code
class Student : IDisposable
{
    public void Dispose()
    {
        Console.WriteLine("Student.Dispose");
    }

    void IDisposable.Dispose()
    {
        Console.WriteLine("IDisposable.Dispose");
    }
}

4.16. What is Inheritance?

Ability of a new class to be created, from an existing class by extending it, is called inheritance.

Inheritance.gif

Collapse | Copy Code
public class Exception
{
}

public class IOException : Exception
{
}

According to the above example the new class (IOException), which is called the derived class or subclass, inherits the members of an existing class (Exception), which is called the base class or super-class. The class IOException can extend the functionality of the class Exception by adding new types and methods and by overriding existing ones.

Just like abstraction is closely related with generalization, the inheritance is closely related with specialization. It is important to discuss those two concepts together with generalization to better understand and to reduce the complexity.

One of the most important relationships among objects in the real world is specialization, which can be described as the “is-a” relationship. When we say that a dog is a mammal, we mean that the dog is a specialized kind of mammal. It has all the characteristics of any mammal (it bears live young, nurses with milk, has hair), but it specializes these characteristics to the familiar characteristics of canis domesticus. A cat is also a mammal. As such, we expect it to share certain characteristics with the dog that are generalized in Mammal, but to differ in those characteristics that are specialized in cats.

The specialization and generalization relationships are both reciprocal and hierarchical. Specialization is just the other side of the generalization coin: Mammal generalizes what is common between dogs and cats, and dogs and cats specialize mammals to their own specific subtypes.

Similarly, as an example you can say that both IOException and SecurityException are of type Exception. They have all characteristics and behaviors of an Exception, That mean the IOException is a specialized kind of Exception. A SecurityException is also an Exception. As such, we expect it to share certain characteristic with IOException that are generalized in Exception, but to differ in those characteristics that are specialized in SecurityExceptions. In other words, Exception generalizes the shared characteristics of both IOException and SecurityException, while IOException and SecurityException specialize with their characteristics and behaviors.

In OOP, the specialization relationship is implemented using the principle called inheritance. This is the most common and most natural and widely accepted way of implement this relationship.

4.17. What is Polymorphisms?

Polymorphisms is a generic term that means ‘many shapes’. More precisely Polymorphisms means the ability to request that the same operations be performed by a wide range of different types of things.

At times, I used to think that understanding Object Oriented Programming concepts have made it difficult since they have grouped under four main concepts, while each concept is closely related with one another. Hence one has to be extremely careful to correctly understand each concept separately, while understanding the way each related with other concepts.

In OOP the polymorphisms is achieved by using many different techniques named method overloading, operator overloading and method overriding,

4.18. What is Method Overloading?

The method overloading is the ability to define several methods all with the same name.

Collapse | Copy Code
public class MyLogger
{
    public void LogError(Exception e)
    {
        // Implementation goes here
    }

    public bool LogError(Exception e, string message)
    {
        // Implementation goes here
    }
}

4.19. What is Operator Overloading?

The operator overloading (less commonly known as ad-hoc polymorphisms) is a specific case of polymorphisms in which some or all of operators like +, – or == are treated as polymorphic functions and as such have different behaviors depending on the types of its arguments.

Collapse | Copy Code
public class Complex
{
    private int real;
    public int Real
    { get { return real; } }

    private int imaginary;
    public int Imaginary
    { get { return imaginary; } }

    public Complex(int real, int imaginary)
    {
        this.real = real;
        this.imaginary = imaginary;
    }

    public static Complex operator +(Complex c1, Complex c2)
    {
        return new Complex(c1.Real + c2.Real, c1.Imaginary + c2.Imaginary);
    }
}

I above example I have overloaded the plus operator for adding two complex numbers. There the two properties named Real and Imaginary has been declared exposing only the required “get” method, while the object’s constructor is demanding for mandatory real and imaginary values with the user defined constructor of the class.

4.20. What is Method Overriding?

Method overriding is a language feature that allows a subclass to override a specific implementation of a method that is already provided by one of its super-classes.

A subclass can give its own definition of methods but need to have the same signature as the method in its super-class. This means that when overriding a method the subclass’s method has to have the same name and parameter list as the super-class’s overridden method.

Collapse | Copy Code
using System;
public class Complex
{
    private int real;
    public int Real
    { get { return real; } }

    private int imaginary;
    public int Imaginary
    { get { return imaginary; } }

    public Complex(int real, int imaginary)
    {
        this.real = real;
        this.imaginary = imaginary;
    }

    public static Complex operator +(Complex c1, Complex c2)
    {
        return new Complex(c1.Real + c2.Real, c1.Imaginary + c2.Imaginary);
    }

    public override string ToString()
    {
        return (String.Format("{0} + {1}i", real, imaginary));
    }
}

In above example I have extended the implementation of the sample Complex class given under operator overloading section. This class has one overridden method named “ToString”, which override the default implementation of the standard “ToString” method to support the correct string conversion of a complex number.

Collapse | Copy Code
Complex num1 = new Complex(5, 7);
Complex num2 = new Complex(3, 8);

// Add two Complex numbers using the
// overloaded plus operator
Complex sum = num1 + num2;

// Print the numbers and the sum
// using the overriden ToString method
Console.WriteLine("({0}) + ({1}) = {2}", num1, num2, sum);
Console.ReadLine();

4.21. What is a Use case?

A use case is a thing an actor perceives from the system. A use case maps actors with functions. Importantly, the actors need not be people. As an example a system can perform the role of an actor, when it communicate with another system.

usercase1.gif

In another angle a use case encodes a typical user interaction with the system. In particular, it:

  • Captures some user-visible function.
  • Achieves some concrete goal for the user.

A complete set of use cases largely defines the requirements for your system: everything the user can see, and would like to do. The below diagram contains a set of use cases that describes a simple login module of a gaming website.

usecaseLogin.gif

4.22. What is a Class Diagram?

A class diagrams are widely used to describe the types of objects in a system and their relationships. Class diagrams model class structure and contents using design elements such as classes, packages and objects. Class diagrams describe three different perspectives when designing a system, conceptual, specification, and implementation. These perspectives become evident as the diagram is created and help solidify the design.

The Class diagrams, physical data models, along with the system overview diagram are in my opinion the most important diagrams that suite the current day rapid application development requirements.

UML Notations:

notation.jpg

4.23. What is a Package Diagram?

Package diagrams are used to reflect the organization of packages and their elements. When used to represent class elements, package diagrams provide a visualization of the name-spaces. In my designs, I use the package diagrams to organize classes in to different modules of the system.

4.24. What is a Sequence Diagram?

A sequence diagrams model the flow of logic within a system in a visual manner, it enable both to document and validate your logic, and are used for both analysis and design purposes. Sequence diagrams are the most popular UML artifact for dynamic modeling, which focuses on identifying the behavior within your system.

4.25. What is two-tier architecture?

The two-tier architecture is refers to client/ server architectures as well, the term client/ server was first used in the 1980s in reference to personal computers (PCs) on a network. The actual client/ server model started gaining acceptance in the late 1980s, and later it was adapted to World Wide Web programming.

According to the modern days use of two-tier architecture the user interfaces (or with ASP.NET, all web pages) runs on the client and the database is stored on the server. The actual application logic can run on either the client or the server. So in this case the user interfaces are directly access the database. Those can also be non-interface processing engines, which provide solutions to other remote/ local systems. In either case, today the two-tier model is not as reputed as the three-tier model. The advantage of the two-tier design is its simplicity, but the simplicity comes with the cost of scalability. The newer three-tier architecture, which is more famous, introduces a middle tier for the application logic.

2-Tier.jpg

4.26. What is three-tier architecture?

The three tier software architecture (also known as three layer architectures) emerged in the 1990s to overcome the limitations of the two tier architecture. This architecture has aggressively customized and adopted by modern day system designer to web systems.

Three-tier is a client-server architecture in which the user interface, functional process logic, data storage and data access are developed and maintained as independent modules, some time on separate platforms. The term “three-tier” or “three-layer“, as well as the concept of multi-tier architectures (often refers to as three-tier architecture), seems to have originated within Rational Software.

3-Tier.jpg

The 3-Tier architecture has the following three tiers.

  1. Presentation Tier or Web Server: User Interface, displaying/ accepting data/ input to/ from the user
  2. Application Logic/ Business Logic/ Transaction Tier or Application Server: Data validation, acceptability check before being added to the database and all other business/ application specific operations
  3. Data Tier or Database server: Simple reading and writing method to database or any other storage, connection, command, stored procedures etc

4.27. What is MVC architecture?

The Model-View-Controller (MVC) architecture separates the modeling of the domain, the presentation, and the actions based on user input into three separate classes.

Unfortunately, the popularity of this pattern has resulted in a number of faulty usages; each technology (Java, ASP.NET etc) has defined it in their own way making it difficult to understand. In particular, the term “controller” has been used to mean different things in different contexts. The definitions given bellow are the closes possible ones I found for ASP.NET version of MVC.

mvc.jpg

  1. Model: DataSet and typed DataSet (some times business object, object collection, XML etc) are the most common use of the model.
  2. View: The ASPX and ASCX files generally handle the responsibilities of the view.
  3. Controllers: The handling of events or the controlling is usually done in the code-behind class.

In a complex n-tier distributed system the MVC architecture place the vital role of organizing the presentation tier of the system.

4.28. What is SOA?

A service-oriented architecture is essentially a collection of services. These services communicate with each other. The communication can involve either simple data passing or it could involve two or more services coordinating some activity. Some means of connecting services to each other is needed.

The .Net technology introduces the SOA by mean of web services.

SOA.gif

The SOA can be used as the concept to connect multiple systems to provide services. It has it’s great share in the future of the IT world.

According to the imaginary diagram above, we can see how the Service Oriented Architecture is being used to provide a set of centralized services to the citizens of a country. The citizens are given a unique identifying card, where that card carries all personal information of each citizen. Each service centers such as shopping complex, hospital, station, and factory are equipped with a computer system where that system is connected to a central server, which is responsible of providing service to a city. As an example when a customer enter the shopping complex the regional computer system report it to the central server and obtain information about the customer before providing access to the premises. The system welcomes the customer. The customer finished the shopping and then by the time he leaves the shopping complex, he will be asked to go through a billing process, where the regional computer system will manage the process. The payment will be automatically handled with the input details obtain from the customer identifying card.

The regional system will report to the city (computer system of the city) while the city will report to the country (computer system of the country).

4.29. What is the Data Access Layer?

The data access layer (DAL), which is a key part of every n-tier system, is mainly consist of a simple set of code that does basic interactions with the database or any other storage device. These functionalities are often referred to as CRUD (Create, Retrieve, Update, and Delete).

The data access layer need to be generic, simple, quick and efficient as much as possible. It should not include complex application/ business logics.

I have seen systems with lengthy, complex store procedures (SP), which run through several cases before doing a simple retrieval. They contain not only most part of the business logic, but application logic and user interface logic as well. If SP is getting longer and complicated, then it is a good indication that you are burring your business logic inside the data access layer.

4.30. What is the Business Logic Layer?

I know for a fact that this is a question for most, but from the other hand by reading many articles I have become aware that not everyone agrees to what business logic actually is, and in many cases it’s just the bridge in between the presentation layer and the data access layer with having nothing much, except taking from one and passing to the other. In some other cases, it is not even been well thought out, they just take the leftovers from the presentation layer and the data access layer then put them in another layer which automatically is called the business logic layer. However there are no god said things that cannot be changed in software world. You can change as and when you feel comfortable that the method you apply is flexible enough to support the growth of your system. There are many great ways, but be careful when selecting them, they can over complicating the simple system. It is a balance one needs to find with their experience.

As a general advice when you define business entities, you must decide how to map the data in your tables to correctly defined business entities. The business entities should meaningfully define considering various types of requirements and functioning of your system. It is recommended to identify the business entities to encapsulate the functional/ UI (User Interface) requirements of your application, rather than define a separate business entity for each table of your database. For example, if you want to combine data from couple of table to build a UI (User Interface) control (Web Control), implement that function in the Business Logic Layer with a business object that uses couple of data object to support with your complex business requirement.

4.31. What is Gang of Four (GoF) Design Patterns?

The Gang of Four (GoF) patterns are generally considered the foundation for all other patterns. They are categorized in three groups: Creational, Structural, and Behavioral. Here you will find information on these important patterns.

Creational Patterns

      • Abstract Factory Creates an instance of several families of classes
      • Builder Separates object construction from its representation
      • Factory Method Creates an instance of several derived classes
      • Prototype A fully initialized instance to be copied or cloned
      • Singleton A class of which only a single instance can exist

Structural Patterns

      • Adapter Match interfaces of different classes
      • Bridge Separates an object’s interface from its implementation
      • Composite A tree structure of simple and composite objects
      • Decorator Add responsibilities to objects dynamically
      • Facade A single class that represents an entire subsystem
      • Flyweight A fine-grained instance used for efficient sharing
      • Proxy An object representing another object

Behavioral Patterns

    • Chain of Resp. A way of passing a request between a chain of objects
    • Command Encapsulate a command request as an object
    • Interpreter A way to include language elements in a program
    • Iterator Sequentially access the elements of a collection
    • Mediator Defines simplified communication between classes
    • Memento Capture and restore an object’s internal state
    • Observer A way of notifying change to a number of classes
    • State Alter an object’s behavior when its state changes
    • Strategy Encapsulates an algorithm inside a class
    • Template Method Defer the exact steps of an algorithm to a subclass
    • Visitor Defines a new operation to a class without change

4.32. What is the difference between Abstract Factory and Builder design patterns?

The two design patterns are fundamentally different. However, when you learn them for the first time, you will see a confusing similarity. So that it will make harder for you to understand them. But if you continue to study eventually, you will get afraid of design patterns too. It is like infant phobia, once you get afraid at your early age, it stays with you forever. So the result would be that you never look back at design patterns again. Let me see whether I can solve this brain teaser for you.

In the image below, you have both design pattern listed in. I am trying to compare the two one on one to identify the similarities. If you observe the figure carefully, you will see an easily understandable color pattern (same color is used to mark the classes that are of similar kind).

Factory and Builder

Please follow up with the numbers in the image when reading the listing below.

Mark #1: Both patterns have used a generic class as the entry-class. The only difference is the name of the class. One pattern has named it as “Client”, while the other named it as “Director”.
Mark #2: Here again the difference is the class name. It is “AbstractFactory” for one and “Builder” for the other. Additionally both classes are of type abstract.
Mark #3: Once again both patterns have defined two generic (WindowsFactory & ConcreteBuilder) classes. They both have created by inheriting their respective abstract class.
Mark #4: Finally, both seem to produce some kind of a generic output.

Now, where are we? Aren’t they looking almost identical? So then why are we having two different patterns here?

Let’s compare the two again side by side for one last time, but this time, focusing on the differences.

  • Abstract Factory: Emphasizes a family of product objects (either simple or complex)
  • Builder: Focuses on constructing a complex object step by step
  • Abstract Factory: Focus on *what* is made
  • Builder: Focus on *how* it is made
  • Abstract Factory: Focus on defining many different types of *factories* to build many *products*, and it is not a one builder for just one product
  • Builder: Focus on building a one complex but one single *product*
  • Abstract Factory: Defers the choice of what concrete type of object to make until run time
  • Builder: Hide the logic/ operation of how to compile that complex object
  • Abstract Factory: *Every* method call creates and returns different objects
  • Builder: Only the *last* method call returns the object, while other calls partially build the object

Sometimes creational patterns are complementary: So you can join one or many patterns when you design your system. As an example builder can use one of the other patterns to implement which components get built or in another case Abstract Factory, Builder, and Prototype can use Singleton in their implementations. So the conclusion would be that the two design patterns exist to resolve two type of business problems, so even though they look similar, they are not.

I hope that this shed some light to resolve the puzzle. If you still don’t understand it, then this time it is not you, it has to be me and it is since that I don’t know how to explain it.

5. What is the Conclusion?

I don’t think, that it is realistic trying to make a programming language be everything to everybody. The language becomes bloated, hard to learn, and hard to read if everything plus the kitchen sink is thrown in. In another word every language has their limitations. As system architect and designer we should be able to fully and more importantly correctly (this also mean that you shouldn’t use a ballistic missile to kill a fly or hire FBI to catch the fly) utilize the available tools and features to build usable, sustainable, maintainable and also very importantly expandable software systems, that fully utilize the feature of the language to bring a competitively advance system to their customers. In order to do it, the foundation of a system places a vital role. The design or the architecture of a software system is the foundation. It hold the system together, hence designing a system properly (this never mean an *over* desinging) is the key to the success. When you talk about designing a software system, the correct handling of OOP concept is very important. I have made the above article richer with idea but still kept it short so that one can learn/ remind all of important concept at a glance. Hope you all will enjoy reading it.

Finally, after reading all these, one may argue with me saying that anybody can write all these concept definitions but do I know how/ when to apply them in real world systems. So for them to see these concepts being applied in real world systems, please check the source code of the latest of my open-source project name Rocket Framework.

Note: For newbies Rocket Framework is going to be little too advance but check it, use it and review it if you have any questions/ criticisms around my design don’t hesitate to shoot them here or there..

6. What I Referred?

IIS Documentation


Introduction

When request come from client to the server a lot of operation is performed before sending response to the client. This is all about how IIS Process the request.  Here I am not going to describe the Page Life Cycle and there events, this article is all about the operation of IIS Level.  Before we start with the actual details, let’s start from the beginning so that each and everyone understand it’s details easily.  Please provide your valuable feedback and suggestion to improve this article.

What is Web Server ?

When we run our ASP.NET Web Application from visual studio IDE, VS Integrated ASP.NET Engine is responsible to execute all kind of asp.net requests and responses.  The process name is “WebDev.WebServer.Exe” which actually take care of all request and response of an web application which is running from Visual Studio IDE.

Now, the name “Web Server” come into picture when we want to host the application on a centralized location and wanted to access from many locations. Web server is responsible for handle all the requests that are coming from clients, process them and provide the responses.

What is IIS ?

IIS (Internet Information Server) is one of the most powerful web servers from Microsoft that is used to host your ASP.NET Web application. IIS has it’s own ASP.NET Process Engine  to handle the ASP.NET request. So, when a request comes from client to server, IIS takes that request and  process it and send response back to clients.

Request Processing :

Hope, till now it’s clear to you that what is Web server and IIS is and what is the use of them. Now let’s have a look how they do things internally. Before we move ahead, you have to know about two main concepts

1.    Worker Process
2.    Application Pool
Worker Process:  Worker Process (w3wp.exe) runs the ASP.Net application in IIS. This process is responsible to manage all the request and response that are coming from client system.  All the ASP.Net functionality runs under the scope of worker process.  When a request comes to the server from a client worker process is responsible to generate the request and response. In a single word we can say worker process is the heart of ASP.NET Web Application which runs on IIS.

Application Pool:  Application pool is the container of worker process.  Application pools is used to separate sets of IIS worker processes that share the same configuration.  Application pools enables a better security, reliability, and availability for any web application.  The worker process serves as the process boundary that separates each application pool so that when one worker process or application is having an issue or recycles, other applications or worker processes are not affected. This makes sure that a particular web application doesn’t not impact other web application as they they are configured into different application pools.

Application Pool with multiple worker process is called “Web Garden”.

Now, I have covered all the basic stuff like Web server, Application Pool, Worker process. Now let’s have look how IIS process the request when a new request comes up from client.

If we look into the IIS 6.0 Architecture, we can divided them into Two Layer
1.    Kernel Mode
2.    User Mode

Now, Kernel mode is introduced with IIS 6.0, which contains the HTTP.SYS.  So whenever a request comes from Client to Server, it will hit HTTP.SYS First.

Now, HTTP.SYS is Responsible for pass the request to particular Application pool. Now here is one question, How HTTP.SYS comes to know where to send the request?  This is not a random pickup. Whenever we creates a new Application Pool, the ID of the Application Pool is being generated and it’s registered with the HTTP.SYS. So whenever HTTP.SYS Received the request from any web application, it checks for the Application Pool and based on the application pool it send the request.

So, this was the first steps of IIS Request Processing.

Till now, Client Requested for some information and request came to the Kernel level of IIS means at HTTP.SYS. HTTP.SYS has been identified the name of the application pool where to send. Now, let’s see how this request moves from HTTP.SYS to Application Pool.

In User Level of IIS, we have Web Admin Services (WAS) which takes the request from HTTP.SYS and pass it to the respective application pool.

When Application pool receive the request, it simply pass the request to worker process (w3wp.exe) . The worker process “w3wp.exe” looks up the URL of the request in order to load the correct ISAPI extension. ISAPI extensions are the IIS way to handle requests for different resources. Once ASP.NET is installed, it installs its own ISAPI extension (aspnet_isapi.dll) and adds the mapping into IIS.

Note : Sometimes if we install IIS after installing asp.net, we need to register the extension with IIS using aspnet_regiis command.

When Worker process loads the aspnet_isapi.dll, it start an HTTPRuntime, which is the entry point of an application. HTTPRuntime is a class which calls the ProcessRequest method to start Processing.

When this methods called, a new instance of HTTPContext is been created.  Which is accessible using HTTPContext.Current  Properties. This object still remains alive during life time of object request.  Using HttpContext.Current we can access some other objects like Request, Response, Session etc.

After that HttpRuntime load an HttpApplication object with the help of  HttpApplicationFactory class.. Each and every request should pass through the corresponding HTTPModule to reach to HTTPHandler, this list of module are configured by the HTTPApplication.

Now, the concept comes called “HTTPPipeline”. It is called a pipeline because it contains a set of HttpModules ( For Both Web.config and Machine.config level) that intercept the request on its way to the HttpHandler. HTTPModules are classes that have access to the incoming request. We can also create our own HTTPModule if we need to handle anything during upcoming request and response.

HTTP Handlers are the endpoints in the HTTP pipeline. All request that are passing through the HTTPModule should reached to    HTTPHandler.  Then  HTTP Handler  generates the output for the requested resource. So, when we requesting for any aspx web pages,   it returns the corresponding HTML output.

All the request now passes from  httpModule to  respective HTTPHandler then method and the ASP.NET Page life cycle starts.  This ends the IIS Request processing and start the ASP.NET Page Lifecycle.

Conclusion

When client request for some information from a web server, request first reaches to HTTP.SYS of IIS. HTTP.SYS then send the request to respective  Application Pool. Application Pool then forward the request to worker process to load the ISAPI Extension which will create an HTTPRuntime Object to Process the request via HTTPModule and HTTPHanlder. After that the ASP.NET Page LifeCycle events starts.

This was just overview of IIS Request Processing to let Beginner’s know how the request get processed in backend.  If you want to learn in details please check the link for Reference and further Study section.

Rich Custom Error Handling with ASP.NET


Introduction

The quality of a site should be measured not only by how well it works, but by how gracefully it fails. While developers need detailed error reports while debugging, visitors to the site should be shielded from these. Technical errata only serve to confuse, disappoint, and reveal cracks in the armor.

If an error page is displayed, it should serve both developers and end-users without sacrificing aesthetics. An ideal error page maintains the look and feel of the site, offers the ability to provide detailed errors to internal developers—identified by IP address—and at the same time offers no detail to end users. Instead, it gets them back to what they were seeking—easily and without confusion. The site administrator should be able to review errors encountered either by e-mail or in the server logs, and optionally be able to receive feedback from users who run into trouble. Is this the stuff of dreams? No more.

There are several obstacles standing between the current built-in features of ASP.NET 1.1 and realizing the ideal. For one, the built-in detailed error page is fixed and cannot be customized. Further, a custom error page (as set in web.config) does not have access to the last error thrown, so it is really only useful to make the apology prettier. While thecustomErrors tag in web.config has a property to provide the custom page to external users and the detailed error page only to the local user (mode=RemoteOnly), how many developers debug at the server console?

All these problems can be solved, but first it helps to understand the basics. Peter Bromberg wrote two resources on exception handling that everyone should read as a prerequisite for this article: Documenting Exceptional Developers and Build a Really Useful ASP.NET Exception Engine. In addition, source code is provided with this article (click the link near the top of this page) for a complete rich custom error system. As with my previous MSDN article, the sample is from my favorite fake Swedish journal of finance: Fjorbes Online. All these online resources will introduce you to the basics. Now let’s see how to put it all together to bring error handling from the dark ages to the space age.

Errors Raise Exceptions

When errors happen, an exception is raised or thrown. There are three layers at which you may trap and deal with an exception: in a try…catch…finally block, at the Page level, or at the Application level. The first two happen right inside a page’s code, and code for application events is kept inside global.asax.

The Exception object contains information about the error, and as the event bubbles up through the layers, it is wrapped in further detail. In rough terms, the Application_Errorexception contains the Page_Error exception, which expands on the base Exception, which triggered the bubbling in the first place.

The Exception Class

Not surprisingly, the call to get the last error is Server.GetLastError() and it returns an object of type Exception:

   Dim err As Exception = Server.GetLastError()

You will find an Exception class reference here. Some of the properties and methods of the Exception class are more useful than others. (See Table 1.)

Table 1. Exception class properties and methods rated for usefulness

Property / Method() Return Type Description
Message String The error message. Useful. Available with debugging on or off.
Source String The application or object that caused the error. Not of much use when an .aspx file fails, as .NET generates a random name when it compiles an .aspx into IL (for example, “MyPage.aspx” can become “ecpgatxa”). Reasonably useful for debugging classes and controls.
StackTrace String When execution ends, the stack is unwound. This means that every call from the original page request, down to the line that triggered the error, is popped off the execution stack and noted. Happily, even line numbers are recorded in the base Exception when debugging is turned on. Only the method name is reported when debugging is off. This is highly useful.
TargetSite MethodBase The method that threw the Exception. This also shows up in the StackTrace. It is not as useful on its own.
HelpLink String Can hold a URL that might help the user, but usually doesn’t. Consider implementing it when throwing custom exceptions.
InnerException Exception The next error in the StackTrace. You can use InnerException to drill down through the complete list of exceptions to the originalException.
GetBaseException() Exception The Exception describing the original error. Since the original error might be wrapped up in the depths of InnerException, this method is essential to cut to the chase.
ToString() String Concatenates the above properties into a single string.

To see how the Exception looks as it bubbles up through each layer, consider the following sample Page_Load (with debugging turned on):

Sample Microsoft® Visual Basic® code

Sub Page_Load(ByVal src As Object, ByVal e As EventArgs)
   Throw New ApplicationException("This is an unhandled exception.")
End Sub

Try…Catch…Fail (Exception.Source=” yk1wsaam”)

Message: "This is an unhandled exception."

Stack Trace

at ASP.Default_aspx.Page_Load(Object src, EventArgs e) in C:\dev\CustomErrors\Default.aspx:line 5

Page_Error (Exception.Source=” yk1wsaam”)

Message: "This is an unhandled exception."

Stack Trace

at ASP.Default2_aspx.Page_Load(Object src, EventArgs e) in C:\dev\CustomErrors\Default.aspx:line 5 
at System.Web.UI.Control.OnLoad(EventArgs e) 
at System.Web.UI.Control.LoadRecursive() 
at System.Web.UI.Page.ProcessRequestMain()

Application_Error (Exception.Source=”System.Web”)

Message: "Exception of type System.Web.HttpUnhandledException was thrown."

Stack Trace

at System.Web.UI.Page.HandleError(Exception e) 
at System.Web.UI.Page.ProcessRequestMain() 
at System.Web.UI.Page.ProcessRequest() 
at System.Web.UI.Page.ProcessRequest(HttpContext context) 
at System.Web.CallHandlerExecutionStep.System.Web.HttpApplication+IExecutionStep.Execute() 
at System.Web.HttpApplication.ExecuteStep(IExecutionStep step, Boolean& completedSynchronously)

At the Try…Catch…Fail layer, only the immediate Exception exists and Exception.Source is a random string of characters that ASP.NET uses to identify the IL version of Default.aspx.

At the Page level, the stack has unwound to show that the error happened during Page.ProcessRequestMain.

At the Application layer, something interesting happens. The Source changes to the slightly meaningful, “System.Web.” Everything above Page.ProcessRequestMain from the Page level exception has been rolled into the Page.HandleError(exception e) line. At the Application layer, that detail is still available by either using InnerException or getting straight to the original exception with GetBaseException().

Try…Catch…Finally

The sooner you catch and resolve an error, the better. There is a reason they are called exceptions and not rules. In most cases, you can stop problems before they become exceptions with simple validation. FileIO.File.Exists and String.Empty are your friends. When writing a new class, always provide a way to validate data. For example, this article’s sample code includes an IP address class (IPAddress.vb). While methods IsInRangeToLong, and ToIPAddress can throw exceptions, the Validate and IsEmptyOrZero functions do not. No one should rely on Try…Catch…Fail for validation.

When writing a line or block of code that could fail based on an uncontrollable condition, such as an unavailable object (like a missing database connection or Web service), it should be wrapped with Try…Catch…Finally.

Inside the Catch block, you have the option of throwing the exception higher to a Page and perhaps an Application error handler. While you can still recover gracefully (that is, without an apology) inside a Page_Error handler, you are not likely to write one for every page. No, the main reason to throw the Exception higher than the Catch block is to perform notification or logging in an Application_Error handler.

When throwing an Exception higher, don’t:

Throw New ApplicationException(e)

Do:

Throw

The former is the syntax for a brand new custom Exception. In a Catch you already have one in front of you. The latter is all you need to send the current Exception merrily up the chain of command for further handling. If you must add your own two cents, you can always:

   Catch e As System.Exception
      Throw New System.ApplicationException("My Two Cents", e)

This creates a new Exception that wraps up the original error as its InnerException. Now for a proper demonstration of Try…Catch…Finally.

Visual Basic:

Dim Conn as New _
SqlConnection("Server=sql.mySite.com;uid=myUser;password=myPass")
Dim Cmd As New _
SqlCommand("SELECT Title, URL FROM Article ORDER BY Title", Conn)
Dim IsDbAvailable as Boolean = True
try
   ' The database may not be available
Conn.Open
ArticleGrid.DataSource = Cmd.ExecuteReader
ArticleGrid.DataBind
catch e as Exception
   ' Executed if an error occurs
   IsDbAvailable = False
   Trace.Write ("Database unavailable with Message: ", e.Message)
Trace.Write ("Stack Trace: ", e.StackTrace)

   ' Throw the exception higher for logging and notification
   Throw
finally
   ' If any clean-up is required for either case (unmanaged objects 
   ' left open, etc.), do it here.
Conn.Close()
end try

C#:

New SqlConnection("Server=sql.mySite.com;uid=myUser;password=myPass") Conn;
New SqlCommand("SELECT Title, URL FROM Article ORDER BY Title", Conn) Cmd;

Boolean IsDbAvailable = True;
try {
   // The database may not be available
Conn.Open();
ArticleGrid.DataSource = Cmd.ExecuteReader();
ArticleGrid.DataBind();
}
catch (e as Exception) {
   // Executed if an error occurs
   IsDbAvailable = False;
   Trace.Write ("Database unavailable with Message: ", e.Message);
   Trace.Write ("Stack Trace: ", e.StackTrace);

   // Throw the exception higher for logging and notification
   throw;
}
finally {
   /* If any clean-up is required for either case (unmanaged objects 
      left open, etc.), do it here. */
   Conn.Close ()
}

You can have multiple Catch blocks, each overloaded to catch a different Exception type (ExceptionIndexOutOfRangeExceptionNullReferenceException, and so on). Chris Sully wrote an article, Error Handling in ASP.NET…, which both provides a reference table of exception types and makes terrific further reading.

Before going on, note that there is a school of thought that says you should always throw an exception higher, that “swallowing” the exception is a bad idea. The reasoning is that exceptions should be visible and logged so that they can be guarded against in the future (with improved infrastructure, scalability, and so on), and that any instances that might be swallowed could be avoided with better programming. This happens to be true. Swallowing an exception is fine while debugging, but production code should always throw exceptions higher. Then, whenever preventable exceptions show up in the logs, you can apply some validation to ensure they won’t happen again.

Page_Error

Page_Error and Application_Error are similar. They take the same arguments, and they can even contain the same code. In fact a Page_Error section on a test page is a great way to debug code intended for Application_Error.

Their differences are few. One goes inside the .aspx file (or its code-behind), and the other inside global.asax (or an IHttpHandler class assembly). Differences between their stack traces were noted earlier, but if you always use GetBaseException(), then you will always have the original error, making this difference irrelevant. Another point to note is that in Page_Error you can prevent an exception from bubbling up further on to Application_Error by invoking Context.ClearError(). While useful for debugging (to avoid clogging the error log), this is not good practice in production code.

The following sample code adds the error to the trace information. The page will not finish loading once the exception is raised, so a brief apology is presented. Note that this simply shows the mechanics of Page_Error; actually helping the user out is an exercise left to the reader.

Visual Basic:

Sub Page_Load(ByVal src As Object, ByVal args As EventArgs)
   Throw New ApplicationException("This is an unhandled exception.")
End Sub

Sub Page_Error(ByVal src As Object, ByVal args As EventArgs) Handles MyBase.Error
   Dim e As System.Exception = Server.GetLastError()
   Trace.Write("Message", e.Message)
   Trace.Write("Source", e.Source)
   Trace.Write("Stack Trace", e.StackTrace)
   Response.Write("Sorry, an error was encountered.")
Context.ClearError()
End Sub

C#:

void Page_Load(Object src, EventArgs args) {
   // raise an intentional exception to get the ball rolling
   throw new ApplicationException("This is an unhandled exception.");
}

void Page_Error(Object sender, EventArgs args) {
   Response.Write("Error:\n");
   Exception e = Server.GetLastError();
   Trace.Write("Message",e.Message);
   Trace.Write("Source",e.Source);
   Trace.Write("Stack Trace",e.StackTrace);
Response.Write("Sorry, an error was encountered.");
   Context.ClearError();
}

Some people believe that putting code into an override of the Page‘s OnError event is equivalent to putting it in the Page_Error event. It isn’t. OnError hands control to a privateHandleError method. This is where ASP.NET checks whether customErrors is turned on and redirects when an exception is raised. It is where ASP.NET checks whether tracing is turned on and adds its own bit about the exception just raised. The main reason to override OnError is to replace this behavior with your own (described later). There is no good reason to put other code there. If someone does decide to turn on the built-in customErrors, code sitting in OnError will get in the way. If someone decides to add code toPage_Error it will not fire, as OnError fires first. To do error-handling at the Page level, use Page_Error.

global.asax: Application_Error

Generating e-mail notification, logging errors to the Event Log, and the structure of global.asax are covered wonderfully in many books and articles. Here are two good references:

The source code provided with the article implements these in global.asax and uses these web.config declarations:

<appSettings>
  <add key="customErrorAutomaticLogging" value = "On/Off" />
  <add key="customErrorAutomaticEmail" value="On/Off"/>
  <add key="customErrorEmailAddress" value="errors@mySite.com" />
</appSettings>

The interesting part is the construction of rich error messages.

Rich Custom Error Pages

There are four pieces to the puzzle:

  1. Configuring behavior in web.config. The choices are either to use the built-in customErrors tag with its mode and defaultRedirect properties, or to build custom settings in the appSettings section.
  2. Capturing, logging, and storing the Exception (in global.asax). The Exception needs to be stored inside an object that will persist until the custom error page. Possibilities are: ApplicationContextCookies, and QueryString. Other notification (e-mail, pager, and so on) can occur here too.
  3. Passing control from global.asax to the custom error page. Methods include using the built-in customErrors method, Server.Transfer(), or Response.Redirect().
  4. Retrieving and displaying the custom error message. Logic to display detailed information only to certain IP addresses may be included here.

Aa479319.customerrors_01(en-us,MSDN.10).gif


Figure 1. Flow of custom error handler

Unfortunately, you cannot pick and choose among all these options; some can only be implemented certain ways. For example, you cannot store the Exception in Context.Itemsand retrieve it after a Response.Redirect() since the Redirect() creates a brand new Context. The Exception would disappear. Here is a list of which storage baskets work with which control-passing methods:

Storage Basket Control-passing methods that work
Application Response.Redirect()Server.Transfer(), or customErrors:defaultRedirect
Cookies Response.Redirect()Server.Transfer(), or customErrors:defaultRedirect
ContextSession Server.Transfer()
QueryString Response.Redirect() or Server.Transfer()

While Application works with all three, it does not scale without a way to identify which session triggered the error. If two users trigger nearly simultaneous errors, you do not want one to overwrite the other. An advantage of Application is that it can store the complete Exception object.

Cookie storage also works with all three, and the client that triggered the error is guaranteed to see the proper error message. The caveats are that cookies must be enabled on the client, and they place an extra burden on bandwidth, which raises a scalability issue. Since you can only store strings and not complete objects to a cookie, you need to decide which strings to pass. XML serialization of an Exception is prevented by internal security issues, but binary or custom serialization is an option.

Context and Session, while limited to Server.Transfer(), both provide the advantage that the entire Exception object may be stored, without the client identification steps required to store the object to Application.

QueryString is an interesting option first described by Donny Mack in ASP.NET: Tips, Tutorials and Code (Mitchell, Mack, Walther, et al., SAMS Publishing, 2001). While you can’t stuff a complete Exception into QueryString and must choose which strings to pass, it does avoid local storage overhead completely and would seem to scale the best.

The sample code provided with this article implements all of these methods except Session, which would not be an improvement on Context.

Implementation

Now let’s look in more detail at the four steps mentioned above to construct rich custom error pages.

Configuring Behavior

The customErrors setting has three options for the mode property: On, Off, and RemoteOnly. The defaultRedirect property sets the custom error page. You can usecustomErrors in combination with your own appSettings, which you might do to control events in global.asax (like event logging). ASP.NET transfers control from global.asax to the custom page by generating a default OnError method in the Page‘s event cycle. You can replace the generated method with your own. The code goes something like this (if “myErrorPage.aspx” is the defaultRedirect value):

Visual Basic:

Protected Overrides Sub OnError(ByVal args As EventArgs)
    Response.Redirect("myErrorPage.aspx?aspxerrorpath=" & _
        Request.Path, True)
End Sub

C#:

protected override void OnError(EventArgs args) {
    Response.Redirect("myErrorPage.aspx?aspxerrorpath=" + 
        Request.Path, true);
}

The True tells ASP.NET to end the current request and proceed. Omitting it would imply the default false, and require an extra line to explicitly call Response.End.

Unfortunately, there is no easy way to override the Page OnError event for all pages on a site (the ideal way to replace customErrors), short of subclassing Page, which would require a new reference at the top of each page. The source code provided uses a different method, relying instead on custom appSettings inside web.config:

   <appSettings>
      <add key="customErrorAutomaticLogging" value="On/Off" />
      <add key="customErrorAutomaticEmail" value="On/Off" />

      <add key="customErrorMethod" 
value="Application/Context/Cookie/QueryString/Off" />
      <add key="customErrorPage" value="myErrorPage.aspx" />
<add key="customErrorBranchMethod" value="Redirect/Transfer" />
      <add key="customErrorAllowReport" value="On/Off" />
      <add key="customErrorEmailAddress" value="errors@mySite.com" />
</appSettings>

Using appSettings in code is as simple as this:

if (System.Configuration.ConfigurationSettings.AppSettings _
("customErrorAutomaticLogging").ToLower) = "on"

Settings can be added for other functions. For example, you might need to define a connection string for a central error log on a particular server.

Capturing, Logging, and Storing

The top of global.asax imports three namespaces: System.IOSystem.Diagnostics, and Msdn.ErrorIO. The Msdn.ErrorIO class is provided in the download as ErrorIO.vb.

This line of Application_Error captures the Exception and converts it to a string for logging or notification:

   Dim objError As Exception = Server.GetLastError.GetBaseException

In C# this is written over two lines:

   Exception objError = Server.GetLastError();
objError = objError.GetBaseException();

It was shown that the Page and Application layers stuff the original Exception in their own Exception wrappers as the call stack unwinds. While Server.GetLastError returns this whole wrapped package, GetBaseException pulls out the original Exception that interrupted execution.

The error is next logged and e-mailed to an administrator depending on web.config settings (see the section, global.asax: Application_Error). Functions WriteErrorToLog() andEmailError() are included in global.asax. Note that their catch blocks are empty, effectively swallowing any problems with writing to the event log or sending e-mail. This is done to avoid throwing a new Exception inside the handler and either creating an endless loop or having ASP.NET default to its own handler. However, it is never preferred to swallow errors. One solution would be to store a message (for example, HandlerMessage) along with the Exception to describe any problems with the exception handler itself. Such a message could appear with the original error on the custom error page. The WriteErrorToLog and EmailError functions allow for this by returning a true or false based on their success, though this feature is not implemented in the source provided.

Four storage models are implemented in the source code. You will find each represented by a class in ErrorIO.vbErrorApplicationErrorCookieErrorContext, andErrorQueryString. Since all classes use the same methods (StoreRetrieve, and Clear), a single interface (IErrorIOHandler) is provided for all three, plus an ErrorIOFactory class with a Create(model) method that allows the storage model to be selected at runtime. The advantage of using the Factory Pattern here is that you can declare the model to use in web.config and switch between them freely. Switching to a new model does not require changing any source code, only the web.config declaration. Of course you can still explicitly choose a model by creating an instance of, say, ErrorContext and using its StoreRetrieve, and Clear methods directly.

In the source, the storage basket is created like this:

   Dim objErrorIOFactory As New Msdn.RichErrors.ErrorIOFactory
   Dim objErrorBasket As MSDN.RichErrors.IErrorIOHandler
   objErrorBasket = objErrorIOFactory.Create(strErrorMethod)

Yes, it takes three lines to create an ErrorIOFactory, create a storage basket, and to connect the object created by the Factory to the basket. It’s the price of flexibility. As an alternative, you can hardcode the type of basket used, like so:

   Dim objErrorBasket as ErrorContext = New ErrorContext()

Instead of ErrorContext, you could similarly create an instance of ErrorApplicationErrorCookie, or ErrorQueryString. Whichever you choose, this is how the exception is stored:

   Dim strRedirect, strQueryString, strFilePath As String 
   strRedirect = AppSettings("customErrorPage")
   strQueryString = objErrorBasket.Store(objError)
   strFilePath = strRedirect & strQueryString

Hmmm, that probably wasn’t what you expected. You may be asking, “What’s this about building strFilePath? The result of objErrorBasket.Store() is a QueryString?!” Well, back in the section on configuring behavior, you saw the default ASP.NET way of implementing customErrors, and it went like this:

Response.Redirect("myErrorPage.aspx?aspxerrorpath=" & Request.Path, True)

To recreate this behavior, each Store() method in the ErrorIO classes generates the aspxerrorpath parameter. The ErrorQueryString class goes a step further and stores parts of the error (MessageSource, and StackTrace) plus a DateTime stamp in additional parameters. Combining the customErrorPage defined in web.config with the query string generated during the Store() results in a string that can be used with either Response.Redirect(strFilePath) or Server.Transfer(strFilePath).

Refer to the source to see exactly how each of the four storage baskets work; each has unique traits. When naming Application identifiers, ErrorApplication.Store() appends the client IP address so each client is sure to receive his own message. ErrorCookie.Store() uses one multi-part cookie rather than four separate cookies to get the job done.ErrorContext.Store() is the simplest the bunch; nothing tricky about it. QueryString.Store() uses a fast StringBuilder to generate the query string, which it initializes as 512 chars (the default is 16) to cut down on internal resizing steps.

Since some of the storage baskets provided store strings and not objects, the decision was made to store: Exception.MessageException.SourceException.StackTrace, theDate.Now marking the Exception, and the Request.Filepath (the Web page requested). The source can be modified to record other properties of Exception, the server name, client IP, or whatever meets your debugging requirements.

The web.config <appSettings> tag to turn rich custom errors on and set the storage basket is:

<add key="customErrorMethod" 
value="Application/Cookie/Context/QueryString/Off" />

Setting this value to Off prevents the remaining steps from occurring, but will not get in the way of any automatic logging or notification already done.

Passing Control

The final task of Application_Error is to execute the Redirect() or Transfer(). From the discussion of configuring behavior above, you already know that which of these you choose is tied to how the Exception is stored, and that some combinations work while others don’t. The features of the storage methods usually drive the decision.

But occasionally, features of Redirect() and Transfer() drive the decision. Redirect creates a new ContextTransfer does not. Redirect requires a round-trip to the browser,Transfer does not. As a result of this round-trip, Redirect rewrites the URL to reflect the location of the error page, Transfer does not.

If this seems to be an argument in favor of Transfer, it isn’t. The built-in customErrors feature uses Redirect and not Transfer for a reason. The rationale of the ASP.NET development team is that Redirect accurately displays the URL of the custom error page, while Server.Transfer is intended for “switchboard”-style pages (as on content management sites) where the true URL is preferably hidden.

Therefore, while Context is one of the more convenient ways to move the Exception from Application_Error to the rich error page, its dependence on Server.Transfer() makes it less than perfect. While you may not be concerned that this approach breaks a tenet of the design philosophy of ASP.NET, be aware that it does.

The web.config <appSettings> tags to set the control-passing method and identify the custom error pages are:

<add key="customErrorBranchMethod" value="Redirect/Transfer" />
<add key="customErrorPage" value ="myErrorPage.aspx" />

Retrieving and Displaying

Finally, the Exception must be retrieved from its storage basket and displayed in the rich error page. In the sample, this page is called myErrorPage.aspx.

In the sample code, the Exception is retrieved in myErrorPage.aspx, inside the DisplayDetailedError() function.

   Dim objErrorIOFactory As New Msdn.ErrorIO.ErrorIOFactory
   Dim objErrorBasket As Msdn.ErrorIO.IErrorIOHandler
objErrorBasket = objErrorIOFactory.Create( _ 
System.Configuration.ConfigurationSettings.AppSettings("customErrorMethod") )
   objErrorBasket.Retrieve(strMessage, strSource, 
     strStackTrace, strDate, strQueryString)
   objErrorBasket.Clear()

The first three lines are familiar; a similar series was used to create the basket to Store() the Exception.

Retrieve() passes five parameters by reference. These will come back holding the exception data. The actual Retrieve methods (in ErrorIO.vb) are similar to their Store()counterparts. The big difference is the use of Try…Catch…Fail to swallow errors that might occur while retrieving data from the baskets. Again, it is not desirable for an exception handler to throw exceptions of its own. If the Retrieve() fails, the error data returned instead describes the type of retrieve attempted (ApplicationCookieContext, orQueryString). Try…Catch…Fail is not used in QueryString.Retrieve(), it being the only technique that cannot generate exceptions of its own.

Finally objErrorBasket.Clear is called. Two of the storage baskets can or should be destroyed explicitly. Since Application is unique for each client (it uses the IP Address to name each identifier), it must be destroyed once used, and even then there is a chance this technique will leak memory.

So too should cookies be destroyed. Cookies are set to expire in thirty minutes, but a user can trigger any number of errors in this span. Thirty seconds would make more sense, but the expiration is based on the server’s clock, not the client’s. Have you seen how far off some system clocks are? Thirty minutes is a realistic term, most clocks should be within that span of each other. But this is the problem with short-term cookies. Explicit destruction is the best answer.

ErrorContext.Clear() and ErrorQueryString.Clear() have nothing to do, as these baskets ceases to exist once the rich error page is emitted to the client.

The sample rich error page has three display features:

  • Standard Error Message. The standard message, intended for public consumption, explains that an error occurred while loading the requested page and provides a link to try loading the page again. Links are also provided to get the user back to familiar ground—in this case back to the home page. If your site has standard navigation or menu bars, be sure to include them in the error page as well.The last thing you want is for someone to hit a brick wall of no return. Get the user back on track. Some sites parse the page request to seed a search of either the current site or the whole Web with a message like, “We couldn’t service your request but maybe this will help.” Helpful is good.
  • Error Report Panel. A form asking the user what was expected when the error happened is a good way to trace issues. This sample panel says, “If you describe what you were trying to do, perhaps it can be fixed.” Reports are e-mailed to the administrator along with the Exception.ToString data. The code in SendClick(), which sends the actual message, is similar to the EmailError() function in global.asax. This feature is configured with the web.config <appSettings> keys:

    <add key="customErrorAllowReport" value="On"/>
    <add key="customErrorEmailAddress" value="errors@mySite.com"/>
  • Detailed Error Panel. This panel (populated in the DisplayDetailedError() function) reports the exception raised by the error, as retrieved from the storage basket. This information is useful to those debugging the site, but not the general public. While you could add authentication to distinguish the two, not all sites need authentication. The built-in customErrors feature has a switch (mode="remoteOnly") to only display detailed information to the client at 10.0.0.1, but developers rarely have access to the server console (Why are so many errors only reproducible on the live server?). The way to overcome this limitation is to make a custom IP address class with range checking. Table 2 shows the methods for this class.Table 2. IPAddress Class (namespace: Msdn.IPUtils, source: IPAddress.vb)
    Method Description
    Validate() Test for a valid IP address with a regular expression.
    IsInRange() Check an IP address against a specified range.
    ToString() Return a value of type String.
    ToLong() Returns the IP address as a 12-digit Long (for example, “10.0.0.255” becomes 010000000255). Helpful for a variety of comparisons.
    ToIPAddress() Returns a value of type System.Network.IPAddress.

    This panel is displayed if the client’s IP address is within the range declared by web.config <appSettings>:

    <add key=”customErrorIpRangeMin” value=”10.0.0.1″/>

    <add key=”customErrorIpRangeMax” value=”10.0.0.255″/>

The Return of Page_Error

Debugging custom error pages is a pain. In addition to a local Page_Error handler, it helps to turn on tracing and debugging so you can capture and display problems without throwing the Exception all the way up to Application_Error. Once your custom error page works, turn these off again. While you can just forget about Page_Error, you will be glad it’s there during routine maintenance, or whenever you add new errors.

Using HTTP Modules and Handlers to Create Pluggable ASP.NET Components


Introduction

Have you ever worked on an ASP.NET application and designed some useful functionality or feature set that you wanted to be able to easily reuse in another ASP.NET application? ASP.NET offers different tools for componentizing different types of functionality. The two most common tools for reuse in ASP.NET are:

  • User Controls and custom, compiled server controls for user interface elements and functionality.
  • .NET class libraries for business logic and data access code.

Two ASP.NET reuse tools that don’t get much attention are HTTP modules and handlers.

If you’re not familiar with what HTTP handlers and modules are, don’t worry. We’ll talk more about them later on in this article. For now, just understand that HTTP modules are classes that can be configured to run in response to events that fire during the request for an ASP.NET resource. An HTTP handler is a class that is responsible for rendering a particular resource, or a particular type of resource. In fact, each time you add an ASP.NET Web page to your project, you are essentially writing a HTTP handler. This is because when the HTML portion of an ASP.NET Web page gets dynamically compiled at run time, it directly or indirectly inherits from System.Web.UI.Page, which happens to be a HTTP handler implementation. This is true irrespective of whether you take the inline or code-behind strategy.

As you know, an ASP.NET application usually consists of a set of Web pages, which are invoked when they are requested by an end-user’s browser. As ASP.NET developers, most of the code we write is specific to a request for a particular Web page, such as code in a particular page’s code-behind class to display database results based on some search query. There are times, though, that we need to write code that is orthogonal to a single Web page, code that applies to all pages in an application. For example, we might want to track the order with which each user moves around our Web site. To do this, we’d need to have each page log the time of the request and information identifying the user.

One way to provide such logging functionality would be to add code that recorded the germane data in a database in the Page_Load event handler for each Web page on the site. This approach, however, is hardly maintainable or reusable. Each time we add a new ASP.NET page in our site, we’d need to make sure that we included the appropriate logging code. If we wanted to add similar functionality to another site, we’d need to go through each page in that site and add the requisite code. Ideally, the logging functionality would be logically and physically separate from the functionality of each individual page, and adding it to another site would be as simple as dropping an assembly in the site’s/bin directory.

Such reuse and maintainability is quite possible with HTTP modules and handlers. In this article, we are going to examine a set of HTTP modules and handlers that have been designed to make error logging a highly maintainable and reusable exercise. The goal of this article is to demonstrate how HTTP handlers and modules can be used as a very high-level form of componentization, enabling entire sets of functionalities to be developed, packaged, and deployed as a single unit and independent of Web applications. We’ll achieve this goal in large part through an examination of an application that benefits from reuse and componentization through HTTP handlers and modules.

ELMAH: Error Logging Modules And Handlers

The Error Logging Modules And Handlers (ELMAH), which we’ll be examining throughout this article, were written by coauthor Atif Aziz (http://www.raboof.com/) and demonstrate an easy means to add error logging capabilities to an ASP.NET Web application. ELMAH illustrates how HTTP modules and handlers can be used to provide a high degree of componentization for code that is orthogonal to the Web application (such as application-wide logging). ELMAH is a truly pluggable solution, meaning that it can be dynamically added to a running ASP.NET Web application without any need for recompilation or redeployment.

No matter how well written and tested a particular Web application may be, things will still go awry every now and then. It may not be your code at fault, it could be that the e-mail server is not responding, or some corruption of data causes a cryptographic failure. Regardless of the reason, when an exception occurs, especially on a live site, it is important that the details of the exception are recorded in order to assist with diagnosing the problem. ELMAH provides a mechanism for centralized error logging and notification. Whenever an exception occurs in an ASP.NET application that is not caught, ELMAH is notified and handles the exception as spelled out in the Web.config file. This may include recording the details of the exception to a database, sending an e-mail to an administrator, or both.

ELMAH isn’t designed to respond gracefully to unhandled exceptions. It simply records the details of unhandled exceptions. Once ELMAH has been added to an ASP.NET Web application, any unhandled exceptions raised in this application are logged. ELMAH doesn’t affect the end user’s experience when an unhandled exception occurs. They’ll still see the “Server Error” page, or, if you have custom errors configured to handle HTTP 500 errors, they’ll be redirected to a page with a more user-friendly message. But behind the scenes, ELMAH will have detected that an unhandled exception occurred and recorded the details.

ELMAH discovers unhandled exceptions by way of the HttpApplication object’s Error event. The Error event is raised whenever an uncaught exception bubbles up during request processing be that from a .NET class library or an ASP.NET Web page. Bear in mind that a lot of ASP.NET applications incorrectly implement custom error pages and handling by calling the Server.ClearError() method. Clearing the error will prevent the Error event from firing (as well as being reported to the client) and so ELMAH will never get a chance to log the exception. To put it another way, when using ClearError() in a custom error page, your user will see that a problem occurred, but you won’t.

Note   For more information on creating custom error pages, read Eli Robillard’s article Rich Custom Error Handling with ASP.NET.
Note   When an unhandled exception occurs in an ASP.NET Web service, the

Error

event is not bubbled up to HTTP modules and thus ELMAH. Rather, it is intercepted by the ASP.NET runtime and a SOAP fault is returned to the client. To have an error logged in a Web service, you would need to create a SOAP Extension that listened for SOAP faults.

In addition to recording details of unhandled exceptions, ELMAH also comes with a set of HTTP handlers for viewing the error log. There is a Web interface to the log, which can provide a list of all unhandled errors, as well as details about a particular error (see Figures 1 and 2).

Aa479332.elmah_fig01(en-us,MSDN.10).gif

Figure 1. Viewing the Error Log

Aa479332.elmah_fig02(en-us,MSDN.10).gif

Figure 2. Viewing an error

This error log can also be rendered as RSS, thereby allowing an administrator to receive notifications through her favorite RSS aggregator when an error has occurred (see Figure 3).

Aa479332.elmah_fig03(en-us,MSDN.10).gif

Figure 3. RSS feed of errors

Note   RSS, which stands for Really Simple Syndication, is an XML-formatted standard that is commonly used to syndicate news and other types of changing content. To learn more about RSS, including how to syndicate content using RSS, as well as how to create a Web-based RSS reader, consider reading Creating an Online News Aggregator with ASP.NET.

For brevity, this article touches upon only a subset of the features of ELMAH, focusing on the key components. The complete code is available for download with this article and we encourage you to study it thoroughly to get at the implementation details. There is also a GotDotNet Workspace setup for ELMAH at http://workspaces.gotdotnet.com/elmahfor the purpose of discussions, reporting issues, and staying up to date with any changes.

Existing Solutions for Centralized Error Logging

While ASP.NET does not provide built-in error logging and viewing capabilities, Microsoft’s Patterns & Practices Group have created an open-source error logger—the Exception Management Application Block (EMAB). The EMAB was designed to work with both desktop and Web-based .NET applications, but one can’t help feel that the EMAB was primarily designed for desktop applications with Web applications as an afterthought because the EMAB, by default, publishes exception details to the Windows Event Log. While the Event Log is a suitable backing store for concise exception information for a desktop application, most Web applications—especially those being hosted on a shared server at a Web hosting company—steer clear of the Event Log because using the Event Log requires special permissions to be established to allow the ASP.NET application to write to the Event Log. Granted, the EMAB is flexible enough that you can create a custom publisher that records information to a database, but that’s an extra step that you, the developer, are tasked with.

Note   ELMAH ships with a database-logging module for Microsoft SQL Server 2000, which we’ll discuss later. With ELMAH you can also create custom exception loggers, such as a logger that records exception details to an XML file on the Web server’s file system. In fact, you could extend ELMAH to use the Exception Management Application Block, if you already had a custom publisher written for the EMAB that you wanted to use.

How the EMAB is used to record exception information strongly influences the maintainability and reusability of the Web application. For example, a naïve approach to recording exception information would be to place a try ...catch block around each block of code in each ASP.NET Web page, calling the EMAB in the catch section.

private void Page_Load(object sender, EventArgs e)
{
  try {
    // Code that might cause an exception
  }
  catch (Exception ex) {
    // record exception information by calling exception logger library
  }
}

This approach is foolhardy since it tightly couples the exception logging to each and every ASP.NET Web page, making it anything but maintainable or reusable. A better approach would be to utilize the EMAB in the Application_Error event in Global.asax. This approach offers a more loosely coupled, maintainable, and reusable architecture, as the exception publishing code does not touch any ASP.NET Web page and is instead located in one, centralized location. The downside of this approach is that it is not pluggable. To add this error logging functionality to another ASP.NET Web application, you’d need to modify that application’s Global.asax, thereby needed to recompile and redeploy the application.

The point of this article is not to introduce a replacement for the EMAB. Rather, it is to highlight the componentization made possible by HTTP handlers and modules. ELMAH illustrates how one can take a common task, such as centralized error logging, and componentize it to ease maintainability and afford a high degree of reusability. The purpose of ELMAH is to offer guidance for componentizing applicable functionality.

A Brief Overview of HTTP Handlers and Modules

Before we move on to examining the specifics of ELMAH’s architecture and implementation, let’s take a moment to review HTTP handlers and modules. Whenever a request arrives at an IIS Web server, IIS examines the extension of the request to decide how to proceed. For static content like HTML pages, CSS files, images, JavaScript files, and so on, IIS handles the request itself. For dynamic content like ASP pages, ASP.NET Web pages, and ASP.NET Web Services, IIS delegates the request to a specified ISAPI Extension. An ISAPI Extension is a piece of unmanaged code that knows how to render requests of a particular type. For example, the asp.dll ISAPI Extension is responsible for rendering requests for classic ASP Web pages; the aspnet_isapi.dll ISAPI Extension is invoked when a request comes in for an ASP.NET resource.

In addition to ISAPI Extensions, IIS also allows for ISAPI Filters. An ISAPI Filter is a piece of unmanaged code that can run in response to events raised by IIS. During the lifecycle of a request, IIS passes through a number of steps that raise corresponding events. For example, an event is raised when the request first reaches IIS, when the request is about to be authenticated, when the rendered content is about to be sent back to the client, and so forth. ISAPI Filters are commonly used to provide capabilities such as URL rewriting, compression, specialized authentication and authorization, specialized logging, and so on.

When a request for an ASP.NET resource reaches IIS, it is routed to the ASP.NET engine, which renders the content for the requested resource. The ASP.NET engine behaves a lot like IIS in that it raises a number of events as the request passes through the ASP.NET HTTP pipeline. Furthermore, the ASP.NET engine delegates rendering of the requested resource to a particular class. Whereas IIS uses unmanaged ISAPI Extensions and Filters, ASP.NET uses managed classes called HTTP handlers and modules.

An HTTP handler is a class that is responsible for rendering a particular type of resource. For example, the code-behind class for an ASP.NET Web page is an HTTP handler, knowing how to render the markup for the particular Web page. It helps to think about handlers as specialized renderers that know how to create the markup for a particular type of resource.

Note   For a more in-depth discussion on HTTP handlers, along with some practical applications of handlers, be sure to read Serving Dynamic Content with HTTP Handlers.

An HTTP module is a class that can tap into the various events raised as a request passes through stages of its lifecycle on the server. One such ASP.NET application event is theError event, which fires when an unhandled exception occurs, which is the event ELMAH is interested in.

Note   For more information on HTTP modules, including a look at how to use HTTP modules to implement URL rewriting, check out URL Rewriting in ASP.NET.

Figure 4 provides a graphical representation of the ASP.NET HTTP pipeline. Note that the process starts with a request arriving at IIS. Assuming the requested resource is configured to be handled by the ASP.NET ISAPI Extension, IIS dispatches the request to the unmanaged aspnet_isapi.dll ISAPI Extension. This ISAPI Extension passes off the request to the managed ASP.NET engine. During the request lifecycle, one or more HTTP modules may execute, depending on what modules have been registered and what events they have subscribed to. Finally, the ASP.NET engine determines the HTTP handler that is responsible for rendering the content, invoking the handler and returning the generated content back to IIS, which returns it back to the requesting client.

Aa479332.elmah_fig04(en-us,MSDN.10).gif

Figure 4. Data flow through the Error Logger

ELMAH provides centralized error logging through an HTTP module that has an event handler for the Error event. When the event fires, ELMAH logs the exception details. ELMAH also uses HTTP handlers that are primarily responsible for generating HTML and RSS markup to display information from the error log.

Configuring an existing Web application to utilize various handlers or modules is accomplished by copying the module or handler assembly into the Web application’s /bindirectory and adding a few lines of configuration to the Web.config file.

To configure the HTTP modules for a Web application, include an <httpModules> section to the Web.config file that specifies the type of the module to add:

<httpModules>
   <add name="ModuleName" type="ModuleType" />
</httpModules>

The ModuleType is a string that spells out the module’s type, which is the fully qualified class name (Namespace.ClassName) followed by the assembly name. The type attribute can also include versioning and culture information, along with a public key token that is required of strong-named assemblies. The following snippet shows the actual<httpModules> setting you’ll need to use to include ELMAH’s error logging Module in your ASP.NET application:

<httpModules>
  <add name="ErrorLog" type="GotDotNet.Elmah.ErrorLogModule, 
    GotDotNet.Elmah, Version=1.0.5527.0, Culture=neutral, 
    PublicKeyToken=978d5e1bd64b33e5" />
</httpModules>

An HTTP handler can be used in a Web application by adding an <httpHandlers> section to the Web.config file. Since an HTTP handler renders content for a particular type of resource, in addition to a type attribute the <httpHandlers> element contains a path attribute, which indicates what file paths or extensions should be mapped to this HTTP Handler. There’s also a verb attribute that allows you to limit use of the handler to specific types of HTTP requests, as in a GET or POST request. The following example would create an HTTP Handler that is invoked for all requests to files with a .ashx extension.

<httpHandlers>
   <add verb="*" path="*.ashx" type="HandlerType" />
</ httpHandlers >

The type attribute for the HTTP handler is expressed using the same syntax options as with HTTP modules. These settings in the Web.config can also be placed in themachine.config file, which has the effect of enabling the handlers and modules for all Web applications on the server. The following snippet shows the <httpHandlers> element in the Web.config file in the demo included in this article’s download. Note that it indicates that any incoming requests to /elmah/default.aspx should be rendered by theErrorLogPageFactory class.

<httpHandlers>
    <add 
        verb="POST,GET,HEAD" 
        path="elmah/default.aspx" 
        type="GotDotNet.Elmah.ErrorLogPageFactory, 
          GotDotNet.Elmah, Version=1.0.5527.0, Culture=neutral, 
          PublicKeyToken=978d5e1bd64b33e5" />
</httpHandlers>

As you can see, adding HTTP modules and handlers to an ASP.NET Web application is very simple, can be done in a matter of seconds, and doesn’t require any recompilation or redeployment of the ASP.NET application. This is why HTTP modules and handlers are a great tool for reuse, and afford a means to componentize your application into loosely-coupled, highly maintainable pieces.

Examining ELMAH’s Architecture

ELMAH’s architecture is comprised of three subsystems:

  • An error logging subsystem
  • An HTTP module subsystem
  • An HTTP handler subsystem

The error logging subsystem is responsible for two tasks: recording errors to the log and retrieving error information from the log. The HTTP module subsystem is responsible for logging an error when an unhandled exception occurs in the ASP.NET application. The HTTP handler subsystem provides a means for the error log to be rendered into markup, constituting a Web-based interface to the error log, as well as an RSS feed.

As Figure 5 shows, the HTTP module and handler subsystems both utilize the error logging subsystem. The HTTP module subsystem sends off exception information to the error logging subsystem, while the HTTP handler subsystem reads and renders the error information.

Aa479332.elmah_fig05(en-us,MSDN.10).gif

Figure 5. Where the Error Logging System fits

To better understand ELMAH’s architecture, let’s examine each of these three subsystems in more detail.

The Error Logging Subsystem

The error logging subsystem is responsible for recording errors in the log, as well as offering capabilities for retrieving details about a particular error, or a subset of the errors. This functionality is made available by a number of classes:

  • ErrorLog: This abstract class provides the contractual methods to both read from and write to the log.
  • Error: This class contains properties that describe the details of a particular error.
  • ErrorLogEntry: This class represents a particular Error instance for a particular ErrorLog. The ErrorLogEntry essentially groups an Error instance with the ErrorLoginstance it originated from.

Let’s take a look at these three classes and how they work with the HTTP modules and HTTP handler subsystems in order to provide a complete, centralized exception-logging utility.

Examining the ErrorLog Class

Depending on a particular project setup or strategy, you might want to employ a different backing store for the error log. For example, on a production server, you might want to log exceptions to Microsoft SQL Server, but on a development server you might be happy just storing the errors in a set of XML files or a Microsoft Access database. To offer the capability of using different backing stores, the error logging subsystem provides an abstract base class, ErrorLog, which defines the base methods that all ELMAH error loggers must implement. These methods are:

  • Log(Error): Logs an error to the backing store. The Error class represents information about an unhandled exception; we’ll discuss this Error class in more detail shortly. In logging the error information, the Log() method must also assign a unique identifier to the error.
  • GetError(id): Returns information about a particular error in the log.
  • GetErrors(…): Returns a subset of errors from the log. This method is used by the HTTP handler subsystem to display the error log in a paged fashion, rather than displaying all errors at once.

ELMAH ships with two ErrorLog implementations:

  • SqlErrorLog: Records errors to a Microsoft SQL Server 2000 database using the System.Data.SqlClient provider. The SqlErrorLog requires SQL Server 2000 because it takes advantage of some of its XML features, but this is an implementation detail that can be changed.
  • MemoryErrorLog: Records errors in the application’s memory (RAM). In other words, it is bound to the AppDomain such that each application receives its own private log. Needless to say, this log does not survive application restarts or lifetime, so it’s mostly good for testing and temporary troubleshooting purposes when other implementations may fail.

You can use either of these exception loggers by simply adding a couple lines of text to your ASP.NET Web application’s Web.config file. If you need to store error details to someplace other than SQL Server or application memory, you can create your own custom logger. To implement an error logger for ELMAH, create a class that extends ErrorLogand supply the implementation for the Log()GetError(), and GetErrors() against your desired store.

Realize that both the HTTP module and handler subsystems in ELMAH interact directly with the specified ErrorLog class, be it SqlErrorLogMemoryErrorLog, or your own custom log class. The HTTP module logs exception information by creating an Error instance and passing this to the ErrorLog method’s Log() method. The HTTP handlers read details about one or more errors through the ErrorLog‘s GetError() and GetErrors() methods, which return either a specific ErrorLogEntry instance, or a set of ErrorLogEntryinstances.

A Look at the Error Class

The Log() method of ErrorLog expects an input parameter of type Error. A custom Error class is used in place of the Exception class provided in the .NET Framework because the Exception class is more suited for communicating exception information across the code stack and during the lifetime of an application. However, Exception objects are not ideal for storing in an exception log because of storage, typing, and portability concerns. Yes, binary serialization could be utilized to store an Exception instance, but this would require that the Exception object be deserializable on a machine with the same set of types and assemblies available. This is an unacceptable limitation (especially from the point of view of administration and operations) because a log and its contents should be portable and not only be viewable on a machine with a particular runtime or configuration. Furthermore, an Exception instance often lacks periphery information specific to a Web application, such as the values of the current Web request’s ServerVariables collection, something that can be invaluable for diagnosis. So, in short, the Error class acts as a surrogate for all exception types, holding over information from an exception raised in a Web application.

The complete list of Error properties are shown in Table 1.

Property Description
Exception The Exception instance represented by this error. This is a run-time property only that is never persisted along with an instance of the class.
ApplicationName The name of application in which this error occurred.
HostName The name of host machine where this error occurred. A good default is Environment.MachineName.
Type The type, class or category of the error. Usually this would be the full type name (sans the assembly qualification) of the exception.
Source The source of the error, usually the same as the Message property of an Exception object.
Message A brief text describing the error, usually the same as the Message property of an Exception object.
Detail Detailed text of the error, such as the complete stack trace.
User The User logged into the application at the time of the error, such as that returned by Thread.CurrentPrincipal.Identity.Name.
Time The date and time at which the error occurred. This is always in local time.
StatusCode The status code being returned in the response header as a result of the error. For example, this is 404 for a FileNotFoundException. Unfortunately, this value cannot always be reliably determined from within ASP.NET. For a few cases this StatusCode value may be reported as zero.
WebHostHtmlMessage The default HTML message that the Web host (ASP.NET) would have generated in absence of custom error pages.
ServerVariables NameValueCollection of Web server variables, such as those contained in HttpRequest.ServerVariables.
QueryString NameValueCollection of HTTP query string variables, such as those contained in HttpRequest.QueryString.
Form NameValueCollection of form variables, such as those contained in HttpRequest.Form.
Cookies NameValueCollection of cookies sent by the client, such as those contained in HttpRequest.Cookies.

The WebHostHtmlMessage property needs some explanation. If your ASP.NET Web application encounters an unhandled exception and you do not have your application configured to use custom error pages, you’ll see a screen similar to the one shown in Figure 6. This is a screen every ASP.NET developer has seen far too many times.

Aa479332.elmah_fig06(en-us,MSDN.10).gif

Figure 6. Standard Error page

When an exception is raised, the actual HTML markup for the corresponding screen is accessed and saved in the WebHostHtmlMessage property of the Error class. When the page that shows detailed information about a particular exception is visited, if the corresponding Error instance has a value in its WebHostHtmlMessage property, the visitor is presented with a link to a page that will show the actual exception information screen (like that shown in Figure 6). The neat thing here is that you not only get the exception logged, but you can also visit the original error page generated by ASP.NET when examining the log later. And all this while you have custom errors enabled!

The Error class also has methods to serialize and deserialize its state to and from an XML format. See FromXml and ToXml in accompanying code for details.

The ErrorLogEntry Class: Associating an Error with an ErrorLog

The final class in the error logging subsystem is the ErrorLogEntry class, which associates an Error instance with an ErrorLog instance. When the HTTP handler subsystem calls the GetError() method to retrieve information about a particular exception, the GetError() method retrieves the information from the specific backing store and populates this information in an ErrorLogEntry instance. The ErrorLogEntry class contains three properties:

  • Id: The unique ID of the exception details.
  • Log: A reference to the ErrorLog instance that represents the backing store.
  • Error: A populated instance of the Error class with the details of the specific error.

While the GetError() method returns a single ErrorLogEntry instance, the GetErrors() returns a list of ErrorLogEntry instances. GetErrors() is especially designed to allow errors to be paged through n records at a time.

Figure 7 shows an updated view of ELMAH’s architecture, showing greater detail in the error logging subsystem.

Aa479332.elmah_fig07(en-us,MSDN.10).gif

Figure 7. Updated architecture

The HTTP Module Subsystem

ELMAH consists of two HTTP modules: ErrorLogModule and ErrorMailModuleErrorLogModule is an HTTP module that creates an event handler for the application’s Errorevent. In the event of an unhandled exception, the HTTP module gets the appropriate error logger as specified in the application’s configuration, and calls the Log() method on it, passing in an Error instance populated with the information of the exception and the HttpContext for the current request. The following source code shows the germane code from the ErrorLogModule class:

public class ErrorLogModule : IHttpModule
{
    public virtual void Init(HttpApplication application)
    {
        application.Error += new EventHandler(OnError);
    }

    protected virtual ErrorLog ErrorLog
    {
        get { return ErrorLog.Default; }
    }

    protected virtual void OnError(object sender, EventArgs args)
    {
        HttpApplication application = (HttpApplication) sender;
        LogException(application.Server.GetLastError(), 
          application.Context);
    }

    protected virtual void LogException(Exception e, 
      HttpContext context)
    {
        try
        {
            this.ErrorLog.Log(new Error(e, context));
        }
        catch (Exception localException)
        {
            Trace.WriteLine(localException);
        }
    }
}

The ErrorLogModule‘s execution begins in the Init() method, where it indicates to the ASP.NET runtime that the OnError() method should be invoked whenever the Error event is raised. The OnError() method references the HttpApplication object and calls the LogException() method, passing in the details of the last exception, as well as theHttpContext instance specific to the particular request. LogException() simply calls the appropriate ErrorLog class’s Log() method, passing in a new Error instance. (TheError instance’s constructor takes in an Exception and HttpContext instance, and populates the properties accordingly; refer to the source code available in the download for more information.)

The ErrorLogModule contains a read-only ErrorLog property, and returns the ErrorLog instance returned by ErrorLog.DefaultDefault is a static property of type ErrorLogin the ErrorLog class. It consults the Web application’s configuration to determine what class to use for exception logging: SqlErrorLogMemoryErrorLog, or a custom exception logging class.

Note   In the section Adding ELMAH to an ASP.NET Web Application we’ll examine how to configure a Web application to use a specific exception logger. It’s as simple as adding a couple of lines to the

Web.config

or

machine.config

files.

The other HTTP module in the HTTP module subsystem is the ErrorMailModule class, which sends an e-mail to an administrator in the event of an exception. We won’t be discussing this piece of ELMAH, although you can examine how to use this module in the code samples available in this article’s download.

The HTTP Handler Subsystem

Recall that the purpose of HTTP handlers is to render the content for a particular type of resource. When a request comes into the ASP.NET HTTP pipeline, the ASP.NET engine examines the requested path and determines what HTTP handler should be used to handle the requested resource. Specifically, an ASP.NET application may be configured to have a particular path handled by either an HTTP handler or an HTTP handler factory. An HTTP handler factory is a class that is not directly responsible for rendering the content, but instead is responsible for selecting and returning an HTTP handler instance. This returned HTTP handler instance is then the one that is tasked with rendering the requested resource.

ELMAH’s HTTP handler subsystem consists of a number of HTTP handler classes designed to produce markup to display the logged errors, along with a single HTTP handler factory class. The HTTP handler factory class, ErrorLogPageFactory, examines the PathInfo portion of the requested URL to determine what HTTP Handler should generate the output.

Note   The

PathInfo

portion of a URL is any extra content following the file name, and is available through the

Request

object’s PathInfo property. For example, in the URL

, somePath is the

PathInfo

portion of the URL. For more information on the terminology used for the various parts of a URL, and the corresponding

Request

object properties, refer to Rick Strahl‘s blog entry Making Sense of ASP.NET Paths.

The following code snippet shows the more interesting code from the ErrorLogPageFactory HTTP handler factory class.

public class ErrorLogPageFactory : IHttpHandlerFactory
{
    public virtual IHttpHandler GetHandler(HttpContext context, 
      string requestType, string url, string pathTranslated)
    {
        string resource = 
          context.Request.PathInfo.Length == 0 ? string.Empty :
            context.Request.PathInfo.Substring(1);

        switch (resource.ToLower(CultureInfo.InvariantCulture))
        {
            case "detail" :
                return new ErrorDetailPage();

            case "html" :
                return new ErrorHtmlPage();

            case "rss" :
                return new ErrorRssHandler();

            default :
                return new ErrorLogPage();
        }
    }
}

As you can see, the ErrorLogPageFactory class’s GetHandler() method returns an HTTP handler instance based upon the PathInfo of the request. If the PathInfo is rss, an instance of the ErrorRssHandler HTTP handler is returned, which renders the log as an RSS feed. If the PathInfo is detail, an ErrorDetailPage HTTP handler instance is returned, which displays information about a particular exception.

In the ASP.NET Web application’s settings, you must specify a path that maps to the ErrorLogPageFactory HTTP handler factory, such as ErrorLog.aspx. To view an RSS feed of the exception log, you could visit: http://www.example.com/ErrorLog.aspx/rss.

ELMAH’s various HTTP handler classes—ErrorDetailPageErrorHtmlPageErrorRssHandlerErrorLogPage, and so on—render different markup. The ErrorRssHandler HTTP handler, for instance, loops through the 15 latest errors and emits the proper XML markup to display this information in an RSS format. The other HTTP handlers are all derived, directly or indirectly, from the System.Web.UI.Page class (which is the class from which all ASP.NET code-behind classes are derived from). These page-related HTTP handlers override the Page class’s Render() and OnLoad() methods to create an HTML interface displaying a pageable list of the logged exceptions. Refer back to Figures 1, 2, and 3 for screenshots of these pages.

Note   While the

Error

class saves the

ServerVariables

,

QueryString

,

Form

, and

Cookie

collections, only the

ServerVariables

collection is displayed in the details for an exception. This is because the

QueryString

parameters and cookies are viewable through the

ServerVariable

‘s

QUERY_STRING

and

HTTP_COOKIE

parameters, respectively. The

Form

collection is omitted because this could include potentially tens of kilobytes of view state information that usually serves little purpose for most diagnosis. Of course, you could easily modify the details of the HTTP handler to include this information, if you so chose.

Now that we have examined ELMAH’s three subsystems, let’s take a look at how to add ELMAH to an existing ASP.NET Web application. Pay particular attention to how easy it is to add ELMAH to any site—a benefit of componentization that the HTTP handlers and modules afford.

Adding ELMAH to an ASP.NET Web Application

Adding ELMAH to an ASP.NET Web application is fairly simple, and is comprised of two steps:

  • Adding the ELMAH assembly to the Web application.
  • Configuring the Web application to use ELMAH’s HTTP modules and HTTP handlers.

ELMAH can be applied to a particular Web application on a Web server by copying the assembly to the Web application’s /bin directory, and configuring ELMAH’s settings through the Web.config file. What’s more, you can configure ELMAH to be applied to all Web applications on a Web server by adding the assembly to the Web server’s Global Assembly Cache (GAC) and adding the same configuration settings in machine.config instead of Web.config.

In the Web.config (or machine.config) file, you’ll need to add the following settings:

  • <sectionGroup> element in the <configSections> element that defines a new section name, <gotdotnet.elmah>, with a section inside called <errorLog>, which has information about how to log exception information.
  • <gotdotnet.elmah> section, with an inner section named <errorLog>, which contains a type reference to the exception logger you want ELMAH to use, along with any settings specific to that exception logger.
  • An entry in the <httpHandlers> section indicating the path that, when visited through a browser, will render various views on the error log.
  • An entry in the <httpModules> section that adds the ErrorLogModule to the ASP.NET HTTP pipeline.

The following snippet from the Web.config file included in this article’s download illustrates how these four settings can be specified:

<?xml version="1.0" encoding="utf-8" ?>
<configuration>
  <configSections>
    <!-- Allows for a new section group to the Web.config -->
    <sectionGroup name="gotdotnet.elmah">
      <!-- Indicates that inside the section group there will be an
              errorLog section -->
      <section name="errorLog" 
        type="System.Configuration.SingleTagSectionHandler, 
          System, Version=1.0.5000.0, Culture=neutral, 
          PublicKeyToken=b77a5c561934e089" />
    </sectionGroup>
  </configSections>

  <!-- This section group contains the type of the exception logger
         to use (SqlErrorLog, MemoryErrorLog, or a custom logger).
         It also contain properties pertinent to the exception logger
         (connectionString, for the SqlErrorLog). -->
  <gotdotnet.elmah>
    <errorLog type="GotDotNet.Elmah.SqlErrorLog, 
      GotDotNet.Elmah, Version=1.0.5527.0, Culture=neutral, 
      PublicKeyToken=978d5e1bd64b33e5" 
      connectionString="...connection string..." />
  </gotdotnet.elmah>

  <system.web>
    <!-- Register that a request to aspnetham/errorlog.aspx should
        be serviced by the ErrorLogPageFactory HTTP Handler factory -->
    <httpHandlers>
      <add verb="POST,GET,HEAD" path="elmah/default.aspx" 
        type="GotDotNet.Elmah.ErrorLogPageFactory, 
        Skybow.Samples.AspNetHam, Version=1.0.5527.0, 
        Culture=neutral, PublicKeyToken=978d5e1bd64b33e5" />
    </httpHandlers>

    <!-- Adds the ErrorLogModule HTTP Module to the HTTP pipeline. -->
    <httpModules>
      <add name="ErrorLog" type="GotDotNet.Elmah.ErrorLogModule, 
         GotDotNet.Elmah, Version=1.0.5527.0, Culture=neutral, 
         PublicKeyToken=978d5e1bd64b33e5" />
    </httpModules>

    ...
  </system.web>
</configuration>

The <sectionGroup> element in the <configSections> element spells out that there will be an additional section group in the configuration file called <gotdotnet.elmah>. Furthermore, it indicates that inside this custom section, there will be an <errorLog> section. Inside the actual <gotdotnet.elmah> element there is an <errorLog> element that specifies which error log implementation should be used. Recall that ELMAH ships with two built-in implementations, namely SqlErrorLog and MemoryErrorLog. You can specify which of these two to use, or you can specify to use a custom exception logger you may have created, in the <errorLog> element. The <errorLog> element also holds the settings specific to an error log implementation. For example, when using the <errorLog> element to indicate that the SqlErrorLog should be used, a connectionStringproperty must be included that tells it how to connect to the database. The SQL script to create the appropriate table and associated stored procedures is included in the download.

Note   If you want an administrator to be e-mailed in the event of an unhandled exception, you would need to add another

<section>

element in

<sectionGroup>

that defines a new element called

<errorMail>

. Furthermore, in the actual

<gotdotnet.elmah>

element, you’d need to add an

<errorMail>

element. Consult the

Web.config

file in the download for a sample of this syntax.

The <httpHandlers> section specifies that the ErrorLogPageFactory (an HTTP Handler factory) should be used to retrieve the HTTP handler that renders the content to view the error log. The value of the path attribute indicates the URL relative to the application’s virtual root for getting at the error log display. You can change this to whatever you like, but make sure that it is a URL with an extension that is handled by the ASP.NET engine. That is, if you change the path to something like errors.log, you’ll need to configure IIS to map requests to errors.log to the ASP.NET ISAPI Extension (aspnet_isapi.dll). If you want to ensure that only administrators can view the log, use ASP.NET’s URL authorization capabilities to restrict access to a specific user or a set of users or roles. On the other hand, if you want to entirely disable Web-based access to the log then you simply don’t configure the <httpHandlers> section.

The <httpModules> section adds the ErrorLogModule HTTP module to the ASP.NET HTTP pipeline. Make sure you include this <httpModules> setting, otherwise ELMAH won’t be listening for the Error event, and therefore won’t be logging any unhandled exceptions.

As you can see, adding ELMAH to an existing ASP.NET Web application is fairly straightforward. The simple deployment and reusability of ELMAH is due to the fact that it is componentized using HTTP modules and handlers.

Conclusion

Hopefully this article has been able to shed some light on how HTTP handlers and modules are great tools for componentizing functionality orthogonal to an ASP.NET Web application. Common tasks such as centralized, application-wide logging, or monitoring requests across the entire application, can be componentized through handlers and modules. By wrapping up this functionality into a set of components, you get reusability, maintainability, and deployment benefits without requiring any migration, integration or re-compilation of existing code and applications.

To demonstrate the componentization possible with HTTP modules and handlers, we examined ELMAH, a centralized error logging and mailing application. ELMAH uses an HTTP module to listen for any application-wide Error events, which is fired as a result of an unhandled exception bubbling up. Upon learning of an unhandled exception, ELMAH logs the exception to a SQL Server database, to memory, or, perhaps, to some other backing store. ELMAH can also e-mail the contents of the exception to one or more recipients like developers and operations staff.

In addition to an HTTP module, ELMAH contains a set of HTTP handlers and an HTTP handler factory to facilitate viewing of the error log through a Web-based medium. This includes not only a traditional Web page, but also an RSS feed. ELMAH maintains a discrete component by having the display functionality wrapped in an HTTP handler, as opposed to requiring that the Web application include an ASP.NET Web page that displays such information. Through the use of HTTP handlers, deploying ELMAH is a simple process, and does not require a recompilation of the Web application, or uploading an ASP.NET Web page to the production server.

ELMAH is only one example of the power of componentization that HTTP handlers and modules afford. Perhaps there are other application-wide processes that you have implemented that can benefit from being componentized with handlers and modules.

Happy Programming!